How to stop windows 7 or 8 from downloading windows 10 automatically
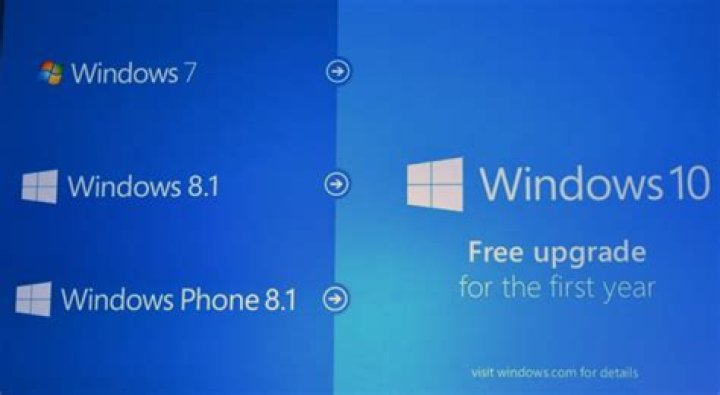
Are you still using Windows 7, Windows 8 or Windows 8.1 on your devices? It might not be much longer as Microsoft keeps pushing its new operating system as “an easy upgrade.” Starting this week, the company has turned Windows 10 into a recommended update from an optional one. While Microsoft was already downloading bits and pieces of the new OS on users’ computers, for users who have enabled “Give me recommended updates the same way I receive important updates,” the update process will start automatically for them. For those of you who don’t want the new OS to download on their devices, it’s super easy to avoid upgrading to Windows 10.
– Windows 10 Sees Biggest Growth in January 2016 as It Grabs XP’s Second Position
How to stop Windows 10 from downloading on Windows 7, 8.1 machines:
If you aren’t sure about installing Windows 10, you still have a few months to decide. In the meantime, for those of you who are worried about the latest steps Microsoft has taken, simply adjust the Windows Update settings to avoid any surprises.
Microsoft made it clear that users will still have the power to interrupt the installation once it has started since the operating system asks for permission. However, as the recommended updates are automatically downloaded and Microsoft is staying put to reach to its goal of 1 billion Windows 10 users by 2017 no matter how aggressive the push is, following are the steps to ensure the new OS doesn’t download for you.
Here are the steps to check your Windows Update settings in Windows 7 and Windows 8, 8.1 devices to disable automatic update installation.
Windows 7 users:
- If you’re running Windows 7, go to Control panel > Windows Update.
- Select change settings on the left menu.
- Uncheck the box recommended updates.
- Click on OK to confirm the changes.
Stop Windows 10 upgrade on Windows 8.1:
You can either follow the above steps or use the Settings app:
- Go to Settings app.
- Click on Update and Recovery > Windows Update.
- Uncheck the Give me recommended updates the same way I receive important updates box.
- Click Apply to confirm.
Remember that the Windows 10 will not install on your machines, the latest move from being an optional to a recommended update will only enable automatic downloading of the new OS. Before initiating the installation process, it will ask you for permission.
However, if you want to avoid nagging prompts, save space and bandwidth being used to download the new operating system, you can follow the above steps to stop Windows 10 from automatically downloading on your devices. It should be noted that if you disable recommended update installation, you will have to manually check Windows Update from time to time to ensure you are not missing any important security updates.
Most people tend to be lazy with keeping their desktop OS up-to-date, even though it can present a huge security risk. That’s why, starting with Windows 10, Microsoft chose the slightly controversial route of enabling updates by default. Windows 10 not only checks for updates, but downloads and installs them as and when they are available, making the process convenient and the OS safe for everyone.
It’s a big push for the company, with last year’s Windows 10 Anniversary Update rendering a couple of methods that disabled automatic updates redundant. However, sometimes we might have good reason to delay an update – for example, you might get cheaper data rates at night, and thus want the download to take place only then. You might prefer to have the download happen when you’re in office, rather than use up your Fair Usage Policy (FUP) at home. Thankfully, there are still some ways to prevent Windows 10 from updating your OS whenever it feels like, as detailed below.
Set active hours for your Windows 10 device
Active hours are meant to convey the time you usually use your device. Think of it as your working hours. During this time, Microsoft won’t automatically restart your Windows 10 system, saving you from embarrassing yourself while you’re at a presentation, collaborating with people, or doing other grown-up things.
Essentially, setting active hours is the easiest way to take matters into your hands with Windows 10 updates, while still ensuring complete safety of your system. The only catch is that active hours can be between 1 and 12 hours. If you need a longer period, you’re probably working too much anyway.
Here’s how to set active hours for your Windows 10 device–
- Open the Start Menu, and click the Settings gear icon. Choose Update & Security.
- Under Update Settings, click Change active hours.
- In the dialog box that presents itself, pick a start time, and an end time. Note that the two can’t be more than 12 hours apart.
- Hit Save.
From now on, Windows 10 will only automatically restart itself outside of those hours. It will still download and install updates in the background, as usual. If you’d like to put a stop to that as well, read on to find out how you can stop automatic download and installation of Windows 10 updates.
Set your Windows 10 Internet connection as metered
There is no outright way to stop updates in Windows 10, but the OS does understand that certain Internet connections charge by the amount of data consumed – such as in-flight or hotel Wi-Fi – or have a data cap – such as your mobile hotspot. Hence, Windows 10 has an in-built option to set these connections as ‘metered’, which will reduce the overall data usage, including no automatic downloads for OS updates.
Here’s how to signify a connection as metered and stop automatic download of Windows 10 updates:
- Open the Start Menu, and click the Settings gear icon.
- Choose Network & Internet.
- Select Wi-Fi on the left. Make sure you’re connected to the network that you usually make use of, and then click on it.
- Under Metered connection, flick on the toggle that reads Set as metered connection.
Windows 10 won’t download – and thus won’t be able to install – any updates while you’re connected to that Wi-Fi network. The metered connection switch is specific to each network, so you’ll need to do it for all the Wi-Fi networks you connect to, if you’d like to put a stop to updates in general.
You can’t easily set an Ethernet connection as metered, because Microsoft assumes that your wired Internet gives you unlimited data. That may not be true for a lot of people – you probably have to deal with a FUP – so you’ll need to make a registry edit to prevent automatic updates over your Ethernet connection.
A warning before you proceed – the Registry Editor is a powerful tool, and you can get your system into trouble if you’re not careful. That said, stick to the instructions below, and you shouldn’t have any trouble.
Here’s how to set an Ethernet connection as metered to prevent automatic download of Windows 10 updates:
- Open the Start Menu, and type in “regedit”. Do not press Enter.
- Right-click it, and choose Run as administrator. Grant it administrative access upon request.
- Once it opens, use the left-side navigation to locate HKEY_LOCAL_MACHINE.
- Click the right direction arrow, and find SOFTWARE. Keep doing the same until you reach Microsoft > Windows NT > CurrentVersion > NetworkList > DefaultMediaCost.
- Right-click DefaultMediaCost, and choose Permissions.
- In the new dialog box, click Advanced.
- In the next window, click Change next to the Owner field at the top.
- In the object name field, enter your Windows user name, or the Microsoft account that you use to log in.
- Then click Check Names to validate.
- Hit OK on the Select User or Group window, and then hit OK on Advanced Security Settings window.
- Back in the Permissions window, locate your user name in the top pane.
- Under the lower pane, next to Full Control, check the check-box named Allow, and click OK.
- Back in the Registry Editor, locate Ethernet key in the right pane, and double-click it.
- Change the value from “1” to “2”, and then click OK.
That’s all. You can close Registry Editor, and return to work. Windows 10 won’t reflect your metered setting in the Network window since it’s not built to do so. But automatic Windows 10 updates shouldn’t happen.
To download updates from now on, open the Windows Update page, and then choose Download. To enable automatic updates over Ethernet, open Registry Editor, navigate to DefaultMediaCost, and change the Ethernet value back to “1”. Remember that “1” stands for unlimited, and “2” means metered.
Have you had any problems with automatic updates on Windows 10? Let us know via the comments below.
For the latest tech news and reviews, follow Gadgets 360 on Twitter, Facebook, and Google News. For the latest videos on gadgets and tech, subscribe to our YouTube channel.
Last Friday, Microsoft confirmed that it downloads Windows 10 files onto PCs just in case the user decides to upgrade later on. These files are massive and can consume up to six gigabytes of storage. It’s a pain, especially if you don’t have much device storage or you need as much free space as you can get. Thankfully, there is a way to stop it from happening.
Microsoft automatically sends software, including the Windows 10 files in question, to your PC when your Windows Update settings allow for automatic updates.
(Unfortunately, turning off automatic updates can leave computers vulnerable to hacks and attacks if security updates are blocked. So if you want to stop Windows 10 taking up space you’ll need to manually update regularly to make sure you’re not missing out.)
Turning auto updates off depends on whether you’re using Windows 7 or 8.1. If you’re using the latter, move the mouse to the bottom right corner, then click Settings. Then go to “Change PC Settings,” then “Update and Recovery,” then “Choose how updates get installed,” then “Check for updates but let me choose whether to download and install them.”
If you’re on Windows 7, go to the Start menu, then type “update” in the search. Click “Windows Update,” then “Change settings,” then “Check for updates but let me choose whether to download and install them.”
Automatic downloads can actually be quite useful. When Windows Update is set to automatically download, it downloads the files without asking until the user decides it’s time to install. Important security patches won’t interrupt your workflow until you’re ready, and the system will silently download them ahead of time so that when the opportunity arises, Windows doesn’t have to wait around for the download to complete.
In that situation, it’s useful, but Windows 10 isn’t exactly a run-of-the-mill update, and even though it’s free for the first year for Windows 7 and 8.1, not everyone will want it. In a statement, Microsoft explained that they download the files to computers so they’re ready to go if the user decides to take the jump. Hopefully in the future Microsoft changes course over what most people would agree is not a regular update.
Upgrading to Windows 10 should be a personal choice, but increasingly it isn’t. In a series of ever more cheeky , arrogant and downright deceptive moves Microsoft has pushed Windows 10 upon millions of unsuspecting Windows 7 and Windows 8 users.
So how do you stop an automatic Windows 10 installation on your PC? And, if you’re too late, how do you reverse it? Thankfully both preventative and restorative measures are fairly straightforward:
- How To Stop Windows 10 Installing Automatically
Since Windows 10 was launched on July 29, 2015 there have been all sorts of complex hacks to try and head off Microsoft’s ever more desperate attempts to push the new operating system on you. Thankfully there is a much better and more reliable option now: third parties.
New Windows 10 upgrade prompts on Windows 7 and Windows 8 turn the close button into a confirmation. . [+] Image credit: Microsoft
Over the last 10 months two third party apps have stood high above the crowd and gained both the respect and trust of the Windows user communities: ‘Never10’ and ‘GWX Control Panel’. Let’s break them down:
Never10 – can be downloaded here and its key quality is simplicity. The app is tiny (85kb) and only needs to be run once. You get the option to ‘Remove Win10 files’ and this tweaks your registry to always reject Windows 10 upgrade attempts. As a bonus it also deletes the 6GB+ of secret Windows 10 installation files every Windows 7 and Windows 8 has hidden on their computer.
Never10 app is very simple and effective. Image credit: Gibson Research Corporation
The downside: Never10 works by following Microsoft’s own registry rules for prevention of upgrades and these could be changed, though it is unlikely. As Never10 explains :
“Never10 is relying upon Microsoft to obey their own provided settings, which they created a special update to Windows Update to provide. And they buried those settings where no ‘regular user’ would ever find them. Corporations the world over are relying upon those settings to prevent unwanted upgrading of their existing systems. There is just no chance that Microsoft would ever choose to deliberately bypass the express desire of their users by ignoring their own registry settings. It’s not impossible, but it’ll never happen.”
My thoughts? Never10 is right and its app is the easiest solution.
GWX Control Panel – can be downloaded here and is the option for those not satisfied with Never10’s faith in Microsoft. It is a program which runs in the background and continually monitors your system for signs an attempt to upgrade your computer to Windows 10 might begin. It also updates regularly.
The biggest pro and con of GWX Control Panel is the same thing: ongoing monitoring. You’ll get regular notifications that your computer is protected and all is well.
GWX Control Panel is thorough by more complex than Never10. Image credit: Ultimate Outsider software
As you might expect Never10 thinks this is totally unnecessary and I tend to agree. Then again it is the safest option for those convinced Microsoft will take its upgrade attempts even further in the coming months and break its own registry rules to do so.
Regardless, whichever option you choose, both Never10 and GWX Control Panel will ensure Windows 10 never appears on your system.
- Windows 10 Installed Already! How Do I Go Back?
Unfortunately for many, the prompt to install Never10 or GWX Control Panel will come too late – you already have Windows 10 on your PC and you don’t know how or why.
The good news is you can reverse this. if you act quickly.
For the first month you have Windows 10, Microsoft offers a rollback facility to return you to whichever operating system you used before be it Windows 7 or Windows 8. To access it follow this path:
Settings > Update & Security > Recovery
Depending which version of Windows you had previously, you will then be presented with the option “Go back to Windows 7” or “Go back to Windows 8.1”.
Another cheeky Windows 10 upgrade prompt Microsoft has used in recent months. Image credit: Gordon . [+] Kelly
A word of warning. There have been several reports that the rollback feature doesn’t always work perfectly. This is a minority of cases, but – besides formatting your drive and starting again – rather conveniently the only way to make a poorly performing Windows 7 or Windows 8 rolled back PC work well again is to reinstall Windows 10. Conspiracy theorists love this one.
Should your rollback work properly, however, the next stage is to install either Never10 or GWX Control Panel. Why? Because otherwise Microsoft will start prompting you to install Windows 10 again. Yes, you’ve been there and rejected it but this logic currently escapes the company.
It’s About Choice
At the end of the day none of this is to deliver a hit piece on Windows 10. When it comes to that operating system what it takes away in user control and legacy hardware compatibility, it gives back in upgraded design and functionality.
But this is irrelevant.
What matters more is users deserve the right to choose what operating system is on their PC and not to have something they don’t want forced upon them. It is true that the likes of Chrome OS and Safari can update to new versions automatically but that has always been the case, users knew what they signed up for.
This was not how any previous version of Windows has ever worked and users did not sign up for them knowing years later they would be pushed towards Windows 10 by increasingly cynical methods.
The options in this article return control to all Windows 7 and Windows 8 users. What you do next is up to you…
Original Title: Windows 8.1 Not wanted. How can I stop it from automatically downloading?
I have an HP Pavillion 15 Sleekbook (15b142dx according to the box) that i’ve had for a little over a year now. I’ve used it for school work, or playing games. It came with windows 8 (NOT windows 8.1) installed. It’s a good operating system, and i love the amount of control it gives me over the slightly more advanced functions that I know how to tinker with.
When it first came out, I tried installing windows 8.1 and immediately ran into some problems:
– My USB 2.0 and 3.0 ports didn’t detect anything that was inserted into them. My portable mouse, or my PX21 turtle beach headphones. Things that worked perfectly normal until the update.
– The Dolby Advanced Audio v2 program that I so loved using was apparently absent from my hard drive.
– My audio jack didn’t work.
– I couldn’t customize anything, all the options seemed to be removed, save for changing backgrounds. Battery options, touchpad, and a few other things that I can’t recall were affected so that I couldn’t change any of their options.
I didn’t like this. Luckily, I was able to do a system restore to a point BEFORE the godawful 8.1 update, and all functionality was restored. I have since rejected any reminders from windows to install 8.1.
As of the posting of this topic, I have shut down my laptop and unplugged all power supplies. The reason being is because my laptop is being forced to update to 8.1, something that I don’t want.
I don’t want 8.1’s “improvements” in my laptops hard drive. From what i’ve been reading all over your forums, 8.1 has been a thorn in everyone’s side since it came out.
My family isn’t wealthy enough to pay for a new laptop that will function correctly with the 8.1 atrocity in an immediate fashion, since I am currently in my senior year of school.
Is there a way to stop it from installing? Or am I going to hafta live with no USB ports, audio, or customized advanced options?
Windows 10 is required to upgrade to Windows 11. Here’s why you need to update today.
Time is running out to upgrade to Windows 10 . Microsoft no longer offers support for Windows 7, and now the company has launched Windows 11. If you’re still running an older version of Windows, keep in mind that Windows 11 will only be available as a free upgrade for Windows 10 users, not older versions. Anyone on older operating systems will have to pay to upgrade. (Here’s how to download Windows 11 and how to check if your computer’s compatible .)
If you’re still running Windows 7, you can buy Windows 10 Home on Microsoft’s website for $139 (£120, AU$225). But you don’t necessarily have to shell out the cash: Over the summer, there was a free Microsoft upgrade offer that worked (it still might). Updating to Windows 10 now will make future updates, like Windows 11, easier. But you can expect to update to Windows 11 soon because support for Windows 10 will end in 2025 .
Windows 7 users who don’t upgrade to Windows 10 are already missing out on Microsoft’s security updates, bug fixes and technical support. So the best way to protect your computer from viruses is to update it now. We’ll show you how to download Windows 10 for free and give you the latest on Windows 11 computer requirements and a common Windows 11 error that Microsoft users are running into. And here’s what you can expect before upgrading from Windows 10 to Windows 11 . This story was recently updated.
How to download Windows 10 for free
Here’s how to get Windows 10 for free, if you’re currently running a licensed and activated copy of Windows 7, Windows 8 or Windows 8.1 Home or Pro:
2. Under Create Windows 10 installation media, click Download tool now and Run.
3. Choose Upgrade this PC now, assuming this is the only PC you’re upgrading. (If you’re upgrading a different machine, choose Create installation media for another PC, and save the installation files.)
4. Follow the prompts.
5. When the upgrade is complete, go to Settings Update & Security > Activation, and you should see a digital license for Windows 10.
Microsoft is encouraging Windows 7 users to upgrade to Windows 10 now support for the former has ended.
It should be noted that if you have a Windows 7 or 8 Home license, you can only update to Windows 10 Home, while Windows 7 or 8 Pro can only be updated to Windows 10 Pro. (The upgrade is not available for Windows Enterprise. Other users may experience blocks as well, depending on your machine.) This upgrade using the media creation tool isn’t meant for the general consumer, but it works for many nonetheless.
To get the best Windows 10 experience and take advantage of features like passwordless sign-on through Windows Hello , you’ll want to buy a new Windows 10 PC (or one released after July 2015) with all the hardware upgrades. If you’re a student or university faculty member, you may also be able to download Windows 10 for free. (Search for your school’s software offerings here.)
Stay current on the latest Microsoft news, plus reviews and advice on Windows PCs.
Windows installing the wrong or outdated drivers? Here’s a simple way to disable automatic driver installation in Windows 10.
When it comes to Windows 10, there are a couple of things that bug most people. The first one is the automatic updates, which you can pause, and the second one is the automatic driver installation. For the most part, automatic driver installation is not a problem and works fine for many people. In fact, for the past few years, other than the graphics driver, I haven’t installed any driver manually. Windows 10 automatically downloaded all the relevant drivers and installed them for me.
However, there might be situations where the automatic driver installation is not desired. Those situations include but are not limited to buggy drivers, wrong drivers, outdated drivers, incompatible drivers, etc. In those situations, you can disable automatic driver installation in Windows 10. Here’s how.
Disable Automatic Driver Installation in Windows 10
There are multiple ways to disable automatic driver installation in Windows 10. All the methods shown below achieve the same thing. So, follow the one you are comfortable with. That being said, if you are on a Pro or Enterprise version of Windows, then follow the second method.
Jump to:
1. Stop Automatic Driver Install via Device Installation Settings
- Open the Start menu.
- Search for “Settings” and open it.
- Go to the “System > About” page.
- Click “Advacend System Settings” under the “Related Settings” section.
- Go to the “Hardware” tab.
- Click on the “Device Installation Settings” button.
- Select the “No (your device might not work as expected)” option.
- Click on the “Save changes” button.
- Close the other windows.
- Reboot Windows.
That is it. After rebooting, Windows will no longer automatically install drivers.
2. Disable Automatic Driver Installation via Group Policy
- Press Win + R to open Run dialog box.
- Type gpedit.msc and press Enter to open Group Policy.
- Go to the following location in the group policy editor.
- Here, find “Do not include drivers with Windows Update” policy on the right panel and double-click on it.
- Select “Enabled” radio option.
- Click on the “Apply” button.
- Click on the “Ok” button to save the changes.
Reboot your system, and Windows will no longer download and install driver updates automatically. If you want Windows to download drivers automatically, select the “Not configured” option in step 5 .
3. Disable Automatic Driver Installation via Registry Editor
By changing the “ExcludeWUDriversInQualityUpdate” value in the Registry Editor, you can disable automatic driver installation in Windows 10. This method is beneficial for Windows 10 Home users.
To make things easy for you, I’ve created downloadable reg files to enable or disable automatic driver installation easily. You can either download them or follow the manual approach shown below.
After downloading the reg file, extract it to your desktop, right-click on the .reg file and select “Merge.” Click on the “Yes” button in the subsequent windows. That is it. Restart your system, and Windows will no longer install drivers automatically.
- Press Win + R to open Run dialog box.
- Type regedit and press Enter to open Windows Registry.
- Go to the following location.
- Right-click on the “Windows” key and select “New > Key“.
- Name the folder as “WindowsUpdate“.
- Right-click on the right panel and select “New -> DWORD (32-bit) value“.
- Name the value as “ExcludeWUDriversInQualityUpdate“.
- Double click on the new value.
- Type “1” in the value data field.
- Click on the “Ok” button to save changes.
- Close registry.
- Restart Windows.
After the restart, Windows will not download drivers automatically. To change that behavior in the future. i.e., enable automatic driver installation again, either delete the “ExcludeWUDriversInQualityUpdate” value or change its Value Data to “0” in step 9 .
Conclusion
As you can see, it is rather easy to disable automatic driver installation in Windows 10. Follow any one of the above methods, and you should be good. If you are wondering, the above settings (especially group policy settings) should stay intact even after you upgrade to another major Windows 10 version. If they are not, you can always re-configure them by following the above steps. For ease of use, bookmark this page, and you can return to it and verify as and when needed.
If you like this article, you might want to check out how to disable driver signature enforcement on Windows 10 and how to disable Cortana permanently on Windows 10 to protect your privacy.
The company changed the designation of the Windows 10 download from “optional” to “recommended” within Windows Update, which means anyone with Windows 7, 8 or 8.1 that has automatic updates activated – the default and the best way to keep a computer protected against security bugs – with recommended updates automatically selected will have Windows 10 downloaded without asking.
Once downloaded it can also automatically start the install process, presenting users with the option to proceed to stop the installation. But the propensity of users to simply hit “OK” or accept when faced with a prompt in the middle of doing something else, will likely see users just blindly hit OK and unknowingly installing Windows 10, preventing access to the computer while the instalment completes.
Users will then have 31 days to roll back their version of Windows. Users will also be able to manually block the update from downloading, but will have to actively do so within Windows Update, and soon.
Most Windows updates are relatively small, but the complete download of Windows 10 will take up between 3.5GB and 6GB of storage space on user hard drives and could be particularly troublesome for users with limited internet download allowance or metered connections.
Terry Myerson, executive vice president of Microsoft’s Windows and Devices group, said: “If you are on a metered connection on Windows 7 or Windows 8.1, then you have the option of turning off automatic updates. We strongly discourage this in today’s connected world because of the constant risk of internet threats.”
Windows 10 has seen good reviews and one of the best launches for a Windows version since Windows 98 in terms of compatibility with existing devices and software. It is free when upgrading from older versions and had been installed on 200m computers by the end of 2015, accounting for 13.7% of desktop internet users according to data from web analytics firm StatCounter. Windows 7 still held a 46.7% share of global internet users.
The company announced that Windows 10 will become a “recommended update” starting next year, which means anyone with Windows 7 or 8 that has automatic updates activated – the default and the best way to keep a computer protected against security bugs – will have Windows 10 automatically downloaded without asking.
What’s more, the installer for Windows 10 will start once it has been downloading, presenting users with a popup. Users will be able to decline the update, once the installer has started, or prevent the update from being downloaded by manually blocking it in Windows update.
But the propensity of users to simply hit “OK” or accept when faced with a prompt in the middle of doing something else, will likely see users just blindly hit OK and unknowingly installing Windows 10, preventing access to the computer while the instalment completes.
Terry Myerson, executive vice president of Microsoft’s Windows and Devices group said: “If you choose to upgrade (our recommendation!), then you will have 31 days to roll back to your previous Windows version if you don’t love it.”
Windows 10 automatically downloads on to the computers of those running Windows 7 or 8 who have registered interest in the new version of Windows.
Optional first, recommended later
Windows 10 will imminently be upgraded to an “optional” update, which could also see it downloaded automatically if a user has manually set Windows update to automatically install optional updates as well as recommended updates.
While Windows 10 has seen good reviews and one of the best launches for a Windows version since Windows 98 in terms of compatibility with existing devices and software, automatic downloads may cause issues, particularly for those short of storage space or on metered internet connections.
“If you are on a metered connection on Windows 7 or Windows 8.1, then you have the option of turning off automatic updates. We strongly discourage this in today’s connected world because of the constant risk of internet threats,” said Myerson.
The automatic Windows 10 download has been shown to take up between 3.5GB and 6GB on a user’s computer. Some metered connections provide as little as 40GB of data allowance a month. Some Windows 8 computers have as little as 32GB of storage space.
Should the user decline the installation of Windows 10 after it has been downloaded the update will not be automatically deleted, meaning it will sit on a user’s computer taking up storage space.
Windows 10, which is free when upgrading, had been installed on 75m computers by the end of August, accounting for 4.9% of desktop internet users according to data from web analytics firm StatCounter. Windows 7 still held a 48.1% share of global internet users.




