How to set up a bluetooth keyboard or mouse on your mac
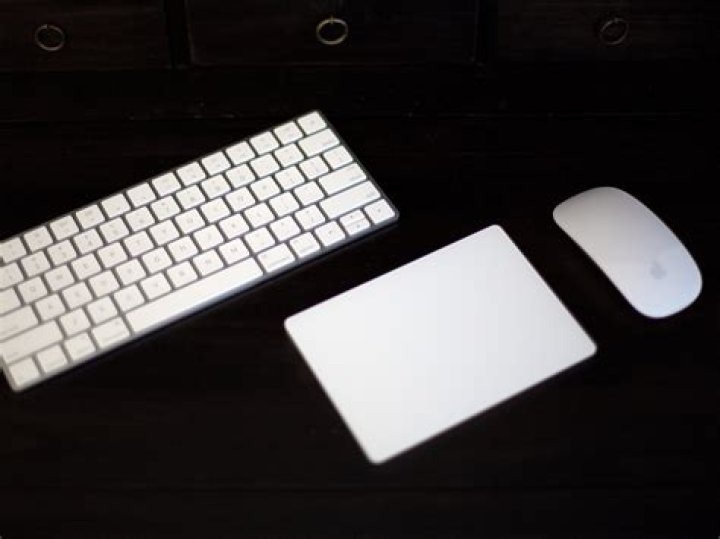
Every MacBook comes with a built-in keyboard and trackpad, but these can often feel clunky and awkward to use.
If you’re craving the extra space of a full-sized keyboard, or you prefer the separate left/right buttons and scrolling wheel of an external mouse, then you could always purchase a wired keyboard and mouse – or you could go wire-free and purchase Bluetooth peripherals.
In this article I’ll share everything you need to know, in order to get any Bluetooth mouse or keyboard communicating with your Mac. Once you’ve setup your external keyboard or mouse, you may discover that it functions slightly differently to your Mac’s built-in keyboard or trackpad, so I’ll also be covering some essential ways that you can tweak each device’s configuration.
Turn on your Bluetooth
Before you can connect any device to your Mac over Bluetooth, you need to make sure that its Bluetooth is enabled!
If your Mac features a “Bluetooth” icon in its menu bar, then click this icon and select “Turn Bluetooth On.”
If your menu bar doesn’t contain a Bluetooth icon, then:
- Select the “Apple” logo from your Mac’s menu bar.
- Navigate to “System Preferences… > Bluetooth.”
- Select “Turn Bluetooth On.”
- While we’re here, you may also want to consider adding the Bluetooth icon to your Mac’s menu bar, so it’s always within easy reach. To add the Bluetooth icon, select the “Show Bluetooth in menu bar” checkbox.
Pair your mouse or keyboard
To pair your Bluetooth peripheral:
- Select the “Bluetooth” icon from your Mac’s menu bar, and then select “Open Bluetooth Preferences…” Alternatively, navigate to “System Preferences… > Bluetooth.”
- Check whether you need to manually enter “pairing mode” on your specific model of keyboard or mouse. Sometimes, this mode will be enabled by default, but it’s worth checking for any kind of “sync” button, or a power button that you need to press before the device starts actively looking for something to connect to. If in doubt, check the manual that came with your Bluetooth-enabled device, or consult its online documentation.
- Once the keyboard or mouse is in pairing mode, it should appear in your Mac’s “System Preferences… > Bluetooth” menu, along with an accompanying “Pair” button. Give the “Pair” button a click.
Your Mac should now wirelessly connect to your mouse or keyboard.
Configuring your Bluetooth mouse
Once you’ve connected your external mouse, you may discover that the settings that worked for your built-in trackpad aren’t quite right for your new, external mouse. For example, maybe you need to tweak the scrolling speed, or switch the primary mouse button.
To make changes to your mouse’s settings, select “System Preferences… > Mouse.”
From here, you can tweak the following settings:
- Tracking speed. This controls how fast, or slow the onscreen pointer moves across the screen. Move the tracking slider to the right to speed up the cursor, or left to slow things down.
- Scrolling speed. This is how quickly the page scrolls, when you roll the mouse’s scrolling wheel. When the scrolling speed is set to fast, you’ll race to the top of the page, and when it’s slow you’ll be able to view more content as you scroll the page in multiple, separate motions. For speedier scrolling, move the slider to the right; for slower scrolling, drag the slider to the left.
- Double-Click speed. You double-click by pressing your mouse’s primary button twice in quick succession. If you’re struggling to activate the double-click feature, then you can give yourself more time to press the button twice, by dragging the slider to the left. Alternatively, if you find yourself double-clicking by accident, then you may want to drag the slider to the left, at which point you’ll have to press the primary key twice almost immediately, before macOS registers it as a double-click.
- Primary mouse button. By default, macOS uses the left mouse button as the “primary button.” If clicking the right button feels more natural, then you can switch things around by selecting the “Primary mouse button: Right” radio button.
Configuring your Bluetooth keyboard
You can also make some tweaks to your Bluetooth keyboard, by navigating to “System Preferences… > Keyboard.” This menu contains plenty of options that are worth exploring in more detail, but some of the most important include:
- Key Repeat. This allows you to specify how fast a key should repeat. Drag the slider to the right and you’ll wind up with a string of the same letters each time you hold down a key for more than a split second. Alternatively, drag the slider to the “Slow” end of the scale, and your Mac will wait before repeating the same key. If you’re a slower typer, then you may want to disable the key repeat feature entirely, by dragging the slider all the way to the “Off” position.
- Delay until repeat. This option lets you specify how long you need to hold a key, before it begins repeating. If you’re not a particularly fast typer, then you may want to use a longer delay, as this allows you to press keys more slowly without accidentally printing the same character, over and over again.
Before you go
After spending over 20 years working with Macs, both old and new, theres a tool I think would be useful to every Mac owner who is experiencing performance issues.
CleanMyMac is highest rated all-round cleaning app for the Mac, it can quickly diagnose and solve a whole plethora of common (but sometimes tedious to fix) issues at the click of a button. It also just happens to resolve many of the issues covered in the speed up section of this site, so Download CleanMyMac to get your Mac back up to speed today.
If your Apple wireless devices came with a new iMac, turn the devices on to begin using them. If you bought the devices separately or if you need to pair them with your Mac again, follow these steps.
Magic Keyboard, Magic Mouse, and Magic Trackpad work wirelessly with your Mac via Bluetooth when they’re paired and turned on.
If your devices came with a new iMac, they’re already paired with the computer. Just turn them on when you first turn on your Mac. To make sure that your device is turned on, check its power switch. If green is visible, the device is on.
If you bought your devices separately — or if they’ve become unpaired from your Mac — follow the steps below to pair them.
How to set up your wireless device
Follow these steps to set up your Magic Keyboard, Magic Mouse, or Magic Trackpad:
- Connect a Lightning to USB Cable 1 or a USB-C to Lightning Cable to the Lightning port on the device 2 and connect the other end of the cable to your Mac.
- Make sure that the device’s power switch is in the ON position. (Green is visible under the switch when the device is on.)
- Choose Apple menu > System Preferences, then click Bluetooth to open the Bluetooth preferences window. When the device pairs with your Mac, it appears in the list of devices.
- Check the Bluetooth preferences window to see your device’s charge level. When the device is charged, unplug it for wireless use.
1. If your Bluetooth device came with an iMac, a Lightning to USB cable was also included in the box.
2. Magic Mouse can’t be used while connected to the cable.
If your device won’t connect
If you’re unable to connect your device, learn what to do.
How to set up earlier Apple wireless devices
If your Apple wireless device doesn’t have a Lightning port, use a wired mouse or trackpad — or the built-in trackpad if you’re using a Mac notebook — then follow these steps to set up your earlier Apple wireless devices (such as the Apple Wireless Keyboard, Magic Mouse, and Magic Trackpad):
- Turn on your device.
- Wait until your device’s LED starts blinking, which means that it’s in Discoverable Mode. (If the LED is on but not blinking, your device is already paired with another host. To unpair it, choose Apple menu > System Preferences, then click Bluetooth. Hover the pointer over the device you want to remove, then click the button that appears next to the device’s name. Turn the device off, then start again at step 1.)
- Choose Apple menu > System Preferences, then click Bluetooth.
- Wait while your Mac searches for your device. When your device appears in Bluetooth preferences, click Pair 1 .
1. Apple Wireless Keyboard requires the passcode that appears on your Mac. Enter the 8-digit passcode on the keyboard, then press Return. Earlier models of Apple Wireless Mouse or Apple Magic Trackpad will connect automatically or show a dialog. If you see a dialog, click Pair or press Return.
If your Apple wireless devices came with a new iMac, turn the devices on to begin using them. If you bought the devices separately or if you need to pair them with your Mac again, follow these steps.
Magic Keyboard, Magic Mouse and Magic Trackpad work wirelessly with your Mac through Bluetooth when they’re paired and turned on.
If your devices came with a new iMac, they’ll already be paired with the computer. Just turn them on when you first turn on your Mac. To make sure your device is turned on, check its power switch. If green is visible, the device is on.
If you bought your devices separately – or if they’ve become unpaired from your Mac – follow the steps below to pair them.
How to set up your wireless device
Follow these steps to set up your Magic Keyboard, Magic Mouse or Magic Trackpad:
- Connect a Lightning to USB cable 1 or a USB-C to Lightning cable to the Lightning port on the device 2 and connect the other end of the cable to your Mac.
- Make sure the device’s power switch is in the ON position. (Green is visible under the switch when the device is on.)
- Choose Apple menu > System Preferences, then click Bluetooth to open the Bluetooth preferences window. When the device has paired with your Mac, it will appear in the list of devices.
- Check the Bluetooth preferences window to see your device’s charge level. When the device is charged, unplug it for wireless use.
1. If your Bluetooth device came with an iMac, a Lightning to USB cable will have been included in the box.
2. Magic Mouse can’t be used while connected to the cable.
If your device won’t connect
If you’re unable to connect your device, find out what to do.
How to set up earlier Apple wireless devices
If your Apple wireless device doesn’t have a Lightning port, use a wired mouse or use a trackpad – or the built-in trackpad if you’re using a Mac notebook – then follow these steps to set up your earlier Apple wireless devices (such as the Apple Wireless Keyboard, Magic Mouse and Magic Trackpad):
- Turn on your device.
- Wait until your device’s LED starts blinking, which means it’s in Discoverable Mode. If the LED is on but not blinking, your device is already paired with another host. To unpair it, choose Apple menu > System Preferences, then click Bluetooth. Hover the pointer over the device you want to remove, then click the button that appears next to the device’s name. Turn the device off, then start again at step 1.)
- Choose Apple menu > System Preferences, then click Bluetooth.
- Wait while your Mac searches for your device. When your device appears in Bluetooth preferences, click Pair 1 .
1. Apple Wireless Keyboard requires the passcode that appears on your Mac. Enter the 8-digit passcode on the keyboard, then press Return. Earlier models of Apple Wireless Mouse or Apple Magic Trackpad will connect automatically or a dialogue will be displayed. If you see a dialogue, click Pair or press Return.
Anthony Heddings is the resident cloud engineer for LifeSavvy Media, a technical writer, programmer, and an expert at Amazon’s AWS platform. He’s written hundreds of articles for How-To Geek and CloudSavvy IT that have been read millions of times. Read more.
Some wireless keyboards come with small dongles to plug in; some can only be set up over Bluetooth, a short-range wireless protocol that involves pairing devices together. To set up a Bluetooth keyboard or mouse, you’ll need to pair it with your Mac. If you’re setting up a different Bluetooth device, like Bluetooth headphones, the setup is mostly the same.
If you have an iMac and don’t have your Bluetooth keyboard set up by default, or if your trackpad and keyboard are broken on your Macbook, you’ll need a wired keyboard or mouse to set up a Bluetooth keyboard, as you can’t set one up without at least one input device. If you only have a keyboard, you can still set up a Bluetooth mouse by using the Tab key in System Preferences to cycle between options.
To get started, you’ll first want to make sure that Bluetooth is turned on on your Mac and that your wireless device has charged batteries.
Pair Your Device
Open up your Bluetooth settings from the drop down in the top right of your menu bar, or by searching for it in Spotlight (Command+Space) or the System Preferences app.
You’ll have to enter “pairing mode” on the keyboard and mouse. This mode will probably be on by default if the device isn’t paired to anything, but there might be a sync button on the back or bottom. Some devices even require that you press the power button a few times.
Once the device is discoverable, it will show up in the list of Devices on your Mac with a “Pair” or “Connect” button next to it.
After you click the button, your Mac might ask to enter a pairing code on the keyboard. For other devices, you can usually you can click past this window, and the device will pair anyway.
Configuring Keyboard and Mouse Settings
If your keyboard or mouse isn’t behaving properly, you can configure the settings in System Preferences. Under “Keyboard,” you can adjust the key repeat and function key settings, or change your keyboard layout to something different. You can also pair a Bluetooth keyboard automatically from here.
Under “Mouse,” you can adjust the tracking speed, double-click speed, and scrolling speed of your mouse.
For both keyboard and mice, the manufacturer may have their own drivers and settings apps to configure device specific-settings like DPI, macros, and lighting effects—particularly on “gaming” mice. These include things like the Logitech Control Center, Corsair iCue, and Razer Synapse.
Table of Contents
- Make sure the device is turned on and discoverable (see the device’s documentation for details).
- On your Mac, choose Apple menu > System Preferences, then click Bluetooth.
- Select the device in the list, then click Connect.
Quick Answer, why won’t my Bluetooth keyboard connect to my Mac? Using your Mac notebook’s built-in trackpad or a USB mouse, choose Apple menu > System Preferences, then click Bluetooth. … If the Bluetooth icon doesn’t appear, or if the menu bar status continues to indicate that Bluetooth is off, restart your computer and then try to turn Bluetooth on again.
Furthermore, how do I get my Mac to recognize my wireless keyboard?
- Turn on the wireless keyboard.
- Click the Apple logo at the top left corner of the screen and hit “System Preferences.”
- Click on the Bluetooth.
- Put the keyboard into active pairing mode.
- When the device’s name pops up on the screen in the Bluetooth window, click on it.
Frequent question, how do I connect my Bluetooth keyboard to my Mac?
- If you’re setting up a mouse or trackpad, follow the onscreen instructions.
- If you’re setting up a keyboard, click Set Up Bluetooth Keyboard, then follow the onscreen instructions to connect with your keyboard.
Likewise, how do I put my Bluetooth keyboard in pairing mode? To enable Bluetooth, simply go to Settings > Bluetooth and tap the slider button to “On”. Then, turn on your Bluetooth keyboard and put it into pairing mode. (It will usually go into pairing mode automatically after you turn it on, though some keyboards may require an extra step—check your manual if you aren’t sure.)If your Bluetooth keyboard will not pair with your computer, even though the keyboard normally connects, the first thing to do is replace the batteries in the keyboard. If your keyboard uses another power source, ensure the power source is providing power to the device.
Why is my wireless keyboard not connecting?
Replace the batteries in the keyboard and/or mouse. Reconnect the devices by pressing the reconnect button on the wireless receiver, and on the keyboard and mouse. Failing to reconnect wireless devices after changing the batteries is the most common cause of wireless keyboard and mouse failures.
How do you connect a wireless keyboard to a Mac?
- On your Mac, choose Apple menu > System Preferences, then click Bluetooth. Open Bluetooth preferences for me.
- Select the keyboard, mouse, or trackpad in the Devices list, then click Connect.
How do I connect my Mac to Windows keyboard?
On the Apple Wireless Keyboard, turn it on and hold down Command + W , while Windows is searching for bluetooth devices. After your keyboard appears in the list of found devices, click on it and then follow the screen prompts and eventually you will have to type in a pairing code. Type any code and hit return.
Why does my keyboard not work Mac?
Try plugging the MacBook in, let it charge, then check to see if the keyboard works. Check for updates. Connect a USB or wireless keyboard, and perform the standard procedure of checking for updates. If your MacBook needs any driver or operating system updates, update them and then see if the keyboard works.
How do I connect my Bluetooth Keyboard to my Mac without logging in?
How do I make my Bluetooth Keyboard discoverable?
On a Mac, open System Preferences, choose “Keyboard” and click “Set Up Bluetooth Keyboard.” In iOS or Android, turn on “Bluetooth” in Settings, and in Windows, open Control Panel and select “Add a Device.” Your device shows a pass code and a countdown timer, and you must type the numeric code on the keyboard and, to …
How do I connect my wireless Keyboard?
- Step 1: Put the battery in your wireless keyboard. Put the battery in your wireless keyboard.
- Step 2: Insert the unifying receiver into the USB port.
- Step 3: Turn on your wireless keyboard.
- Step 4: Wait until your wireless keyboard pair with your PC.
- Step 5: Test your wireless keyboard.
How do I find the pin for my Bluetooth keyboard?
How do I force a Bluetooth device to pair?
Go to settings, Bluetooth, and find your speaker (There should be a list of Bluetooth devices that you last connected to). Tap on the Bluetooth speaker to connect, then turn the speaker on AFTER you pressed the connect button, while your device is trying to connect to it.
Where is the reconnect button on my wireless keyboard?
To reconnect the device to your computer, press and hold the Connect button on the underside of the device for a few seconds. When the light on top of the device blinks red and green, the device is discoverable to other Bluetooth devices for 2 minutes.
How do I connect a wireless keyboard without USB receiver?
To connect a wired keyboard or mouse without involving USB port means you need a Bluetooth adapter. This device would convert your wired devices into a wireless one while not occupying one of your laptop’s USB ports.
By Killian Bell • 10:00 am, May 14, 2021
- How-To
- Top stories
No need to dig out a wired mouse.
Image: Apple/Cult of Mac
So, you accidentally disabled Bluetooth on your Mac, and now you can’t use your wireless mouse or trackpad. You could dig out a wired mouse to reenable it, but that’s a lot of effort. Instead, just use your keyboard.
We’ll show you how.
Toggling Bluetooth on your Mac is a quick and simple way to solve pesky connectivity issues. It often works wonders, for example, when your AirPods refuse to connect, or your mouse pointer is choppy and lagging.
Many of us forget, however, that our wireless mice usually rely on Bluetooth for connectivity. And once it’s turned off, our mice disconnect and there’s no obvious way to reenable Bluetooth without them.
That’s fine if you’re using a MacBook with a built-in trackpad. But what if you’re using another Mac, and you don’t have a wired mouse you can plug in temporarily? Well, there is a way to reenable Bluetooth with your keyboard.
How to enable Bluetooth with your keyboard on Mac
Simply follow these steps:
- Hold the Command (⌘) key then press the spacebar to open Spotlight Search.
- Type Bluetooth then use your keyboard’s arrow keys to highlight Bluetooth File Exchange.
- Press the enter or return key to open it.
- Your Mac will recognize Bluetooth is disabled and ask if you want to reenable it. Simply hit the enter or return key again to confirm.
Open Bluetooth File Exchange, then hit enter/return.
Screenshots: Cult of Mac
Bluetooth will now be reactivated, and within a few seconds, your mouse should be working again.
A restart may be necessary
Of course, this trick only works if you’re using a wired keyboard. If you have a Magic Keyboard or another that relies on Bluetooth, then you will need to connect it to your machine with a cable for wired communication.
If connecting a keyboard or mouse to your Mac via USB isn’t an option, the other alternative is to reboot your machine by holding down the power button. When it boots up again, you’ll be prompted to connect your peripherals.
I work out of my house where I have two computers: a mid-2010 Macbook Pro (for my day job) and a mid-2010 iMac (personal). During the workday, my iMac acts as a second display for my Macbook Pro via Mini Displayport.
Currently, I use a USB keyboard and mouse for my work computer and a Bluetooth keyboard and Magic Mouse + Magic Trackpad for use with my personal computer. I’d like to get rid of the wired keyboard and mouse and just use the Bluetooth stuff for both machines (but never simultaneously).
Is it possible to easily share the single set of input devices without having to repeatedly break and reestablish the pairing of the input device to the correct computer? I’m not opposed to buying some type of additional hardware to accomplish this, provided it’s not prohibitively costly or cumbersome to use or configure.
It’s not clear to me how I would tell the MacBook Pro to leave the devices alone so the iMac can have them for the evening. I want to avoid de-pairing and re-pairing the devices each time I want to shift them back or forth.
Basically is there software or hardware that works as a Bluetooth KVM switch?
13 Answers 13
The trouble is with the devices, the Apple mouse and the keyboard in your case. They don’t pair with more than one BlueTooth host at a time. You need a BlueTooth host that’s “central” to both Macs if you want to use them.
You can find KVM switches that have BlueTooth host receivers in them. For example, the Zonet KVM3322W (dead link) worked over USB and provided BlueTooth receiver capabilities. I cannot attest to how well that would work. Presumably you’d pair the keyboard and mouse with the BlueTooth receiver in the KVM instead of in either Mac and then using the keyboard shortcuts, switch between control of the Macs who are connected to the KVM via USB. How the Macs would respond to the BlueTooth receiver in the KVM coming and going as you switched between them is unclear to me. Could be they handle it just fine.
The other option is to seek out BlueTooth accessories that allow themselves to be paired with more than one host. And then switch between those hosts from hardware keys on them. For example, this keyboard+trackpad combo from IOGear supports switching between 6 BlueTooth hosts. So you’d pair it with both Macs and the use the keyboard switches to decide which one you were talking to at any point in time. That, to me, seems like the more reliable approach. Of course: now you’re stuck using IOGear’s keyboard instead of the Apple peripherals.
I, too, was looking for an answer to this very question. Here is the solution that I came up with:
- Go to System Preferences -> Bluetooth
- Click ‘Advanced’
- Make sure that ‘Allow Bluetooth devices to wake this computer’ is unchecked
- Click ‘OK’
Now, when I want to switch from my main computer to my MacBook Pro, I put the main computer to sleep and wake up the second one. The bluetooth keyboard and mouse both switch over to the laptop and away I go. When I want to return to the main computer, I put the laptop to sleep and wake the Mac Mini using its power button.
works on Mac and PC and can share between them both.
I’ve been using this solution so I can use my Apple Wireless Keyboard and Magic Mouse on my Mac and PC at the same time. To switch you just drag your mouse to the edge of the screen and it shows up on the other computer as if it were one big desktop.
I don’t have a problem doing the above at all.
I have 2 MBPs. One is the latest Retina and the other is a Mid 2011. I have the same Apple Bluetooth Keyboard and Magic Trackpad paired to both and use them both without ever removing the pairing.
I simply turn Bluetooth off on the device I’m not using them on, so my solution assumes you have no other need for Bluetooth simultaneously. Both the keyboard and trackpad happily pair with multiple devices. It all works great and I don’t need to power cycle the keyboard and Bluetooth . Simply toggling Bluetooth on the MBPs in a proper order works well. Turn off Bluetooth on the current computer you are using them with then turn on Bluetooth on the other. They will connect after a few seconds and you are ready to rock!
As long as both computers are on the same network you may want to consider a software solution like teleport for the keyboard and mouse.
You’ll still need some kind of switch for the display.
I just purchased a Logitech K811 Bluetooth keyboard which has the ability to switch between devices. Add a Logitech T630 Touch Mouse and you are set.
I’ve wrestled with this issue myself – the solution that works for me is to use one of the non-Bluetooth wireless keyboards that has its own USB dongle. That way, the wireless connection is between the Bluetooth dongle and the keyboard, which is pre-paired at the factory. As far as the KVM is concerned, it is just a plain USB keyboard.
My recommendation is to not switch.
The problem with any switching solution, hardware or software is there is a lag between 5 and 10 seconds. So if your intending on switching back and forth quickly between platforms you may not be satisfied with the time requirement to switch back and forth.
I have a IO gear hardware switch for the past 3 years and it takes about 5 seconds each time to switch back and forth with the mouse and keyboard. So I have a wired keyboard for when I need to switch back and forth quickly for pits and pieces of what I’m working on.
There’s VirtualKVM software solution by Duane Fields, which perfectly suites your needs. There’re two main problems with Target Display Mode:
- you’ve to manually press Cmd+F2 each time
- you should don’t forget to disable Bluetooth just before, otherwise keyboard and mouse will not be paired with the MacBook
VirtualKVM solves this problems. Here’s your steps:
- Download the app to the both iMac and MacBook, install and run it.
- Simply connect the MacBook to the iMac with a Thunderbolt cable.
- The app presses Cmd+F2 for you.
- It disables Bluetooth on the iMac and enables on the MacBook.
- Now you can pair keyboard and mouse with the MacBook, if you didn’t do it before. If you did, they’re connected automatically.
So that’s it. Now you can use the iMac as a display with keyboard and mouse connected to the MacBook. When you’ve done, just disconnect the cable and the app will return everything as it was (disable/enable Bluetooth, press Cmd+F2). Please note, that the app will disable Bluetooth on the MacBook, otherwise keyboard and mouse can’t be connected back to the iMac. If you need Bluetooth enabled on the both devices, you’ve to switch it on manually.
Configuration of the app is quite simple, you can see everything on the pictures below. Host Mode is for an iMac, Client Mode is for a MacBook. The app chooses the mode automatically.
I personally use this software everyday and it saves me a lot of time and nerves. With this app I don’t have to do a routine work and it makes me happy. I wish you the same.
MacBook Pro comes with a keyboard and a track pad to interact with the device. But many users simply don’t like to use that built-in keyboard and track pad. They are dexterous with separate mouse and keyboard; however, you need a Bluetooth mouse and keyboard as Apple doesn’t offer many USB slots on MacBook Pro. If you want to use mouse and keyboard separately, you need to check this tutorial on how to pair Bluetooth mouse and keyboard with MacBook Pro.
For Mac users, there are many Bluetooth enabled mouse and keyboards available in the market. Once they purchase such essential accessories, they need to pair wireless mouse or keyboard with Mac or MacBook Pro/Air. It is quite easy to pair such third-party accessories for Mac users (if they are not getting along with the Magic Keyboard and Magic Mouse supplied with Mac).
How to Connect Bluetooth Keyboard or Mouse with New Mac or MacBook Pro/Air
Step #1: First off, click on the Apple logo that appears on the top left corner of your Mac screen.
Step #2: A menu will drop down; you need to click on System Preferences.
Step #3: Next, click on Bluetooth icon from the list of options. The Bluetooth icon is creatively designed B.
Step #4: If Bluetooth option is not turned on, you can click on Turn on Bluetooth button.
Step #5: Take your Bluetooth device in your hands and put it on pairing mode. Most devices follow common commands to pair; however, there are some gadgets that follow different commands.
Step #6: Now, click on Pair button next to the keyboard you wish to pair with Mac.
Step #7: Similarly, you should click on the Pair button next to keyboard you like to pair.
It is done! Your Bluetooth enabled mouse or keyboard is paired with your Mac. Use the device by keeping some distance from your Mac. The range of the device depends on the capacity of your gadget.
As mentioned above, people love to use Bluetooth devices in their daily life. Among the many wireless and portable devices, Bluetooth headsets for iPhone and Bluetooth headphones for iPhone 7/7 Plus have become a super hit.
Since music is the passion and hobby for many users, people like to play songs and watch videos on portable Bluetooth speakers on iPhone and other smartphones.
Also Check :
When Apple launched its flagship iPhone 7 and iPhone 7 Plus phones, the AirPods have grabbed much attention from consumers. However, there are few takers of AirPods as people have to pay heavy price to use these AirPods. But accessory makers have found a better way and introduced best AirPod alternatives for users.
Do you liked this information on how to pair Bluetooth Mouse and Keyboard with Mac or MacBook Pro/Air? Which device you use and love the most? Share your feedback with us on Facebook, Twitter and Google Plus. Also leave your comments in the section below.
Messy cords on a desk can strike a negative chord with today’s workforce, making a wireless mouse a welcome change from the wired alternative. Aside from aesthetics, a wireless mouse just moves and feels so much better than a wired one.
There are two common types of wireless mice, and the way you’ll connect yours to a Mac depends on which type you have.
A RF mouse operates off of radio frequencies, and requires you to simply plug a USB dongle into your Mac. Make sure the mouse is powered on and within range, and you should be able to use it within the minute — there shouldn’t be any real syncing process required.
A Bluetooth -enabled wireless mouse without a dongle, however, requires you to first sync the mouse with your Mac.
Check out the products mentioned in this article:
MacBook Pro (From $1,299 at Best Buy)
Apple Magic Mouse 2 (From $79.99 at Best Buy)
How to connect a wireless mouse to a Mac
1. Turn the mouse on, and make sure it’s within range of your Mac. Depending on the mouse, you may need to press a button to put it into pairing mode.
2. Click the Apple icon in the top-left corner of the screen.
3. Select “System Preferences. “
4. Click the “Bluetooth” icon.
5. If it’s not already on, select “Turn Bluetooth On.”
6. Wait for your mouse to appear on the list. Click on its icon or the word “Connect” to finish the pairing process.
Until somewhat recently the idea of pairing a Bluetooth trackpad, mouse, or keyboard with an iPad is something that would have had people looking very confused indeed. But we live in exciting times, and all modern iPad devices running modern iPadOS versions have proper pointer support for trackpad and mouse, and full support for keyboards, complete with many keyboard shortcuts and handy tricks.
As ever, there are some caveats to consider here. But fear not – we’re going to run through what you need to get up and running, and then the most important part; what you actually need to do to start using a pointing device other than your finger, and to use a physical keyboard instead of the onscreen virtual keyboard, all with your iPad.
If you’re already familiar with using a mouse with iPad, or a keyboard with the iPad, then this won’t be new to you, this is for the users who are yet to have connect a Bluetooth keyboard, trackpad or mouse to their iPad and enjoy that experience.
What You Need to Get Started Using iPad with Keyboard, Mouse, Trackpad
Keyboard: Basically every version of iPadOS and iPad support Bluetooth keyboards, so that won’t be any issue for any model. Nonetheless you will still need a Bluetooth keyboard. The Apple Magic Keyboard is fantastic for this purpose.
Mouse and/or Trackpad: Apple added mouse and trackpad support to the iPad with the arrival of iPadOS 13.4, so as long as your iPad is running newer than that, you’ll be good to go. Obviously enough, you’re going to need an iPad that supports that update. You will of course need a Bluetooth mouse for this, the Logitech M535 is well supported by the iPad and is one option, as is the Apple Magic Mouse. If you prefer a trackpad, the Apple Magic Trackpad is as good as it gets.
iPad models that support the ability to use a mouse include:
- All models of iPad Pro
- iPad Air 2 or later
- iPad (5th generation) or later
- iPad mini 4 or later
Basically any modern iPad will work.
Assuming you have that squared away, and all software updates are installed, let’s move on to the fun part.
How to Pair a Mouse, Trackpad, & Keyboard with an iPad
Make sure your Bluetooth devices are charged up with sufficient battery so they can pair properly.
- Open the Settings app on the iPad
- Tap “Bluetooth” and ensure that it is turned on.
- Put your mouse, keyboard, or trackpad into pairing or discovery mode. That method will differ depending on the accessory you are using. Usually this is a button on the bottom of the device that you hold for a second or so. Check its manual for instructions if you aren’t sure.
- Move the iPad and accessory near to each other and tap the name of the latter when it appears in the “Other Devices” section.
- If you’re pairing an Apple accessory, you’re done. Otherwise, you might be prompted to enter a passcode, which is usually also included in the accessory manual. If you’re unsure what code to use, try 0000.
- If you are connecting additional devices (keyboard, mouse, trackpad), repeat the process to connect those Bluetooth devices
That’s all there is to it. You’re now all set up and ready to use your mouse, keyboard or trackpad with your iPad.
The addition of both keyboard and mouse or trackpad really improves the iPad experience, transforming it into a desktop class workstation. One of my personal favorite setups utilizes an iPad stand, keyboard, and mouse, to make a discussed here and you can achieve that setup for a nice low budget if it interests you.
Another option of course is to use the iPad Magic Keyboard case with Trackpad available for iPad Pro 11″ and 12.9″ models, and the latest iPad Air 11″, which is a fantastic case for iPad that transforms the device into a laptop of sorts, but also a perfectly great desktop computer. Setup with that keyboard case is even easier, just lay the iPad on the magnetic case and both the keyboard and trackpad instantly connect, no manual Bluetooth connections necessary.
Now that you’re in the Bluetooth menus, why not pair some speakers? It turns out that Bluetooth is surprisingly handy!
FTC: we use affiliate links, we means we may get a small commission from purchases from those links, with those proceeds going to support the site.
Did you just make your first-ever purchase of Mac mini, and you are struggling with its setup? No worries! All our firsts can be frustrating, and we have to find a way to adjust to them instead of giving up.
Apple Mac Mini
Mac mini is quite an expensive purchase and comes with a power cable and a few documents. You need to get an external monitor, mouse, trackpad, and keyboard to make it a running device. The Mac mini comes with a Thunderbolt HDMI port that connects a 5K Thunderbolt display or even a 1080p resolution monitor.
But, the primary matter is setting up the entire device for the main show. For that, you might need a keyboard. Thanks to the pair of USB 3.1 ports, your old keywords still have a chance with a new Mac mini. But, if you opt to make a brand new purchase or end up with a wireless keyboard, we are your ultimate setup guide.
Setup Mac Mini with Bluetooth Keyboard
Setting up a Mac mini with a wireless keyboard is actually easy. It does not require you to have any professional assistance. I will focus the entire process on how you can enable wireless connectivity and bring your Mac mini into function.
What you’ll need
- External monitor
- Mac Mini
- Bluetooth keyboard
- Monitor cable
- Trackpad
- Lightning to USB cable
Setting the Hardware
Step 1:
Set the entire system somewhere you have access to at least two power plugs—plug in your monitor and Mac mini.
Step 2:
Now, connect the Mac mini with the external monitor using a monitor cable.
Step 3:
Now, grab any old or Bluetooth keyboard and attach it to the trackpad via a lightning to USB cable, so the keyboard gets charged and ready to pair via Bluetooth connection. Once the battery is complete, you can remove both devices.
Step 4:
Once you are done with connecting and pairing all the hardware systems, cables are on point. Now, you are ready for a big step. Turn on the Mac mini and get to the real work.
Software Setting
- After turning on the Mac mini, you will see a typical Apple welcome screen.
- Once you move ahead, you will see all the Apple traditional setting options. Follow all the on-screen instructions and continue.
- After selecting country, Apple will automatically detect your keyboard and ask you to select it from a drop-down menu.
- Now, enter your WiFi credentials and then sign in with your Apple ID. Your keyboard should work perfectly at this point.
- You can manually adjust Siri, location, and other functions in your device or let Apple decide for you.
Logitech has released new versions of its MX peripherals in Mac-friendly finishes, as well as a new K380 wireless Bluetooth keyboard designed for Apple devices. These aren’t dramatically different devices from the existing versions that Logitech offers — but that’s a good thing in this case, and it elevates what were already amazing peripherals to no-brainer default choices for Mac users.
MX Master 3 for Mac
Image Credits: Darrell Etherington
The MX Master 3 for Mac is a very slightly altered twist on the MX Master 3 — consisting mostly of a new paint job that actually pretty closely resembles the old one. Specs are the same for the Mac-specific version, including its quiet scroll wheel with 1,000 lines per second maximum scroll speed, and Logitech’s MagSpeed tech that dynamically enables freewheel scrolling when you’re going fast.
The MX Master 3 for Mac ships with a USB-C to USB-C cord in the box instead of the USB-A to USB-C cable that comes with the non-Mac version, and that’s much more convenient for charging and using it dongle-free with modern MacBook computers. It can run for 70 days on a full charge, and you can get three full hours of use out of just 60 seconds of charge time. The mouse uses Logitech’s Darkfield laser tracking, which provides 1000 dpi on average of accuracy and the ability to track on virtually every surface, and it can also work across Macs and iPads with Logitech’s Easy-Switch technology for connecting to multiple devices.
In terms of major differences, the main one any owners of the MX Master 3 will notice is that the MX Master 3 for Mac is listed on Logitech’s website as only offering Bluetooth connectivity — and it doesn’t ship with Logitech’s Unifying USB receiver, which connects its peripherals via a dedicated RF network instead of Bluetooth for greater reliability. That’s odd, because the MX Master 3 for Mac definitely still works with Logitech’s Unifying Retriever, and that’s exactly how I had it set up, using the USB dongle that shipped with the MX Master Keys for Mac.
Image Credits: Darrell Etherington
This is noteworthy because Logitech is charging $129.99 for the MX Master 3 for Mac — the same as the non-Mac version, but it doesn’t include the receiver and bills itself as a Bluetooth mouse. It’s a bit of an odd choice, but if you’ve used Logitech gear over the years, you probably have an abundance of unifying receivers on hand, and the Space Gray colorway on the Mac version does match better with actual Mac hardware.
Performance-wise, the MX Master 3 for Mac is still one of the best full-size mice you can get. It’s extremely comfortable to use, features a healthy array of controls that are customizable with Logitech’s Options software and provides smooth, high-precision tracking, with the ability to use it while charging.
MX Keys for Mac
Image Credits: Darrell Etherington
Like the mouse, the Mac version of the MX Keys is mostly an aesthetic change. It’s also done up in Space Gray to match Apple’s colorway of the same name, and it features contrast-coloured black keys and a top bar that houses the wireless and battery electronics. The key layout also gets Mac-specific, ditching the hybrid key labeling of Logitech’s existing MX Keys for actual dedicated Command and Option keys, as well as a hardware eject key.
Also like the Mac Master 3, the MX Keys can work across devices, including those running macOS, iPadOS and iOS. It ships with a USB-C to USB-C charging cable (again, more convenient than the USB-A to USB-C one in the standard MX Keys configuration) and a unifying receiver. It’s also able to connect via Bluetooth, and can be connected to up to three devices with dedicated keys to switch between each.
The MX Keys is already probably your best choice for a third-party keyboard that offers great performance and key feel, unless you’re specifically into clicky mechanical keyboards. It includes smart backlighting that activates automatically when your hands approach, and turns off automatically when not in use to preserve battery life. While it’s made of plastic, it still feels heavy (in a good way), ensuring it’ll rest flat on your desk. Because it’s based on the MX Keys, I can also attest to its durability, as I’ve been using that keyboard since its launch and have not had any problems with it at all thus far.
Image Credits: Darrell Etherington
In terms of battery life, you can expect 10 days of use with the backlighting active — but if you go without the underlay lighting, it’ll stretch out to as much as five months. And as mentioned, it’s easy to charge up directly from your Mac with the included USB-C cable — which also allows you to use it while charging.
Logitech’s work on the color scheme here really does a good job of matching the look of Apple’s aluminum treatment, right down to the metal-like speckles on the Space Gray surfaces. If you’re already using an MX Keys, stick with it, but if you’re in the market for something new, this is the new best choice for a Mac user — at the same $129.99 price point as the original.
K380 Bluetooth Keyboard for Mac, iPad and iPhone
The K380 is a much more portable keyboard option, with rounded keys and a lighter plastic shell. It’s Bluetooth-only, but still offers the ability to connect up to three devices at once. The Mac version comes in either a white or pink version, and it features Mac-specific keys like the MX.
Image Credits: Darrell Etherington
It works across macOS, iOS and iPadOS, and can switch between each seamlessly, making it a great choice for working on the road with a setup that includes both a Mac and your iPad or iPhone. It’s powered by two AAA batteries (included), and is rated at around two years of use on a single pair.
The typing feel is a bit shallower than the MX series, but still impressive, and it’s near-silent, which makes it better for use in shared or busy spaces. It’s available now for $49.99.
Bottom line
Logitech hasn’t reinvented the mouse wheel with any of these products (it already did that with the MX Master 3’s original launch), but these are all welcome updates that make its hardware feel more at home with Mac and other Apple devices. Even Apple itself charges a premium for the dark-coated versions of its input devices, too, so it’s nice to see pricing stay the same along with the facelift.
If you’re in the market for new peripherals and don’t already own the MX series, these are obvious choices. Ditto the K380 for Mac if you want a durable, all-in-one keyboard to use across your devices that won’t add too much weight to your pack, and that looks and feels great.
Even if you aren’t very tech savvy, there’s nothing hard about plugging in a keyboard or mouse. But if you have a wireless keyboard or mouse, it takes a few steps to get set up. Here’s how to do it.
Setting up a Bluetooth peripheral may seem confusing at first, but it’s actually quite easy. Check out the video above to see how it’s done, or follow along with the steps below.
- Power on your mouse or keyboard. If it’s already turned on, turn it off, then turn it back on. This will make it “discoverable”, which means that when your computer scans for nearby Bluetooth devices, it will see your keyboard or mouse.
- In Windows, hit the Start menu and type in “Add a Bluetooth Device”. Click the “Add a Bluetooth Device” option that shows up. On a Mac, you can just hit the Bluetooth icon in the menu bar and hit “Set Up a Device”.
- Your computer will scan for devices, and your keyboard or mouse should pop up. If it doesn’t after a few seconds, try turning it off and back on again. Once it shows up, click on it, and hit Next.
- If you’re setting up a keyboard, you’ll be prompted to type in a PIN number. Type it in on your keyboard, and hit Enter. You should get a message saying the keyboard was paired successfully, and you should be able to start using it right away—with no wires cramping your style.
That’s it! It’s pretty simple. If it doesn’t work the first time, try it again—sometimes these things can be a little finicky. Good luck!
I’ve exclusively used Bluetooth devices to connect to my docked MacBook Pro for many, many months. It’s been a blissful period of time…one that came to a crashing halt this morning. After spending an aggravating period of time getting things working, I wanted to share with the Internet broadly (one) solution to getting both an Apple Wireless Bluetooth Keyboard and Magic Mouse (re)paired with OS X. I will note that I first ‘lost’ my Magic Mouse, and after a restart of my computer subsequently was unable to pair my Apple Wireless Bluetooth Keyboard.
Problem:
After months of blissful Bluetooth connectivity, I’ve awoken to discover that neither my Magic Mouse nor my Apple Bluetooth Keyboard are properly pairing. First my Magic Mouse failed to scroll, which led me to remove the Magic Mouse and attempt to pair it to my computer again. This attempt failed. I then rebooted my computer, and was still unable to pair my computer and Magic Mouse. After another restart, my Apple Bluetooth Keyboard was also unable to be be used as an input device with my computer. It is important to note that, while the Bluetooth Device Manager reported this failure to pair, both devices are reported as ‘connected’ under the Bluetooth icon in the OX X menu bar. Neither device, at this point, is responding to any input.
Solution:
- Delete com.apple.Bluetooth.plist. This file is found at HD/Library/Preferences.
- Turn off Bluetooth on your Mac. This is done by clicking the Bluetooth icon in the menu bar and selecting ‘Turn Bluetooth Off’.
- Unplug input-based USB devices (e.g. any USB mice, keyboards, Wacom tablets, etc).
- Shut down computer. Do *not* restart, but do a full shut down.
- Turn off your Bluetooth devices.
- Boot computer.
- Turn Bluetooth on.
- Begin pairing devices. This involves clicking: Bluetooth icon in menu bar >> Set up Bluetooth Device >> Select Bluetooth device >> Follow on-screen instructions. In the case of your keyboard, I would suggest pressing the ‘Enter/Return’ button several times after entering the passphrase shown on your screen.
This should result in your devices being reconnected.
What May Have Provoked/Complicated My Problem:
Shortly before I had this issue with my Bluetooth devices, I updated my MagicPrefs app. This application is meant to give more complete functionality to your Magic Mouse, and to Apple’s new Magic Trackpad as well. Suspecting this might be driving my problem, I removed both applications by:
- Quitting MagicPrefs by clicking on its icon in the menu bar and selecting ‘Quit’.
- Drag MagicPrefs.app (found in your Applications folder) to the trash.
- Open the Preference pane, right-click on Magic Prefs and select ‘Remove MagicPrefs Preference Pane.’ Do the same for the Magic Menu item in the Preferences pane.
I removed these applications prior to the above written solution. This may, or may not, be required to resolve the Bluetooth pairing problem; I haven’t investigated any correlation between the MagicPrefs application and my problem, but felt it valuable to note this element of my troubleshooting process.
by ruchi · August 18, 2007
Sponsored Link
We need the MAC address (e.g. 00:00:00:00:00) of the mouse and keyboard.You can use KEYBOARD_ADDR and MOUSE_ADDR where you should find the addresses for the keyboard and mouse respectively. Press the button on the mouse that makes it visible to be found by the computer. Do the same for the keyboard. Now open a terminal window and run the following command
Scanning .
KEYBOARD_ADDR Microsoft Wireless Keyboard
MOUSE_ADDR Microsoft Mouse
Adding the Keyboard and Mouse
Now we need to add the keyboard and mouse to the bluetooth configuration files. Run the following command to pop up GEdit
sudo gedit /etc/bluetooth/hcid.conf
You may be asked for your password, this is because we used sudo.
At the end of the file, add the following (replacing KEYBOARD_ADDR and MOUSE_ADDR for the keyboard and mouse MAC addresses as found earlier)
device KEYBOARD_ADDR name “Microsoft Wireless Keyboard”;
auth enable;
encrypt enable;
>
device MOUSE_ADDR name “Microsoft Mouse”;
>
Now you need to restart the bluetooth subsystem so that it refreshes it’s configuration file.
sudo /etc/init.d/bluez-utils restart
* Restarting Bluetooth services. [ ok ]
Pairing the Devices
You now need to pair the devices with the computer. Do not press any buttons on the keyboard as we’ll need to use it to enter a passcode so we can pair. Run the following command
sudo hidd –search
Searching .
Connecting to device MOUSE_ADDR
Connecting to device KEYBOARD_ADDR
They could pair with the computer in any order, you will need to remember which one is the keyboard. As soon as Connecting to device KEYBOARD_ADDR appears you must enter a PIN code into the keyboard. It must consist of numbers not using the numpad, somewhere between 4 and 8 should be fine. Type this number in to the keyboard and press Return.
A window should pop up on your computer asking you for the number you just entered on the keyboard.
You should now be set up. The devices should automatically reconnect when they go to sleep and when your computer boots up.
Troubleshooting
If you have followed all the steps above and you find your mouse or keyboard don’t automatically reconnect, we can fix it. Run the following command in a terminal
sudo gedit /etc/default/bluez-utils
Find the following lines
HIDD_ENABLED=1
HIDD_OPTIONS=” –master –connect KEYBOARD_ADDR –connect MOUSE_ADDR –server “
Now reboot and hopefully they’ll automatically connect (give them a few seconds to connect after you move the mouse/press a key).
And tips for mapping the keys to your preferences
:max_bytes(150000):strip_icc()/JenAllen-214879-65542c15d7fa42b6ba2c61cc14c4a8b8.jpg "How to set up a bluetooth keyboard or mouse on your mac")
- Tweet
- Share
What to Know
- All Mac and Apple keyboards also work on the PC.
- Connect via Bluetooth by clicking Bluetooth >Add Bluetooth > and select your Magic Keyboard from the list.
- It’s possible to remap any keys via the Microsoft PowerTools app.
This article teaches you how to use a Mac Magic Keyboard on a Windows computer and remap some keys if you choose to.
Can I Use a Mac keyboard on a PC?
Yes. Just because a keyboard is targeted at Apple users doesn’t mean you can’t use it on a PC as well. In the case of the Magic Keyboard, it’s Bluetooth-enabled, so users can connect it to any PC that has Bluetooth capabilities, or they can plug it in via the bundled USB cable. There’s no need to install drivers or deal with a complicated setup.
Can I Use an Apple Keyboard on a Windows PC?
Yes. Much like any Mac-labeled keyboard, Apple Keyboards, including the Magic Keyboard and Magic Keyboard with Touch ID, can all be used with a Windows PC once you’ve set it up correctly.
Touch ID only works on Apple devices but the rest of the keyboard is fully functional.
How Do You Connect a Mac Keyboard to a PC?
Connecting a Mac keyboard to a PC is as simple as adding any other keyboard. It’s possible to plug the keyboard in via the USB cable that comes with it, but a better solution is Bluetooth. Here’s how to connect it.
If your Magic Keyboard is already paired with another device such as a Mac and it’s switched on, toggle the Magic Keyboard power switch off then on to put it back into pairing mode.
On your Windows laptop, type Bluetooth into the Windows 10 taskbar search or go to Start Menu > Settings > Bluetooth.
Click Bluetooth.
Click Add Bluetooth or other device.
Click Bluetooth.
Wait for the PC to detect the Magic Keyboard.
If it doesn’t detect it, toggle the power switch on the Magic Keyboard and tap a key.
Click Magic Keyboard.
Wait for it to connect.
Click Done.
How Do I Use a Mac Key on Windows Keyboard?
Most of the keys on your Magic Keyboard work the same on a Windows system as they do on a Mac device. However, it can be helpful to map keys such as function keys to specific settings. You’ll need to download a separate app called PowerToys, but it’s a valuable way to remap keys. Here’s how to assign keys on a Magic Keyboard for Windows.
Looking for the Windows key? On a Magic Keyboard, that’s automatically mapped to the Command button.
Download Microsoft PowerToys from the official site and install it.
Click Keyboard Manager.
Click Remap a key.
Click the plus button to add a new key mapping.
Click Type and tap the key you wish to change.
Click OK.
Click Type under Mapped to follow the same process but with the key you wish to change it to.
Click OK.
Click OK to confirm the changes.
Your key has now been remapped.
Mac keyboards don’t have the Print Screen key, so you can’t use a keyboard shortcut. Instead, use the Windows Snipping Tool to take a screenshot. Search for the Snipping Tool from the Windows Start menu and choose your preferred style (free-form, window, rectangular, or full-screen) from the Mode drop-down menu.
The Alt key on a PC keyboard is the Mac Option key. It’s one of several keys that appears in a different place or by a different name on a Windows keyboard. To compare the placement of other essential keys, browse our guide to Windows and Mac keyboard differences.
These external mouse and keyboard options are great buys.
Looking to increase your productivity on your Macbook but beginning to feel a little constricted by its questionable keyboard? Even with the ultra precise, and gloriously-oversized trackpack, sometimes an external mouse and keyboard are in order so you can work on your own terms and at your own pace without restrictions. If you’re in the market for such a pair of items, check out the best mouses and wireless keyboard for your Macbook below.
Apple Magic Keyboard
You shouldn’t be surprised to find Apple’s own keyboard here — it’s pretty great. Available in two colors (silver and space gray) and two formats (with side number pad and without), the Magic Keyboard should be at the top of the best keyboards list. It’s not perfect, though. Paying the Apple premium usually means you’re getting everything and then some, and for its price, this keyboard should really offer backlit keys. It doesn’t. If that’s not a deal-breaker, be sure to check this one out.
Logitech Easy-Switch K811
Looking for a compact Bluetooth keyboard that checks all of the boxes? Look no further than the K811 from Logitech. While it’s more expensive than Apple’s own Magic Keyboard, it offers everything and then some.
Not only does the keyboard offer backlit keys, and an incredibly comfortable typing experience for its size, it allows you to connect to 3 different devices and easily switch from one to the other with one tap of a key. This means you can connect your Macbook, Apple TV, and iPad/iPhone and switch the connection between the three. Decked out in an aluminum finish, this basically makes a perfect companion to your Macbook.
Logitech K380 Multi-Device Bluetooth Keyboard
Love the idea of having your keyboard connect to multiple devices like the K811 but aren’t in love with the premium it demands? If you can live with a more budget-friendly build and no backlight behind the keys, the Logitech K380 should fit the bill. Featuring unique circular keys and an expected 2-year battery life on a single charge, this is a sub-$50 keyboard that gets a lot right.
Apple Magic Mouse
Moving onto wireless mice, you once again shouldn’t be surprised to see Apple’s own Magic Mouse here. The Magic Mouse 2 is really the best from a design standpoint. It’s a rechargeable mouse, so you won’t have to fiddle with batteries and the multi-touch surface on top allows for easy navigation between web pages and scrolling.
Logitech MX Master 2S Wireless Mouse
Looking for a solid mouse that’s highly accurate and customizable? Look no further than the Logitech MX Master 2S. The Master 2S features a 4000-DPi sensor that allows it to track on almost any surface, including glass, but that’s not all. Much like its keyboard above, this mouse also allows you to connect up to 3 different Mac (or Windows) devices and switch between them with a tap of a button. You can even copy text from one computer and paste it on another! A single charge should last you up to 70 days, but don’t fret, it also comes with fast-charging. A 3 minute charge would give you enough juice to get through an entire day. Impressive.
Logitech MX Anywhere 2S Wireless Mouse
If you love the power the Master 2S mouse brings to the table, but would prefer a more compact size (and price), the MX Anywhere 2S wireless mouse is for you. Just like it’s bigger brother, it can track on virtually any surface, connect to multiple devices and switch with a tap, and stay alive for 70 days on a charge. The primary difference is the overall shape of the mouse itself, where the Master offers a thumb rest and additional design details.
Try these steps to fix issues with your Apple wireless mouse, keyboard, or trackpad.
Your device isn’t recognized by your Mac
Follow these steps if your mouse, keyboard, or trackpad isn’t recognized by your Mac.
Make sure that your wireless mouse, keyboard, or trackpad is turned on
The Magic Mouse and Magic Mouse 2 have a slide switch on the bottom of the device. Slide the switch to turn on the device. On the Magic Mouse, the green LED briefly lights up. On the Magic Mouse 2, green coloring is visible beneath the switch.
The Magic Keyboard, Magic Keyboard with Numeric Keypad, and Magic Trackpad 2 have a slide switch on the back edge of the device. Slide the switch to turn on the device (green colouring becomes visible). Earlier Apple Wireless Keyboard models have a power button on the right side of the device. Press the button and you see a green LED on the top of the device, near the button.
When you turn these devices on, they appear as connected in Bluetooth preferences and in the Bluetooth menu in your menu bar. If a device doesn’t appear there, make sure it’s charged or replace it batteries, and make sure it’s been paired with your Mac.
Make sure that your device has been set up to work with your Mac
Make sure that Bluetooth is turned on
Use your Mac notebook’s built-in trackpad or a USB mouse to choose Apple menu > System Preferences, then click Bluetooth. Make sure that Bluetooth is turned on.
Refer to the table below for more information on determining the Bluetooth status. If the Bluetooth icon doesn’t appear, or if the menu bar status continues to indicate that Bluetooth is off, restart your computer and then try to turn Bluetooth on again.
| Bluetooth menu icon | Bluetooth status |
|---|---|
| Bluetooth is on, but no wireless devices are connected to the Mac. See the Make sure that your wireless mouse, keyboard, or trackpad is turned on section of this article. | |
| Bluetooth is on and at least one wireless device is connected. | |
| When this icon flashes, at least one wireless device has a low battery. Click the Bluetooth icon to identify the affected device, then recharge the device or replace its batteries. | |
| Bluetooth is off. Click the Bluetooth icon using a USB mouse or built-in trackpad and select Turn Bluetooth On. | |
| Bluetooth is offline or unavailable. Restart your Mac. If the Bluetooth status doesn’t change, disconnect all USB devices and restart your Mac again. |
Make sure that your devices are charged
Magic Mouse 2, Magic Keyboard, Magic Keyboard with Numeric Keypad, and Magic Trackpad 2 have built-in rechargeable batteries. You can charge these devices by connecting them to a Mac or a USB power adapter using a Lightning to USB Cable. For the fastest battery charging performance, be sure your device is switched on when connected to the Lightning to USB Cable.
To check the battery level of these devices, click the Bluetooth icon in your Mac’s menu bar, then select your device by name. If the battery level of any device is low, recharge the device. If the device isn’t showing, make sure the device is turned using the steps outlined above.
Turn the device off and on
If your Apple wireless mouse, keyboard, or trackpad isn’t recognized by your Mac after following the tips above, try turning the wireless device off, waiting a few seconds, and then turning it back on.
Your mouse or keyboard intermittently stops responding
- Click the mouse or trackpad or press a key on the keyboard to reconnect the device to the computer. It might take a moment for the device to respond.
- Check for wireless interference.
Your mouse doesn’t scroll up or down or side to side
If you can’t use your mouse to scroll through a web page or document, make sure that you’re using the correct Multi-Touch gestures and have set up your scrolling speed preferences correctly.
Your mouse or trackpad doesn’t track as expected
Apple Wireless Mouse, Magic Mouse, and Magic Mouse 2 can be used on most smooth surfaces. If tracking issues occur, try these options:
- Choose Apple menu > System Preferences, then click Mouse. Set the ”Tracking speed” slider to adjust how fast the pointer moves as you move the mouse.
- Try using a different surface to see if tracking improves.
- Turn the mouse over and inspect the sensor window. Use compressed air to gently clean the sensor window if dust or debris is present.
- If multiple Bluetooth wireless devices are in use nearby, try turning them off one at a time to see if the issue improves.
Your keyboard has one or more keys that don’t respond
Use the Keyboard Viewer to test whether the keyboard keys are responding correctly when they are pressed.
- Choose Apple menu > System Preferences, then click Keyboard.
- Click the Input Sources tab.
- Make sure that the keyboard language that you use is listed on the left side. If it’s not, click the add button (+) and choose from the languages that appear.
- Select the ”Show Input menu in menu bar” checkbox.
- Click the Keyboard tab, then select ”Show keyboard and emoji viewers in menu bar” checkbox, if present.
- From the Input menu in the menu bar, choose Show Keyboard Viewer. The Keyboard Viewer showing the keyboard layout appears on your display.
- Type the key on the keyboard that doesn’t respond and see if the corresponding key highlights on the Keyboard Viewer. If it does, that key is functioning correctly.
If you enable the Mouse Keys feature, many keys might not respond as you expect. To turn off Mouse keys, choose Apple menu > System Preferences, then click Accessibility. Choose Mouse & Trackpad from the list on the left side, then then deselect the Enable Mouse Keys checkbox.
My macbook pro retina 13″ late 2012 built in trackpad and keyboard stopped functioning abruptly.
It has been working fine and just today it stopped all of a sudden. I have absolutely no clue what happened to it.
It kept searching for a bluetooth keyboard. However external keyboard and mouse works, but whenever i unplug them nothing else works.
Power button is the only button that works.
My macbook is currently OSX 10.9.5
I searched on sites and it appears late 2013 had a EFI update that fixed it but i couldnt install any EFI update on my macbook pro.
Это хороший вопрос?
Was the machine dropped or squeezed? (Stacked or pushed in a bag/compartment) Did you upgrade, add any software, or did you go inside the machine before this behavior started? Is this a wake from sleep issue (in other words does this happen after you leave a running machine alone for a while?)
The machine was stationed on the desk. I was playing a game on it when all of a sudden the keyboard became unresponsive. I had an external mouse connected to play the game so i immediately check the trackpad which to find the trackpad failed to work too.
I had brought my laptop out in the morning. I returned home(4pm) and was able to have a fully-functioned laptop until late at night (11pm).
I decided to upgrade from 10.9.2 to 10.9.5 to see if the problem will disappear AFTER it stopped working.
To kill the Bluetooth issue, and extend battery life turn it off (unless there is some Bluetooth device you must use) deleting the
User/Library/Preferences .plist file for Bluetooth may resolve that problem. Often strange application behavior is the result of a corrupt .plist file.
I deleted that .plist however the internal keyboard and trackpad remain unresponsive. I can’t seem to get them to work even after i deleted that .plist you recommended. The search for a keyboard via bluetooth pops up again after i restarted my laptop. Is the Library Macintosh HD -> Library -> Preferences OR did you mean the hidden Library within my account (in this case Michael -> Library . . .)?
I have just had the same problem. trying to solve it but to no avail
27 Ответов
34
283
950
There are few possibilities here:
- The keyboard/track pad ribbon cable from the top case is not seated correctly into the logic board connector (or damaged).
- Something was spilled into the keyboard and it took a bit of time to damage the connections.
- The last possibility is the battery has swelled pressing from under the keyboard causing it to fail.
To test for the battery problem, put your laptop into a plastic bag making sure to pull out as much air out as you can. Place the laptop into your refrigerator for about an 2 hours to drop its temp. Take it out and quickly turn it on, see if the keyboard and track pad are working. If they are the issue is the battery pressing on the top case from below. You’ll need a new battery follow this guide MacBook Pro 13″ Retina Display Late 2012 Battery Replacement its a bit of work so be sure you can do it. Here’s the needed part MacBook Pro 13″ Retina (Late 2012-Early 2013) Battery Sadly iFixit can’t ship via air, so you may need to go to a more local source.
If your upto it pop off the bottom cover to inspect the ribbon cable to see if its correctly seated. Otherwise you’ll likely need a new top case as the keyboard is part of it. While its possible to replace the keyboard alone its a lot of work and if you’re not careful the visible part of the case can get damaged and/or the keyboard may not be fully mounted.
There are many instances where you would need to enable Bluetooth without Keyboard and Mouse. For example, if you’re highly dependent on a wireless keyboard and mouse, and Bluetooth stopped working, how will you turn on Bluetooth without Mouse or Trackpad? In another case, if you’ve turned off Bluetooth accidentally, all the Bluetooth devices will be disconnected from the Mac, and to turn back the Bluetooth, you would have to try the below-listed trick.
we are happy to help you, submit this Form, if your solution is not covered in this article.
Besides, when Bluetooth keeps disconnecting and reconnecting, the only alternative left for you is to troubleshoot the Bluetooth connectivity issues and fix the problem. Let check how to turn on Bluetooth without a keyboard or mouse in Mac.
How to Turn On Bluetooth without a Keyboard or Mouse or Trackpad on Mac?
Use Hey Siri on Mac
Use Siri Command: Hey Siri while connected to Headphone. Make sure Hey Siri is enabled from your Mac system Preferences settings. If not, then follow the below steps,
- Click on Apple Logo from top Mac Menu >System Preferences.
- Next, Click on Siri.
- And Select “Enable Ask Siri” checkbox. Also Select Checkbox “Listen for “Hey Siri” on Headphones”.
- Any Say “Hey Siri, Turn on Bluetooth” in Headphone microphone, and Your mac will turn on Bluetooth without mouse and Keyboard.
- That’s it.
Method 1: With a Working USB Keyboard
It’s hard to find a wired keyboard in this era; most people have already moved on to wireless devices; whether it’s a Keyboard, Mouse, or Headphones, everything is wireless. Since Bluetooth is not working correctly, then, of course, the wireless peripherals are useless; however, you can try arranging a wired keyboard and plug the USB cable into the Mac.
- Connect Keyboard via USB to the Mac.
- Once the Mac detects the keyboard, launch Spotlight Search by pressing Command+Space Bar.
- Search Bluetooth File Exchange in the spotlight search.
- Press Return.
- When you select Bluetooth File Exchange, a pop-up will ask you to enable Bluetooth if it is disabled.
- Select Turn Bluetooth On.
- Use the Return key to enable Bluetooth.
- Once the Bluetooth is enabled, the mouse and trackpad will auto-connect to Mac.
Don’t have Keyboard, Mouse, or Trackpad? Here’s What to Do
Can’t arrange the keyboard or mouse or trackpad? Then we’ve another workaround to turn on Bluetooth in Mac.
- Close all your apps, documents, and programs after saving them.
- Remove all the connected physical peripherals and devices like Keyboard, Mouse, Trackpad, Printer, Headphone, etc., from the Mac.
- Now Power Off the Mac. To do so, press and hold the power button until it turns off completely.
- Wait for 1-2 minutes and then press and hold the Power button to turn on Mac.
- Let the Mac boot up; after detecting no Bluetooth devices are connected to the Mac, Bluetooth Setup Assistant would come up and let you turn on Bluetooth.
Other Thourbleshootings!
Also, try to turn on Bluetooth after put your Mac in Safe mode. Still, you didn’t get any help fixing your Mac’s Bluetooth, then Reinstall MacOS [without Erase Data or Take Backup in Time machine].
Use Bluetooth Adapter
The Best USB Bluetooth Adapter is available in all features like long-range connectivity and Easy Setup [Plug and connect]. Supported with all Headphones, accessories. Easy Setup and connect your Mouse and Keyboard.
Apple Support
Take advantage of free apple hardware support; Apple will repair or replace your Mac is free of cost; if your Mac is under warranty, check your Mac Warranty status online. Here’s a full guide on how to contact apple support and Book Appointment at apple genius bar. If the Hardware repair cost is high, I recommend using External Bluetooth Adapter explained in this tutorial.
jaysukh patel
Jaysukh Patel is the founder of howtoisolve. Also self Professional Developer, Techno lover mainly for iPhone, iPad, iPod Touch and iOS, Jaysukh is one of responsible person in his family. Contact On: [email protected] [OR] [email protected]
Lot of Mac users reported this issue. Sometimes Magic Mouse or Apple Bluetooth keyboard not connecting to Mac computer. Mac users unable to pair and use their bluetooth devices to Mac OS X system .
Under Mac OS X menubar -> Bluetooth icon, both devices are reported as ‘connected’. But Magic Mouse failed to scroll and Bluetooth keyboard not responding.
If you faced “Mac bluetooth mouse won’t connect” issue, also read our earlier guide : How to Fix : Magic Mouse Loses Connection or not working.
- On you Mac computer, go to HD/Library/Preferences and delete com.apple.Bluetooth.plist file.
- Disable Bluetooth on Mac (Click the Bluetooth icon in Mac menu bar and choose “Turn off Bluetooth”.
- Unplug all in-put based USB devices like keyboard, mouse or Wacom tablets.
- Shutdown computer (not a restart).
- Turn off all Bluetooth devices.
- Turn on computer.
- Turn on Bluetooth devices.
- Now try to pair Bluetooth devices ( Press the Bluetooth icon in the Menu bar -> Set up Bluetooth Device -> Choose Bluetooth device ->Follow on-screen instructions. Ex : If you are try to connect Bluetooth keyboard, Press the “Enter/Return” button several times, after entering the passphrase shown on Mac screen.
Now your Bluetooth devices should connect to Macbook Pro/Air. iMac or Mac Mini.
If you need to fix “Mac bluetooth keyboard not pairing” issue, also read our earlier guide: Apple Wireless keyboard won’t connect, fix.
Reason for this issue?
This issue mostly happened because of the software update. If you use MagicPrefs app, removing or uninstalling the app might help you to connect your Bluetooth device to computer.
- Close or quit the MagicPrefs app.
- Drag the MagicPrefs.app from /Application/ folder to the Trash.
- Launch Preference panel. Right click on Magic Prefs and choose ‘Remove MagicPrefs Preference Panel.’ Do the same thing for the Magic Menu item in the Preferences panel.
If you knew any other solutions to fix “MacBook Pro bluetooth not connecting” problem, inform us via comment.
I’ve experienced unexplained connection drops when using an Apple wireless keyboard and/or mouse with my Mac. I looked into this and found others experiencing similar challenges, so I’ve gathered a few suggestions that may help.
The symptoms
Symptoms vary, but they seem to include:
- When you wake your Mac from sleep your Bluetooth mouse and/or keyboard may no longer be connected to your computer.
- During normal use, you may find one of your input devices becomes disconnected from your Mac for no clear reason. This is the problem I have.
- Connection may be unpredictable, for example the machine may wake from sleep when you tap the Space bar, but text entry for your login may fail.
Not every user is affected. It is not possible to estimate how many people are impacted. Further assistance is available here.
What to do
There are numerous quick steps you can attempt to address this problem.
These steps may not work. Apple hosts additional Bluetooth troubleshooting information here.
To use your Mac you can also try:
Some tricks
If your mouse is working and your keyboard isn’t, or if you have a wired mouse you can connect for the task it’s possible to manually reconnect your device(s) by accessing System Preferences>Bluetooth. When Bluetooth Settings appear some users report their devices begin working again, otherwise you can re-enable the connection in the pane.
If your keyboard is working and your mouse isn’t, type Command + Space to invoke Spotlight. Type “Bluetooth” and use the down (cursor) arrow to select System Preferences>Bluetooth, then tap Enter. This sometimes activates the connection.
Resetting PRAM/NVRAM
Some reports claim the Bluetooth problem can be overcome by resetting PRAM and NVRAM, though this doesn’t apparently work for everyone.
- Shut down your Mac
- Locate the Command, Option, P and R keys on your keyboard
- Switch on your Mac
- Press and hold the Command, Option, P and R keys before the gray screen appears
- Keep these keys depressed until the Mac restarts and you hear the StartUp sound for a second time
- Release the keys
- Some settings, (eg. volume, time zone, startup disc) will need to be reconfigured subsequent to reset.
Repair the pair
You can see which devices your system is paired with in System Profiler (Tip: Hold down the Option key when you select the Apple Menu and you will be able to select System Information directly rather than needing to enter About This Mac in order to access System Information). Select ‘System Report’ on the next screen. Is your device listed among those included in the Bluetooth section?
You can create a fresh pairing for your device.
- First enter System Preferences>Bluetooth then delete your existing paired device(s) in the list.
- Restart your Mac and follow these instructions to pair your devices once again. NB: You should switch off your device and remove and reinsert the batteries before you begin the repairing. Follow the instructions and your device should be in discovery mode next time it you switch it on.
- If these steps fail, try again but be sure to keep the power button depressed when it enters discovery mode and you should eventually be given the pairing passcode. More here.
I hope one or more of these steps helps Mavericks users who may be suffering connection problems using a wireless keyboard or mouse with their Mac.
Google+? If you use social media and happen to be a Google+ user, why not join AppleHolic’s Kool Aid Corner community and join the conversation as we pursue the spirit of the New Model Apple?
Got a story? Drop me a line via Twitter or in comments below and let me know. I’d like it if you chose to follow me on Twitter so I can let you know when fresh items are published here first on Computerworld.
Jonny is a freelance writer who has been writing (mainly about Apple and technology) since 1999.
This article explains how you can turn on Bluetooth on your Mac without using your keyboard, mouse, or trackpad. This may sound silly but there can be situations that can require you to switch Bluetooth back on without a mouse, trackpad, or keyboard.
For example, you may have turned off Bluetooth accidentally on your Mac. This will disable your wireless mouse and keyboard connections and make your peripherals unusable. Or you are trying to troubleshoot your Bluetooth connection problems. One of the very basic techniques to troubleshoot something is to turn it off and on. And you turn off Bluetooth to fix it, your wireless mouse, and keyboard will be disconnected and stop working and you will see no cursor, and now you do not know how to turn it on without your mouse or keyboard because you now have no way to control the computer. Do not worry there is a way. Here is how:
When Bluetooth is turned off, your Bluetooth mouse, keyboard, or trackpad will be disconnected.
Obviously, if you have a wired mouse, you can use this mouse to easily turn back on Bluetooth by clicking the Bluetooth status icon in the menu bar. In this scenario, we will assume you do not have a USB mouse.
If you have a working keyboard
1. For this method, you will need to use your keyboard, see the other method below if you have no keyboard connection. You may try:
- Connect a USB keyboard to the Mac (or if possible, connect your keyboard to your Mac with a USB cable). See this article if you are having problems with your USB keyboard. You may also use other wired mouse options.
- If this is a MacBook, then, obviously you can use the built-in keyboard.
2. Now using your keyboard, open Spotlight. Simply use the Command + Space keyboard shortcut. Type the following phrase into the search bar: Bluetooth File Exchange. Then hit return.
3. This command will launch the Bluetooth File Exchange app. This app will recognize that Bluetooth is disabled and prompt you to turn on Bluetooth. It will say “Bluetooth Hardware is Off. In order to use this application, the Bluetooth hardware must be on. Do you want to turn it on?”.
4. Now, again hit the “Return” key again to choose the “Turn Bluetooth On” button. This will enable your Bluetooth connection, and then your mouse or trackpad will start working again momentarily.
If you do not have a working keyboard, mouse, and trackpad
If you do not have a USB keyboard or mouse available, then here is what you can do:
- If you are working on documents, save them, and close them.
- Disconnect all physical peripherals, printers, etc, from your Mac.
- Manually restart your Mac. To do that, press and hold the power button on your Mac until it turns off. Wait a few seconds and then press the power button again to start your Mac.
- When your Mac turns on, wait a few seconds until your device determines that your Bluetooth devices are not connected and opens the Bluetooth Setup Assistant to turn on Bluetooth automatically. In other words, restarting your Mac will automatically turn on Bluetooth when there is no keyboard connected.
Serhat Kurt
Dr. Serhat Kurt worked as a Senior Technology Director. He holds a doctoral degree (or doctorate) from the University of Illinois at Urbana / Champaign and a master’s degree from Purdue University. Here is his LinkedIn profile.
Thank you for choosing to leave a comment.
Please note the following:
- All comments are moderated.
- Your email will NOT be published nor shared.
- All SPAM comments will be deleted.
- Please see our comment policy page for more info.
– Dec. 1st 2021 3:00 am PT
We rely on Bluetooth for more and more devices, and while the wireless standard is very convenient, it can be really frustrating when our peripherals don’t work consistently. Read along for five tips and tricks to fix Mac Bluetooth issues, including resetting your Bluetooth module and ways to remove interference.
Whether you’ve got a new Apple Silicon Mac or are having trouble with Bluetooth on an Intel one, we’ll cover multiple approaches to fix Mac Bluetooth issues.
How to fix Mac Bluetooth issues
Software update, power cycle, unpair
You’ve probably tried these steps, but if not, start here:
- Check if macOS is up to date ( > About This Mac > Software Update…)
- Make sure your Bluetooth device is charged
- Turn off your Bluetooth device and back on again, you can do the same with Bluetooth on your Mac (click the Bluetooth icon in the menu bar – top right of your Mac’s screen)
- You can also unpair a Bluetooth device and re-pair to see if there’s an improvement (Bluetooth in the menu bar > Bluetooth preferences > hover over a device > click the “x” icon > choose “Remove”)
- Reboot your Mac
Remove interference
Apple notes in a support document that if you’re seeing intermittent Bluetooth issues, it’s good to check for interference. Tips include:
- Bring your Mac and Bluetooth devices closer together
- Remove other devices like phones, cameras, power cables, etc. that might be on your desk or nearby
- Move some WiFi devices to 5GHz since Bluetooth and WiFi both use 2.4GHz
- Move USB/Thunderbolt hubs further away from your Mac and Bluetooth devices (and don’t place them on top of your Mac)
- Turn off USB devices that aren’t in use
- Finally, don’t have materials between your Mac and Bluetooth devices like metal, concrete
Reset your Mac’s Bluetooth module
Keep in mind this will disconnect all of your Bluetooth accessories including your mouse/keyboard. Make sure you have a wired keyboard/mouse for Mac desktops.
In macOS Monterey
If you’re still having trouble with Bluetooth issues, you can reset your Mac’s Bluetooth Module:
The option + shift + click on the Bluetooth icon in the menu bar (detailed below) doesn’t show a Bluetooth reset option in Monterey so you’ll need to run a Terminal command.
- Open Terminal
- Type in the command “sudo pkill bluetoothd”
- Press return, then enter your password in asked
- Reset your Mac
In macOS Big Sur or earlier
- While holding option + shift on your keyboard, click the Bluetooth icon in the menu bar
- Click “Reset the Bluetooth module”
- On the confirmation prompt, choose “OK”
- Your Bluetooth devices will disconnect for a moment as the module resets and should automatically reconnect
Here’s how this looks:
Remove all devices + reset Bluetooth module
If that didn’t work, you can remove all of your Bluetooth devices and then reset the module (keep in mind you’ll need to re-pair all of your Bluetooth devices after this):
- Hold option + shift on your keyboard and click the Bluetooth icon again
- This time, choose “Remove all devices” > click OK
- Do option + shift on Bluetooth in the menu bar again > click “Reset the Bluetooth module”
- Re-pair your Bluetooth device(s)
Have a dongle?
This isn’t always an ideal solution depending on your setup, but if your Bluetooth device came with a USB dongle for a direct connection, that should eliminate Bluetooth issues.
The most common devices to come with USB dongles are third-party mice and keyboards.
If you’re having specific issues with scrolling, tracking, and more with Apple’s Magic Mouse or Magic Trackpad, there are some additional suggestions in this support document.
Read more 9to5Mac tutorials:
- Best USB-C and Thunderbolt displays for Mac
- 30+ Mac tips for new setups that everyone should know [Video]
- MacBook Air vs MacBook Pro: Which should you buy?
- Here’s what’s new with the redesigned Safari in macOS Monterey and how it works
FTC: We use income earning auto affiliate links. More.
Buying a Mac computer doesn’t always mean you need to get an Apple keyboard, even though it’s a logical option. Many keyboards are fully compatible with macOS, and while others are only ‘partially’ compatible, only a few function keys don’t work. When buying the best keyboard for Mac or even the best keyboard for MacBook Pro, pay particular attention to their compatibility, build quality, comfort, and overall typing experience.
We’ve tested over 150 keyboards, and below are our recommendations for the best keyboards for Mac. You can also check out our picks for the best keyboards, the best wireless keyboards, or if you write a lot, check out the best keyboards for writers.
Best Office Keyboard For Mac: Apple Magic Keyboard with Touch ID and Numeric Keypad
The best wireless keyboard for Mac for office use that we’ve tested is the Apple Magic Keyboard with Touch ID and Numeric Keypad . It’s Apple’s latest release of their well-known Magic keyboard, and it’s available in both a full-size variant, which is the one we tested, and a 75% compact size if you prefer something smaller.
As this is an Apple keyboard, it works perfectly with Mac computers. It has the new Touch ID button at the top right, which works with M1 Mac computers so that it’s easier for you to unlock your PC, but the Touch ID button doesn’t work with any other Mac. Typing feels great as the low-profile switches are comfortable to type on and are fairly light to press, but it takes some force to get over the tactile bump.
Sadly, it doesn’t have any backlighting, which is disappointing for a high-end Apple product, so it’s not ideal to use in a dark environment. Also, while it has Bluetooth support, you can only connect to one device at a time, so you can’t use it to type a document on your Mac and quickly respond to an email on your tablet. If that isn’t an issue for you, it’s the best keyboard for Mac while in the office.
Cheaper Alternative: Logitech MX Keys
If you prefer something cheaper, then check out the Logitech MX Keys. It’s not a dedicated Apple keyboard like the Apple Magic Keyboard with Touch ID and Numeric Keypad, so you don’t get features like Touch ID, but all keys work on macOS, and you can wirelessly pair multiple devices at once over Bluetooth while you can only pair one device at a time with the Apple keyboard. It also has white backlighting that makes it a good choice for use in dark rooms. You can reprogram some function keys to a preset list of commands through the Logitech Options software. Typing feels great as the keys have a short pre-travel distance, and the keycaps are indented, so you know when you’re about to press them. The scissor switches may feel a bit heavy to get over the tactile bump, but typing still feels light overall, and it’s very quiet.
If you’re in the market for the best keyboard for Mac for office use, you can’t go wrong with the Apple as it’s designed specifically to fill that role. However, if you want something cheaper that has backlighting and multi-device pairing, look into the Logitech.
Best Ergonomic Keyboard For Mac: Logitech ERGO K860 Wireless Split Keyboard
The best wireless keyboard for Mac with an ergonomic design that we’ve tested is the Logitech ERGO K860 Wireless Split Keyboard. It has a unique design that may take some time getting used to, especially if you don’t type the ‘proper’ way, but once you do, typing feels great, and you shouldn’t feel any fatigue.
The split design with the negative incline feet is meant to relieve stress on your wrists. It comes with a wrist rest that contributes to the fantastic ergonomics, but since you can’t remove it, the entire keyboard is big and takes up a lot of space. It has many of the same features as the Logitech MX Keys, like reprogramming the function keys to a preset list of functions, making it easy to open your favorite apps while working. All keys work on macOS, except for the calculator button.
Unfortunately, unlike the MX Keys, it doesn’t have backlighting, so the keys are hard to see if you work in a dark environment. It’s entirely made of plastic, which is a bit disappointing for a high-end keyboard, but the overall build quality is still good, and you shouldn’t have any issues with it. Overall, it’s one of the best keyboards for Mac that we’ve tested.
Best Mechanical Keyboard For Mac: Keychron K10
If you prefer the feel of mechanical switches, the best keyboard for Mac that we’ve tested is the Keychron K10. Unlike many mechanical gaming keyboards, this one is specifically designed for office use, and it has a macOS mode that makes every key work as intended on a Mac.
It’s a full-size keyboard, but Keychron sells models available in several sizes, like the TKL Keychron K8, and they all have mostly the same features, so you can easily get the size you prefer. This keyboard is available with Gateron Red, Brown, and Blue switches, which all offer a different feel, and the Brown switches on our unit are light to press and are quiet. The Red switches are linear, which don’t offer tactile feedback but should feel lighter, and the Blue switches are similar to the Browns in feel but are louder.
Sadly, it doesn’t have dedicated software to customize the keys, but Keychron recommends using third-party software. Typing feels great as most keys are stable, but the ABS keycaps feel slippery, especially if they build up oil from your fingers. It would benefit from having a wrist rest because of the high profile, but Keychron sells them separately. All in all, it’s the best Mac mechanical keyboard that we’ve tested.
Best Compact Mechanical Keyboard For Mac: Obinslab Anne Pro 2
If you’re a fan of smaller form factors, the Obinslab Anne Pro 2 is the best Mac mechanical keyboard we’ve tested in a compact size. It’s a compact 60% gaming keyboard, which means it not only does away with the numpad and several function keys, but it also lacks dedicated arrow keys. Unlike some of the entries on this list, it isn’t fully compatible with macOS, but it’s only its context menu button that doesn’t work on Macs.
This keyboard is available in a wide variety of switch types, from Cherry MX, Gateron, and Kailh. We purchased our unit with Gateron Brown switches which feel light to type on and provide good tactile feedback without being too loud. The keyboard feels very well-built overall, and its design should blend smoothly into just about any work environment. It also has full RGB backlighting, and you can reprogram and set macros to any of its keys using the customization software that’s fully compatible with macOS.
Unfortunately, this keyboard has a high profile, and it doesn’t come with an included wrist rest. It also connects wirelessly via Bluetooth, and you can pair it with up to four devices, but it doesn’t have a USB receiver. Overall, this is a versatile wireless keyboard and an outstanding choice for anyone with limited desk space.




