How to make sweetcorn jelly
with Sharon Peterson
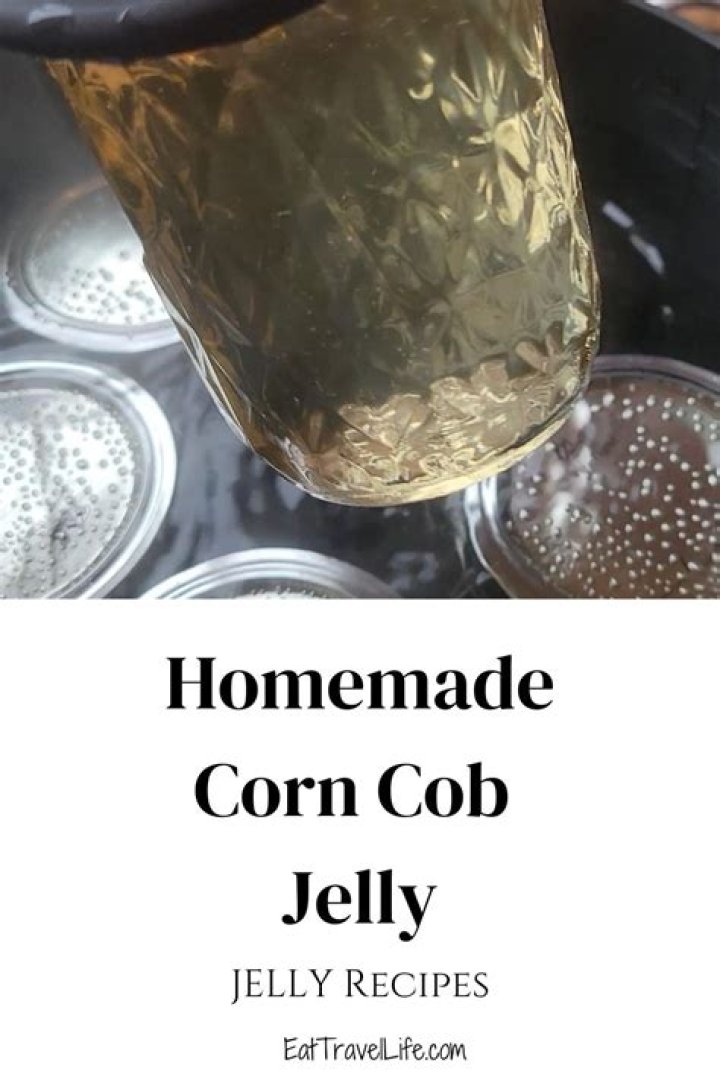
I decided to try something fun. Corn Cob Jelly, sounds weird but hey, if you add enough sugar even corn cobs can turn out tasty. :0)
We freeze corn every year. we have LOTS of cobs we throw away every year!
Prepare:
Gather your canning supplies
- 1 dozen corn cobs (Note: The original recipe from NCHFP says to use field corn, but I used sweet corn from our canning process.)
- Approximately 2 quarts water
- 1 3/4 ounces powdered pectin (1 package)
- 3 cups sugar
How to Make Corn Cob Jelly
Start by making a juice from your corn cobs. First blanch corn for 5 minutes. Then cut the kernels from the cobs. You can then use these kernels for canning, freezing or other recipes. The day I did this we had been freezing corn for the winter, and I just saved enough cobs to fill my stock pot.
Put 12 corncobs in about 2 quarts of water. Bring to a boil, and then boil for 35-40 minutes. Liquid will reduce. that’s ok.
I did this out in my carport with my volcano grill. You’ll need 3 cups of liquid for each batch of jelly you want to make.
I had plenty! You might want just enough for one batch or two. I ended up making two batches of jelly here. For each batch of jelly, use about 12 cobs and 2 quarts of water.
Strain your juice through double cheesecloth, then measure out 3 cups of juice.
It is difficult to make double batches of jelly so what I do is separate pots cooking at the same time.
Stir in pectin. Bring to a boil, then stir in the sugar. Boil 5 minutes, stirring constantly.
Fill your jars with hot jelly, leaving a 1/4-inch headspace.
Wipe the rims clean carefully. You don’t want the stickiness to interfere with the seal. Place your lids and the jars are ready to process in a waterbath canner. If you need more instruction on the canner process see this –> How to use a water bath canner.
Process your corn cob jelly; both 1/2 pints or pints need 10 minutes in a water bath canner. Be sure to adjust for your altitude!
Altitude Adjustments
Altitude Adjustments for Boiling Water Bath Canner
by Sarah Mock First published: August 15, 2019
Last Modified: March 11, 2020 I am an Amazon Associate I earn from the qualifying purchases.
Use your leftover corn cobs and make old school corn cob jelly. The sweet corn kissed jelly adds a layer of sweet corn flavor to your favorite biscuits, corn bread, pancakes or what ever you like! Just 3 ingredients and you have made a sweet treat to share with friends and family.
Don’t forget to learn how to freeze corn, or try your hand at another canning recipe: pectin free cherry jam. Another way to use produce to the fullest is to make your own tomato paste.
Corn Cob Jelly Ingredients
- corn cobs, corn removed
- water
- package powdered pectin
- sugar
What does Corn Cob Jelly taste like?
In my opinion corn cob jelly tastes like sweet corn sprinkled with sugar, in jelly form. Not buttery but a sweet jelly that tastes like it has been kissed by sweet corn.
Corn cob jelly is a perfect example of the “waste not, want not” spirit of our ancestors who knew how to use everything, and I mean everything. Most of us are accustomed to tossing corn cobs in the trash or the compost pile, but there are actually many, many ways to utilize them. Corn cob jelly is one of the tastiest. Here’s a short list of other ideas.
10 Ways to Use Corn Cobs:
1. Give it to the animals. Chickens and donkeys love to peck and chew every bit of sweetness out of a cob.
2. Make a corn cob doll.
3. Make a corn cob pipe. (If you’re handy and into that.)
4. Stick a nail or hook in one end of the cob. Slather cob with peanut butter and seeds–tie on a tree branch as a bird feeder.
5. Boil down for vegetable soup stock. (Similar to the method I outline below for making corn cob jelly–use the corn liquid as soup stock instead.)
6. Potpourri–slice cobs in thin pieces, dry, then sprinkle with scented oil. Makes a very pretty addition to a potpourri bowl!
7. Dry for firestarters.
8. In the old days, dried, they were used as pot scrubbers.
9. Poke a long nail in each end of a dried cob and use as a paint roller to make a neat pattern. (Also can use corn cobs held upright as a brush, or cut in half to use the even, cut edge to stamp patterns.)
10. Corn cob wine!
And so on. (Can you add to the list?) You should never throw a corn cob away again!
Back to corn cob jelly. In Kerrie’s post about dandelion jelly on Farm Bell Recipes the other day, corn cob jelly was mentioned in the comments. It’s still corn time, so I’ve been going through two to three dozen ears of corn a week putting up corn for the winter. I hadn’t thought about corn cob jelly! I got a hankering to try it right away.
Corn cob jelly is an old-fashioned idea and you can find recipes by the handfuls all over the internet. Even when printed at reputable websites, most of these recipes have not been updated to today’s food safety standards. Yes, we know our grandmas and great-grandmas ladled jelly into the jars and simply turned them upside down to seal them. Please don’t do that. We understand much more about food safety today. Preserving food in jars by either boiling water bath or steam pressure canning are the only two proven and recommended methods to destroy yeast, molds, bacteria, and enzymes and keep foods safe.
You can use any kind of corn in this recipe. Traditionally, (red) field corn was often used. The corn you plan to serve for supper will also make a delicious jelly, so use whatever you have on hand. Many recipes I saw recommend the addition of food coloring, either red or yellow, one to two drops. I have no idea why as the jelly turns out beautifully without it and it’s an unnecessary additive. I didn’t use food coloring–the lovely, clear, light amber of the jelly in my photos is the natural color.
After examining numerous corn cob jelly recipes, I created my own. This recipe sets up really well and tastes wonderful.
Don’t know how to can in a boiling water bath? See my tutorial here.
Printer-Friendly
How to make Corn Cob Jelly:
12 large ears of corn
2 quarts water
2 tablespoons lemon juice
1 package powdered pectin
sugar
Cook corn; cut kernels from cobs and store for another use. Measure 2 quarts water into a large pot; add corn cobs.
Bring to a boil; boil hard for 30 minutes. (If you had the pot covered when you brought it to a boil, take the lid off now. Boil it down uncovered for a more concentrated result.) Turn off heat and remove cobs. Strain corn liquid through cheesecloth or a fine mesh strainer–if desired. (I prefer to leave the corn bits in there! I didn’t strain it. Up to you!)
Measure remaining corn liquid. I get a little over 3 1/2 cups corn liquid after it boils down. Return liquid to the large pot. Stir in lemon juice and pectin. (Add a dab of butter to prevent foaming.) Bring to a boil. Add sugar cup per cup to match the measure of your corn liquid. Stir to dissolve sugar. Bring pot to a rolling boil. Boil hard one minute, stirring constantly. Remove from heat. Ladle hot corn cob jelly into hot jars. Adjust lids and bands. Process in a boiling water bath for 10 minutes.
Makes 5 half-pints.
What I read about this jelly, over and over, was that it tastes like honey. Well, here’s the crazy thing–IT DOES. It tastes just like honey. Odd. But delicious. I’m planning to make another batch soon, maybe a couple more batches. Think what a unique holiday gift it would be! Make lots!
See this recipe at Farm Bell Recipes and save it to your recipe box.
Posted by Suzanne McMinn on September 2, 2010
Published: Aug 10, 2014 В· Modified: Jul 22, 2020 by Nicole Cook В· This post may contain affiliate links В· This blog generates income via ads В· 64 Comments
Share this Recipe!
This delicious Corn Cob Jelly is light, sweet and incredibly delicate and delicious. It tastes a whole lot like honey on anything you spread it on.
Saving Summer is my the theme for today and it’s something that’s pretty near and dear to my heart.
My garden is constantly over flowing with fruits and veggies that I can’t use up fast enough.
Last year we had an over abundance of banana peppers and blueberries.
This year it has been strawberries, blueberries and corn. Yes, corn.
Welcome to my world. I live in Missouri and it’s pretty abundant here.
I actually remember the first time I told someone in Florida, that I actually grow corn in my garden.
She laughed and laughed. I guess that does seem kinda strange to someone from Florida but here it’s a household staple.
It’s everywhere. You don’t even have to go far from my house to find corn field after corn field.
No really. Less than 5 minutes.
Since I have such an abundance of corn this year, I thought it only fitting to make that the subject for today.
We made Corn Cob Jelly.
This delicious Corn Cob Jelly is light, sweet and tastes a whole lot like honey.
I got this recipe from my blogging friend Pam from Blueberries and Blessings (blog is gone now) and set about making it nearly immediately.
I cannot tell you how happy I am we tried it and we’ve made it a bunch since!
The first time we tried making Corn Cob Jelly, it never did firm up all the way.
At first, I was disappointed but then realized it had turned into a delicious, thick syrup for waffles and pancakes.
Okay, that works, I guess. But not what I wanted.
It was delicious, but it definitely lacked the jelly consistency that I was looking for.
At least I now know how to make Corn Cob Syrup and yes I have made a few batches.
Since what I wanted was Jelly, I was determined to get some Corn Cob Jelly this year.
So I tweaked the recipe, mixing it with a few others after doing some research.
It all related to the sugar amount.
The less sugar I used, the more syrupy my liquid would be, and no amount of letting it sit in the fridge or anywhere was changing that.
The balance seems to be the amount of cups of water should equal the amount of cups of sugar added.
That seems to work pretty well.
I seem to get about 3 1/2 cups of liquid after straining each time I make this, so that’s what I used in sugar.
This held true whether I used regular fruit pectin or it’s low sugar counterpart.
So use whichever you prefer.
While I certainly have an over abundance of corn growing, it isn’t generally ready all at the same time.
So, my other trick is to freeze the corn cobs after removing the kernels for other uses.
I might only pull 2 or 3 a day, so I pop them in a freezer bag after I’ve removed the kernels.
When I am ready to whip up a batch of Corn Cob Jelly, I just allow a little more time when I am boiling to let the flavor into the water.
I’ve had no problems doing this, so if you’re like me and don’t typically have 12 corn cobs all at the same time, freezing works.
Oh and one more fun little trick.
When I remove the corn cobs from the water, I allow them to dry out completely.
They make AWESOME fire starters for those fall campfires or fire pits.
Well, either that or you can share it with any small rodents you have living in your house.
The Corn Cob Jelly is excellent on:
- toast
- English muffins
- toast
- pancakes
- waffles
- pork chops
- steaks
- anywhere you would add jelly or even honey
Have you ever made or tried Corn Cob Jelly? You really must!
Besides this great Corn Cob Jelly, here are MORE ways to Save Summer!
Learn how to …
- Dry Fruit – No-Dehydrator-Needed from Take A Bite Out of Boca
- Freeze Cherries from Pies and Plots
- Freeze Herbs from Rhubarb and Honey
- Make Freezer Harvest Soup Kits from Cindy’s Recipes and Writings
- Make Pesto Cubes from The Not So Cheesy Kitchen
- Make and Freeze Rosemary Butter from Momma’s Meals
- Make Ready to Blend Smoothie Packs for Your Freezer from The Educators’ Spin On It
- Oven Dry Cherries from The Redhead Baker
Sip sunny cocktails and smoothies
Scoop up special salsas and sauces
- Classic Freezer Tomato Sauce from Noshing With The Nolands
- Peach Salsa from The Texan New Yorker
- Pico de Gallo from Bobbi’s Kozy Kitchen
- Spicy Apple – Carrot Chutney from What Smells So Good?
- Spring Conserve from Hezzi-D’s Books and Cooks
Jump into jellies, jams and preserves
- Apricot Habanero Jam from Food Lust People Love
- Corn Cob Jelly from Daily Dish Recipes
- Hot Pepper Jelly from A Kitchen Hoor’s Adventures
- No Pectin Apricot Jam from Curious Cuisiniere
- Peach Preserves from Delaware Girl Eats
- Pineapple Mango Moscato Jam from Seduction in the Kitchen
- Raw Raspberry-Vanilla Chia Jam from Shockingly Delicious
- Savory Fig and Sweet Onion Freezer Jam from Peaceful Cooking
- Spicy Ginger Tomato Jam with Coconut Sugar from Sue’s Nutrition Buzz
- Spicy Red Pepper Jam from The Wimpy Vegetarian
Pucker up for pickles
- Bread and Butter Pickles from That Skinny Chick Can Bake
- Pickled Beets and Onions from Kudos Kitchen by RenГ©e
- Pickled Cherries from Jane’s Adventures in Dinner
- Pickled Green Tomatoes from Culinary Adventures with Camilla
- Refrigerator Pickled JalapeГ±os with Herbs from Magnolia Days
- Refrigerator Pickled Radish and Turnips from The Girl In The Little Red Kitchen
- Refrigerator Pickles from Webicurean
- Sweet Pickled Cauliflower from Because I Like Chocolate
Slurp and spoon soup and a side dish
This Sweet Corn Pudding with Bird’s Custard Powder is an old time Malaysian favorite. Delicious served as a light dessert or a tea time treat.
Sweet Corn Pudding was one of my favorite childhood desserts. This simple dessert can be prepared in minutes with only five ingredients, most of which are pantry staples. Over here, most people use canned coconut milk. This is very convenient and it is always good to have a couple of cans in the pantry. In Malaysia, coconut milk was always and still is hand squeezed at home from freshly grated coconut. The Veggie Man who came door-to-door in his van always had a supply of grated coconut. Yes, it was most convenient and stay-at-home moms seldom had to leave the house. Even groceries were delivered to the door, usually on a motor bike at no extra charge. However, with the advent of supermarket chains, this personal service is not common place these days but I digress…
Back in Malaysia, we had a lot of goodies from the United Kingdom. I grew up with Smarties, Rowntrees fruit pastilles, Marmite, Garibaldi biscuits, and Jacob’s cream crackers to name a few. In the kitchen, Mom used Bird’s custard powder to make sweet corn pudding. During my trip to the UK last summer, I promised myself that I was going to get me some of that custard powder among other things.
I made this dessert once before in March last year but used Jell-O Cook & Serve custard. It was a little firmer and more jelly-like with a smoother surface. Turned out better than I expected. To go to the post, please click on the picture.
Since Mom does not make this anymore and she never uses any precise measurements in her cooking anyway, I had to “figure” it out for myself. As this was my first try, it came out a little soft but I was still able to mold it. Unmolding the pudding was a little challenging though. I had to place them in the freezer to harden a little before unmolding. It would have been much easier to pour the pudding into a rectangular dish and then cut into pieces after it has set in the refrigerator. That was how Mom did it.
The good thing about using Bird’s custard powder is that you can determine how sweet you like this dessert to be. I only used 3 tablespoons of sugar and it was sweet enough for me. Please adjust according to your taste. I have also adjusted the agar-agar powder to 1 tablespoon instead of 2 teaspoon. To further thicken the mixture, please cook it for approximately 10 minutes. If you are planning to use molds, do coat them lightly with some vegetable oil.
recipes & cooking tips by cookbook author Rachel Rappaport
Ingredients:
6 raw sweet corn cobs*
1 bay leaf
1 6-oz package liquid pectin (both little pouches)
3 cups sugar
Place the corn cobs and bay leaf in a heavy bottomed 6 quart Dutch oven. Fill with water. Bring to a boil. Continue to boil for 30 minutes. Strain into a large measuring cup. It should measure about 4 cups. Pour the liquid back into the Dutch oven. Add the sugar and pectin and bring to a rolling boil. Boil until it “sets” into a jelly-like texture, just a few minutes. Ladle into jars, leaving a 1/4 inch headspace and process 15 minutes using the hot water method.
Yield: 6 8-oz jars
*I used cobs leftover from making things like this. Not cobs I had eaten off of or were previously boiled/grilled. Because I am not an expert corn cutter-offer, there was some corn left on the cobs (mostly half kernels) which added flavor.
Note: A great source for canning information is the Blue Book guide to preserving. I highly recommend it for learning how to can. Here is a bunch of other canning books and equipment I find useful.
My thoughts:
Until I went to Nashville in May, I had only heard of corn cob jelly. Then I was served it with some fried green tomatoes and it was so good, I had to make it myself. I mostly came across recipes using seed corn but the jelly I had was definitely made with sweet corn so I came up with this recipe. I added the bay leaf to enhance the light corn flavor and I am glad I did. It cut the sweetness a bit and added even more of an herbal note.
PS: Today is National Can-it-Forward Day! The perfect day to can with friends.
- Total: 45 mins
- Prep: 45 mins
- Cook: 0 mins
- Yield: 6 servings
| Nutritional Guidelines (per serving) | |
|---|---|
| 157 | Calories |
| 0g | Fat |
| 39g | Carbs |
| 2g | Protein |
×
| Nutrition Facts | |
|---|---|
| Servings: 6 servings | |
| Amount per serving | |
| Calories | 157 |
| % Daily Value* | |
| Total Fat 0g | 0% |
| Saturated Fat 0g | 0% |
| Cholesterol 0mg | 0% |
| Sodium 5mg | 0% |
| Total Carbohydrate 39g | 14% |
| Dietary Fiber 2g | 5% |
| Protein 2g | |
| Calcium 22mg | 2% |
| *The % Daily Value (DV) tells you how much a nutrient in a food serving contributes to a daily diet. 2,000 calories a day is used for general nutrition advice. | |
This recipe for British strawberry jelly is not for a jam or fruit spread as the term “jelly” is known in the States. This is for a fruit-flavored gelatin (Jello) dessert.
Strawberry jelly is the stuff of childhood dreams. Sunday afternoon tea is never right without one, and as the base of a trifle, it is a classic.
In the U.K., jelly is often made using a shop-bought jelly block which is a concentrated, flavored gelatin block that requires only boiling water to make it.
Then there is authentic jelly, made with fruit, sugar, and gelatin as in this authentic recipe.
Jelly can be served simply on its own as it is so tasty, but jelly is fabulous with some whipped cream or ice cream and even custard, which together is a classic of the tea-time table.
Ingredients
- 1 cup/200 g superfine sugar
- 2 cups/600 ml water
- 1 pound/500 g fresh strawberries (gently washed and hulls removed)
- 1/4 cup/75 ml cold water
- 1/4 ounce/11 g powdered unflavored gelatin
Steps to Make It
Place the sugar and 2 cups/600 ml water in a large saucepan and bring to a boil. Boil vigorously for 5 minutes and then remove the pan from the heat and let cool.
Meanwhile, take 4 or 5 of the fresh strawberries, leave them whole, and set to one side.
Purée the remaining strawberries with an immersion blender or in a conventional blender or food processor.
Transfer the purée to a large bowl and pour over the cooled sugar-water syrup. Cover with a clean cloth and let infuse for a minimum of 30 minutes or, if you have the time, up to 2 hours.
Once infused, pass the strawberry mixture through a fine sieve to remove any of the strawberry pulp and seeds. Set aside.
Place 1/4 cup/75 ml cold water into a small dish and sprinkle the powdered gelatin into the water and leave untouched for 5 minutes.
Heat 1 cup of the strained strawberry-sugar syrup mixture in a small saucepan. Stir in the gelatin-water mixture and simmer very gently (do not allow to boil) until the gelatin has completely dissolved. Stir this into the remaining strawberry-sugar syrup.
Transfer to a 3-cup/900-ml gelatin mold and place into the refrigerator and let set. This will take a couple of hours but it is best to leave it overnight. The jelly is ready when it wobbles just slightly. You don’t want it to be too hard because the fun of the jelly is in the wobble.
To serve, decorate the jelly with the remaining whole strawberries and serve with fresh cream, ice cream, or custard. You also garnish with other seasonal fruits—raspberries make a great partner to this strawberry jelly.
less than 30 mins
less than 10 mins
Nothing in the fridge? Keep a can of sweetcorn and a can of new potatoes to hand and you’re 10 minutes away from this comforting soup.
Each serving provides 282 kcal, 7g protein, 40g carbohydrates (of which 15g sugars), 9g fat (of which 1g saturates), 7g fibre and 2.7g salt.
less than 30 mins
less than 10 mins
Ingredients
- 1 tbsp olive oil
- 1 onion, finely chopped
- 418g can creamed-style sweetcorn
- 300g can new potatoes, drained and diced
- 1 chicken or vegetable stock cube
- good pinch crushed chilli flakes
- freshly ground black pepper
Method
Heat the oil in a large saucepan and gently fry the onion for 5 minutes, or until softened and lightly browned, stirring regularly.
Add the sweetcorn, potatoes, stock cube and 300ml/10fl oz of water. Sprinkle over the chilli, stir well and bring to a simmer.
Cook for 5 minutes, stirring occasionally. Season with lots of pepper and serve.
Recipe Tips
You can make a crab and sweetcorn chowder by stirring a drained 165g can of crabmeat into the soup at the same time as the sweetcorn.
Pronounce it: sw-eet corn
Also known as corn on the cob, sweetcorn is composed of rows of tightly packed golden yellow kernels, growing along a tough central core. When ripe, the kernels are sweet and juicy, and are best cooked simply, with a little butter. Like peas, the natural sugars in the kernels turn to starch quite quickly, which makes the kernels tougher and less sweet, so it should be eaten as fresh as possible.
Availability
In season mid August to mid September.
Choose the best
Sweetcorn still in its husk keeps fresher for longer. Look for kernels that are tightly packed, plump, shiny and golden yellow, and smaller at the tip than they are in the middle (this indicates a young cob). The husks should be green, unblemished and fit snugly. When sweetcorn is really fresh, the kernels will release a milky liquid when cut. Frozen sweetcorn is a good option when sweetcorn’s out of season.
You can also buy baby sweetcorn. It is sweet but quite bland, and eaten mainly for its crisp texture.
Prepare it
Pull back the outer leaves of the cob to expose the kernels (you can either leave this husk still attached or cut it off, according to how you plan to cook it). Strip off any of the silky threads still clinging to the cob. Cut off the ends of the cob, then wash.
You can either serve the cob whole, or in chunks, but if you’re doing the latter, it’s best to slice them up after they’re cooked, as the central core will be less tough.
If you want to cook the kernels loose, rather than on the cob, strip back the leaves and threads as above, stand the cob stalk-end down on a chopping board, then carefully sweep a sharp knife down its length, slicing off the kernels as you go. Try to keep the blade as close to the core as you can, so that the kernels stay whole.
Store it
Sweetcorn keeps best in the fridge, wrapped in damp kitchen paper and with the husks removed. Eat within a day or two.
Cook it
Roast or barbecue the cobs (husks off, in foil 8-15 mins; husks on, no foil 8-15 mins; husks off, no foil 5-7 mins). Always turn the cobs when cooking. Boil the cobs (3-6 mins – don’t use any salt as it will toughen them up). Boil the loose kernels (2-3 mins). Stir-fry baby sweetcorn (1-2 mins).
- How to make raspberry jelly
- How to make jelly from the berries
- How to make graviola jelly
- How to cook a delicious jelly
Ingredients:
- 400 g of pure water;
- fresh raspberries – 150-200 g;
- 1 tbsp granulated sugar;
- gelatin – 1 packet.
Preparation:
- Pour the gelatin in a not very big container and fill it with warm or cold boiled water. Liquid should not be too much. The mixture is left to swell, about 40 minutes.
- Thoroughly rinse and sort berries, removing all debris and rotten fruit. After you are done with the preparation of raspberry, it is necessary in a saucepan pour water and put it on the fire.
- As soon as the liquid boils, it is necessary to pour the sugar and carefully mix everything. Then go and raspberries. The water should boil on low heat for at least 10-15 minutes.
- Then you need to be careful not to burn yourself, drain the broth is still hot. Then takes a swollen gelatin and gradually intervenes in the resulting broth.
- The resulting mass is thoroughly mixed, and the consistency is homogeneous, we can proceed to the final stage of preparation.
- To take the prepared molds and pour them in the broth mixed with jelly. Then for 60-120 minutes in a cool, clean place for this purpose great refrigerator.
- After the jelly hardens, you gently pull out of the molds, shifting on the plate. As a decoration you can use fresh berries of raspberry and mint leaves.
Jelly can be prepared not only from fresh berries and also raspberry jam, frozen berries and even juice. To improve the taste, jelly in he often adds lemon or orange zest, drinks such as wines and liqueurs.
Small but mighty meatballs hit the triple play of ease, versatility, and economy — all topped off with awesome sauce. Learn how to make tender, delicious meatballs for appetizers, sandwiches, and dinners. And get tips for how to freeze meatballs so they’re ready to use any time.
Here’s why meatballs should be in every cook’s arsenal:
- Meatballs are easy to make. Making meatballs doesn’t require complicated kitchen skills —you just mix together and cook. Also, you can double up a recipe and freeze half to bank for speedy meals later. (See Freezing Meatballs below.)
- Meatballs are versatile. Just about every global cuisine includes some kind of meatball. That’s a world of flavor to explore.
- Meatballs are economical. You don’t have to spend big bucks on prime cuts of meat to make meatballs. (You can even make meatless meatballs.) And with all the add-ins and binders that go into the making of a proper meatball, you can make a little meat go a long way.
Three Pillars of Meatball Making
What are the ingredients to make meatballs? The sky is the limit, but all meatballs contain some combination of these three essential building blocks:
- Protein Ground or finely minced beef, pork, veal, chicken, turkey, bison, sausage, seafood, or meat substitute. Lots of cooks swear by combining two or more kinds of meat to make a meatball with more complex flavors.
- Seasonings and Optional Add-ins Salt and pepper, plus fresh or dried herbs and spices to complement the flavor profile of the recipe. Meatballs mixtures can also include finely minced onions, garlic, or other vegetables, and finely grated cheese.
- Binder This is what holds the meat, seasonings, and add-ins together into a ball, and keeps it from crumbling when it cooks. Depending on the recipe, you might use moistened bread or breadcrumbs, panko, finely crushed crackers, rice, and/or eggs.
Top Tips for Making Meatballs
Here’s how to make sure your meatballs turn out just right every time.
- The leaner the meat, the less tender the meatball, so if you’re using lean meat, add a little olive oil.
- Do not overwork the meat mixture or your meatballs might toughed up when they cook.
- Use a spoon or scoop to make evenly sized meatballs, and roll lightly into smooth balls.
- Dampen your hands to make rolling easier. Use a light touch to avoid pressing and compacting the meatballs.
- Make small meatballs for appetizers or soups; make large for spaghetti and meatballs or meatball sandwiches.
Turns out, you don’t need meat to make meatballs. These meat-free meatballs get it done through the magic of mushrooms. The key is to chop the mushrooms into mince and brown them well; this process will develop delicious, surprisingly meaty flavors. “What really blows me away is how close the texture of these vegetarian meatballs is to actual meatballs,” says Chef John. They are officially approved for use on spaghetti!”
Here’s how to make gluten-free meatballs. The trick is to bind the ingredients using gluten-free bread crumbs. Or try a lighter take on gluten-free meatballs with Gluten-Free Turkey Meatballs. To make meatballs without eggs or breadcrumbs, check out Paleo Sausage Meatballs.
These meatballs are like the ones you love at that big store with the Scandinavian name — you know the one. They’re made with ground beef and pork, spiced with nutmeg and allspice, and cooked in butter instead of vegetable oil. Then you’ll bake them in a baking dish with a little chicken broth and serve in a brown gravy finished with sour cream. Explore our collection of Swedish meatball recipes.
Cocktail meatballs are the ultimate party appetizer. Tangy, sweet, and spicy, these meatballs are easy to prepare. You’ll bake them briefly, and then combine them with a few simple ingredients in a skillet or slow cooker and slowly simmer. At party time, use the slow cooker to keep them warm. Check out more appetizer meatball recipes.
Freezing Meatballs
Cooked and frozen meatballs put all kinds of meals on the fast track to dinner. Here’s how to easily freeze and thaw meatballs so you can stock up for busy nights.
- Form and cook meatballs using any of the methods above.
- Place meatballs in a single layer on a baking tray.
- Freeze until solid, and transfer to a freezer-safe container or freezer bag.
- Mark with the date. Meatballs can be frozen for up to 4 months.
When it comes time to thaw your meatballs, choose one of these methods for best results:
- Let the meatballs thaw overnight in the fridge, then use them in your recipe.
- Place on a baking sheet in a single layer, cover with foil, and bake at 350° for 10 to 12 minutes, stirring occasionally.
- Simmer in sauce or soup for at least 20 minutes.
- Place in a microwave-safe dish in a single layer with a spoonful of water. Cover loosely and heat on HIGH for 1 minute at a time until heated through.
Related
Check out our collection of Meatball Recipes.
Without a doubt, there’s something joyful about simple foods. And that’s where these sweetcorn fritters really shine.
They’re tasty and uncomplicated, and can virtually always be made with foods leftover in the cupboard.
Eaten with a side or as a stand-alone meal, these corn fritters are an easy recipe that’s just great to have under the belt.
If you’ve run out of ideas or simply need something quick and nutritious for the family, then they’re awesome as a go-to.
We’ve learnt over the years in that order to improve your food life you need several things.
Spice up your kitchen life with sweetcorn fritters
The most helpful things, in no particular order are:
- A rough meal plan for the week (and shopping list where appropriate)
- Some kitchen basics and essentials
- A pantry with a good stock of herbs, spices and long-lasting foods to be called upon when needed
- A collection of simple, yet effective go-to recipes (like these sweetcorn fritters)
We have all of these on the site. Clicking any of the links above will take you to the relevant page.
Madcap experiments
These delicious fritters have led to more experimentation than usual. Often when we make a new recipe, it’s handed to us finished by Heiko, Jansen or Kat.
In this particular case, it was given to us by Heiko (thanks Heiko!) and straight away I was hooked.
I can’t tell you how many times I’ve tried and tested this recipe now. But I can tell you my findings.
For full disclosure, I just took a break from writing this to make them again.
- In blind taste-testing, being cooked in butter instead of olive oil didn’t produce any discernible improvement to taste. We’ll stick with olive oil for the health benefits.
- Less flour and the fritter won’t hold together. Don’t skimp on the flour.
- Making these corn fritters vegan isn’t just possible, it’s delicious! The egg is needed for binding the fritters together – and a ‘flax egg’ works too. To make a ‘flax egg’ add 1 tbsp ground flaxseeds to 3 tbsp hot water, stir, and let thicken). Add it to the recipe in place of the egg.
- Serve the fritters with a little extra salt on top. It really brings out the taste.
- A lot of different sides fit sweetcorn fritters – potatoes or rice are a great choice. The fritters are also delicious on their own, or with a little sour creme.
That’s it for this week, but if you’re looking for more cooking inspiration then you’re in the right place.
Our new ebook, Breakfast in Six has just been released! Just as it sounds – Breakfast in Six makes mornings better with all recipes using just six or less tasty yet effective ingredients.
The recipes are all exclusive to the book too – they will not appear on the site. Don’t miss these morning saviours and order today (with -33% off release price!).
Переводы пользователей
Добавлены профессиональными переводчиками и компаниями и на основе веб-страниц и открытых баз переводов.
Английский
Африкаанс
Информация
Английский
how to make jelly in afrikaans
Африкаанс
hoe om jellie in Afrikaans te maak
Последнее обновление: 2017-03-13
Частота использования: 2
Качество:
Источник: Анонимно
Английский
how to make tea in afrikaans
Африкаанс
hoe om tee in Afrikaans te maak
Последнее обновление: 2016-08-23
Частота использования: 2
Качество:
Источник: Анонимно
Английский
how to make jelly
Африкаанс
stappe om jellie te maak
Последнее обновление: 2019-10-24
Частота использования: 1
Качество:
Источник: Анонимно
Английский
How to make jelly
Африкаанс
hoe jellie te maak
Последнее обновление: 2014-10-21
Частота использования: 1
Качество:
Источник: Анонимно
Английский
how to make jelly
Африкаанс
hoe om jelly te maak
Последнее обновление: 2015-09-07
Частота использования: 1
Качество:
Источник: Анонимно
Английский
how to make coffee in afrikaans
Африкаанс
hoe om koffie te maak in Afrikaans
Последнее обновление: 2019-10-12
Частота использования: 1
Качество:
Источник: Анонимно
Английский
steps for how to make tea in afrikaans
Африкаанс
stappe vir die maak van tee in Afrikaans
Последнее обновление: 2020-07-22
Частота использования: 2
Качество:
Источник: Анонимно
Английский
How to bath a dog in afrikaans
Африкаанс
Последнее обновление: 2019-08-29
Частота использования: 1
Качество:
Источник: Анонимно
Английский
how to make a cheese sandwich in afrikaans
Африкаанс
hoe om ‘n kaas toebroodjie in Afrikaans te maak
Последнее обновление: 2018-08-29
Частота использования: 1
Качество:
Источник: Анонимно
Английский
Steps to make tea in Afrikaans
Африкаанс
hoe om tee in Afrikaans te maak
Последнее обновление: 2017-05-23
Частота использования: 2
Качество:
Источник: Анонимно
Английский
step on how to make a tuna sandwich in afrikaans
Африкаанс
stap in Afrikaans hoe om ‘n tuna-toebroodjie te maak
Последнее обновление: 2020-02-18
Частота использования: 1
Качество:
Источник: Анонимно
Английский
how to make steps to make coffee in afrikaans
Африкаанс
hoe om stappe te doen om koffie in Afrikaans te maak
Последнее обновление: 2019-10-13
Частота использования: 1
Качество:
Источник: Анонимно
Английский
how to save our environment in Afrikaans
Африкаанс
how to save our environment in afrikaans
Последнее обновление: 2016-02-23
Частота использования: 2
Качество:
Источник: Анонимно
Английский
steps to make jelly
Африкаанс
stappe om jellie te maak
Последнее обновление: 2020-07-01
Частота использования: 2
Качество:
Источник: Анонимно
Английский
step on how to make a jelly sandwich
Африкаанс
stap oor hoe om ‘n jellie toebroodjie te maak
Последнее обновление: 2020-05-07
Частота использования: 1
Качество:
Источник: Анонимно
Английский
how to make a sandwich english afrikaans
Африкаанс
how to make a sandwich english afrikaans
Последнее обновление: 2020-05-11
Частота использования: 2
Качество:
Источник: Анонимно
Английский
How to make tea in English
Африкаанс
Hoe om tee te maak in Afrikaans
Последнее обновление: 2019-08-12
Частота использования: 1
Качество:
Источник: Анонимно
Английский
hno3 in afrikaans
Африкаанс
Последнее обновление: 2019-01-22
Частота использования: 1
Качество:
Источник: Анонимно
Английский
rsvp in afrikaans
Африкаанс
rsvp in Afrikaans
Последнее обновление: 2017-03-26
Частота использования: 2
Качество:
Источник: Анонимно
Английский
tab in Afrikaans
Африкаанс
flappie in afrikaans
Последнее обновление: 2020-08-01
Частота использования: 2
Качество:
Источник: Анонимно
Получите качественный перевод благодаря усилиям
4,401,923,520 пользователей
Сейчас пользователи ищут:
MyMemory — крупнейшая в мире память переводов. Она была создана на основе систем памяти переводов Европейского Союза, Организации Объединенных Наций и ведущих специализированных многоязычных сайтов из разных отраслей.
Мы относимся к Translated, так что, если вам нужны услуги профессионального перевода, посетите наш основной сайт.
Well jel: blood orange jelly. Photography: Jill Mead for the Guardian
Well jel: blood orange jelly. Photography: Jill Mead for the Guardian
S erving jelly used to be a form of boasting. It was so incredibly difficult to do. You had to use starch made out of dried ground orchid root, or boil up fruit to get at the pectin, or get the jelly out of the swim bladder of a sturgeon or the grated shavings of a baby deer’s velvet-soft antlers. Putting a jelly on the table was a way of letting the world know that you had troops of servants doing complicated things below stairs. It was all quite a faff.
These days, making jelly couldn’t be easier. You buy a crisp, clear leaf of gelatine from the supermarket, soak it in warm water, mix it with juice and set it in the fridge. Yet it still has the feeling of magic, or alchemy – pig’s trotter turned into juddering, shimmering gold.
When I was a child, my mum always made jellies for special occasions, such as birthdays or dinner parties. Perfect happiness was the “schhhhop” of suction as the first spoonful was served up, the pouring of single cream over the bowl, the joyful sluicing of jelly back and forth between one’s front teeth.
If you are making today’s recipe with children, they will enjoy the trick of suspending some fruit between the layers. If you are making it for grown-ups, try a more sophisticated unlayered jelly: simply add 1 tbsp Grand Marnier to the mix.
Either way, you must serve it with pouring cream (single, double, or whipping). Some things are too good to be left for the children.
Blood orange jelly
Skill level: basic
Prep time: 20 minutes
Chill time: 1 hour
Cook – cooking club Photograph: Jill Mead for the Guardian
Serves 3
300ml blood orange juice
25g caster sugar (1 tbsp)
3 sheets leaf gelatine
3 oranges
1 Gently heat the orange juice with the sugar in a pan until the sugar dissolves (but do not boil, as the gelatine will be less effective).
2 Soak all the gelatine leaves in a bowlful of cold water for about 5 minutes, or until they are soft and pliable. Remove from the soaking water and squeeze out any excess water with your hands. Stir into the warm blood orange juice.
3 Pour the blood orange juice through a sieve into a jug and tip half of it into a glass bowl. Place into the fridge to just set. This can take up to an hour depending on the temperature of your fridge.
4 While your jelly is setting, prepare your blood oranges by either segmenting them or cutting them across into pin wheels. Whatever method you use, the orange has to have its outer skin and pith removed. This can be done easily by cutting across the top and bottom of the orange, and cutting away the skin and pith by using downward strokes. (Any other fruit pieces could be used.)
5 Remove the bowl from the fridge and arrange the orange pieces on top of the set jelly before topping up with the rest of the blood orange juice. Return to the fridge to set.
6 You can serve up the jelly straight from the bowl and it will be utterly delicious. Don’t forget the cream.
The next level
If you want to turn out the jelly for a bit of glorious wobbliness, use a jelly mould instead of a glass bowl in step 3. To turn it out, sit your bowl into another bowl or container filled with warm water to warm through the mould. Turn your bowl on to a serving plate and the jelly should drop onto it. If you have a stubborn jelly, just repeat the process.
For showing off
To make a layered jelly, as Joyce Molyneux did at the Carved Angel, do a layer using the ingredients above. Put in the fridge and when set, repeat the initial method, but this time use normal orange juice and blood orange pieces. You can layer this on top of your original blood orange one and add some chopped mint for extra flavour.
What else can you do?
You can repeat this method with other types of fruit juice and fruit pieces to make all kinds of jelly. Just repeat the quantities of juice and gelatin above, and add in raspberries, melon chunks or pomegranate seeds.
Recipe by Jane Baxter. Henry Dimbleby is co-founder of the natural fast-food restaurant chain Leon. (@henry_leon) Get your children cooking at cook5.
This moist and fluffy sweet cornbread is one of my favorites to make during the fall. It pairs perfectly with a hot bowl of chili. This is the best cornbread recipe!
Nothing beats homemade bread. This sweet cornbread is one of my favorites to bake, as well as homemade french bread, white or whole wheat bread and lion house rolls.
Homemade cornbread
Have I mentioned how much I love October? As busy as this month always seems to get, this is my favorite time of year (besides Christmas). One my my favorite meals to make this time of year is a big pot of chili with moist cornbread. It’s so comforting on a chilly day and something I know my whole family will enjoy.
This homemade cornbread is more on the sweet side, but not overly sweet like cake. It still pairs perfectly with all your favorite savory soups. Nothing better than gathering with friends and family to enjoy the meal too!
Easy cornbread recipe ingredients
If you’re looking for an easy cornbread recipe to make this fall, definitely give this one a try. This recipe takes no time to make, is so soft and fluffy and has the perfect flavor. It uses all your basic ingredients such as:
- milk
- honey
- eggs
- flour
- yellow cornmeal
- sugar
- baking powder
- kosher salt
- butter
How to make cornbread
This sweet cornbread comes together easily in one bowl and can be made in a 9×9″ pan for thicker cornbread or a muffin pan for individual servings. Scroll down for the printable sweet cornbread recipe.
- Preheat oven. Preheat oven to 350°F and then butter a 9×9″ pan and set aside.
- Whisk wet ingredients. Pour 3/4 cup milk into measuring cup and then whisk in honey and eggs.
- Stir dry ingredients & combine wet and dry mixtures. In a large bowl, mix together the flour, cornmeal, sugar, baking powder and salt. Add in the milk mixture and stir just until combined. Then stir in the melted butter. Be careful not to over mix.
- Bake. Pour cornbread mixture into prepared pan and bake for 30 minutes, or until a toothpick comes clean from the center. Remove from oven and allow to cool slightly before serving. Sweet cornbread is best served warm with a little butter and honey (if desired) on top.
How to make sweet cornbread muffins
You can easily turn this cornbread recipe into sweet cornbread muffins. Just make the cornbread batter the exact same way, however pour into a 12-cup muffin tin instead of a baking pan (each cup should be about 3/4 full). Bake at 350°F for 17-20 minutes, or until muffin tops are nice and golden and a toothpick comes out clean.
Can cornbread be left out over night?
Yes, this cornbread can be stored at room temperature for about 1 to 2 days. Just make sure to wrap in foil and store in a zip top bag (this keeps it nice and moist). If you want to extend the shelf life of your cornbread, it will keep in the fridge for about 2-3 days or in the freezer for a few months.
Can cornbread be frozen?
Yes! This sweet cornbread recipe freezes really well. Make sure the cornbread has cooled, then either wrap in aluminum foil or place in a freezer bag. Add a freezer label so you easily know the expiration. Then store in the freezer (will last for a couple of months).
To thaw, place cornbread in the refrigerator overnight or thaw at room temperature until soft and fluffy (no longer frozen). To reheat, re-wrap in aluminium foil and place in oven at 350° until warmed throughout.
What goes with cornbread?
Butter & Spreads: We love to serve this sweet cornbread while it’s still warm with a slab of butter and a little bit of honey drizzled over the top. It adds the perfect flavor and added sweetness! We also like to top with strawberry jam or apple butter.
Soups: This cornbread recipe is seriously perfect to serve with all types of soups. We love to pair it with chili, taco soup, chicken pot pie soup and hearty vegetable soup.
Casseroles: You can’t go wrong serving cornbread alongside delicious casseroles. We especially love to make it when baking chicken broccoli rice casserole.
Meats: We love to make this sweet cornbread recipe when making hearty recipes with chicken, beef or pork. Some of our favorites are one pan chicken with apples, dijon chicken and potatoes, slow cooker beef bourguignon and pork tenderloin.
At our house, sweet corn is a summer staple and after years of experimenting, I’ve found cooking corn right in their husks on a hot grill is the easiest and quickest way to cook the best corn on the cob.
One of the reasons I crave summer is ’tis the season for fresh, sweet corn and surprisingly, my husband’s obsession with the husked and cobbed sphere is even greater than my own.
We grill just about anything and everything we can get our hands on during the summertime, and fresh corn is one of our favorites. While I’ll eat it just about any way — stripped right off the cob and raw, tossed in potluck quinoa salads, or turned into slow cooker creamed corn perfect for every eating occasion, grilled sweet corn on the cob with creamy butter takes the cake.
Grilled corn a delicious way to spruce up fresh salads, tacos and salsas, macaroni and cheese, and it makes an irresistible and easy side to your backyard BBQ. I love the subtle smokiness and the beautiful char marks grilling imparts on the corn and it is SO MUCH EASIER than boiling corn on the cob, especially when you’re cooking for a crowd.
Some people may be a tad intimidated by grilling corn, but I’m here to tell you that it’s a breeze. We’ve found there’s no need to soak the corn before grilling and you can grill them right in their husks, creating built-in steam oven jackets.
Follow the easy steps below and you’ll soon discover grilled corn bliss.
How to Pick the Best Sweet Corn
The key to really fantastic grilled sweet corn…is really fantastic sweet corn. If you try to grill older pieces of sweet corn that have started to dry up a bit, your grilled corn won’t taste good.
The key to picking the best sweet corn is to look for ears of corn with golden silk — if the silk has spots of black in it, the corn’s on its way out. The corn should also smell fairly sweet and should be firm, not mushy, when pressed with your thumb.
Should I Grill Corn in the Husk?
Some recipes call for removing the husks entirely, but I suggest you resist the urge. To me, the best way to grill corn is in the husk. There’s no need to remove the silks before grilling, simply pull them back with the corn husks afterward. The husks act as a natural protective barrier between the corn and the grill, keeping the kernels tender and juicy.
Plus, the corn soaks up that wonderful smokiness from the charred husks, giving it more flavor. Not to mention there’s less prep work to deal with if you skip husking the corn right away. Win-win-win.
How to Grill Corn Perfectly Every Time
To grill the corn on a backyard BBQ, simply place the corn cob husks directly on hot grill grates—about 450°F to 500°F. Keep the corn in its husks to steam, close the grill cover, and turn the cobs with tongs every five minutes or so.
When the grilled sweet corn is finished cooking, the husks should have a good char but they shouldn’t be totally black.
After grilling, peel back the husks, remove the silk, and enjoy with basic butter and season with salt, or go a bit more gourmet with one of my favorite infused compound butters.
How Long to Grill Corn
Cooking corn on the grill takes about 15 to 20 minutes total. Remember to regularly turn the corn so it doesn’t become too dark on one side. In addition to your timer and the look of your grill marks, use your nose as your guide. When you can smell that delicious cooked corn aroma, it’s likely the corn is done cooking.
If you like a more charred flavor, toss the husked corn cobs back on the grill to add more color.
Tips for the Best Grilled Corn on the Cob
- Keep it fresh. Always start with the freshest corn you can find to have the sweetest, plumpest cooked cobs.
- No soak, no problem. Some people soak their corn husks in cold water, prior to grilling (the theory is that this will provide the corn with more moisture.) However, after trying it several times, I find this step to be unnecessary since I’ve never been able to tell a difference.
- Watch your cooking time. When corn is overcooked it can become chewy because the longer heat breaks down the corn’s cell walls and the sugars take over, leading the kernels to lose their crunch.
- No grill? No sweat. You can still achieve a nice charred flavor by using a cast iron grill pan or skillet. For this method, you will need to husk your corn. Put a little oil or butter in a skillet and get it hot. Place your corn in the skillet and turn every few minutes, getting a nice sear on all sides.
More Sweet Corn Recipes to Make
If you make this recipe, please let me know! Leave a rating on this recipe below and leave a comment, take a photo and tag me on Instagram with #foodiecrusheats.
Take advantage of the abundance of fresh sweet corn that comes with summer and save it for the rest of the year. When you know how to make canned corn, you can savor those fresh-from-the-field flavors for months to come.
Cross corn off your grocery list. Once you know how to make canned corn at home, you won’t need store-bought. Even if you’re new to canning, you can make it super simple to use your pressure canner to preserve fresh corn using our step-by-step guide on how to can sweet corn. You won’t find instructions for how to can corn in a water bath (aka boiling-water canner). Since corn is a low-acid food, it has to be processed in a pressure canner to eliminate any harmful bacteria. But if you have a pressure canner and a few canning jars in your cupboard, you can save any extra ears of sweet corn that summer has to offer.
Prep the Corn
For 1 quart or 2 pints of canned corn, you’ll need about 4½ pounds of corn (the weight before you cut off kernels). Start by removing the husks, then scrub the ears with a vegetable brush to remove the silks. Wash each ear and drain. In a large pot cover the ears of corn with boiling water and boil 3 minutes. Cut the corn from the cobs at ¾-inch depth of the kernels (in other words, don’t scrape the cob).
Choose Between Raw-Pack and Hot-Pack Methods
Before you start spooning corn into jars, you’ll need to decide if you want to follow a raw-pack or hot-pack method. A raw-pack (also called a cold-pack) is better for veggies that you process in a pressure canner, so it’s the usual choice for canned corn. The food is ladled into jars while it’s still raw (or just briefly boiled those 3 minutes in the case of canned corn), then boiling water (or syrup or brine) is poured on top. The raw-pack method is faster since it doesn’t include any additional cooking time, but it may result in some shrinkage during processing.
A hot-pack is more commonly used for foods that are going to be processed in a boiling-water canner, but you can still use this method for pressure-canning corn. It’s the best way to remove air pockets from your jars and preserve both the color and flavor of foods. Rather than packing your prepped corn directly into jars, you’ll cook the corn for a few minutes first, then ladle the mixture of corn and liquid into each jar while it’s still hot. This precooking makes your food less likely to spoil, since it eliminates more air. Usually you can fit more food into each jar with a hot-pack, which could be helpful if you’re canning a large amount of corn.
How to Can Sweet Corn Using a Raw Pack
Pack the corn kernels loosely into jars but don’t shake the jars or press down the corn. Pour boiling water over the kernels, leaving a 1-inch headspace in each jar. Wipe the jar rims and adjust the lids. Process in a pressure canner 55 minutes for pints and 85 minutes for quarts.
Test Kitchen Tip: For a dial-gauge canner, use 11 pounds of pressure; for a weighted-gauge canner, use 10 pounds of pressure. Add 1 additional minute to the processing time for each additional 1,000 feet above sea level.
How to Can Sweet Corn Using a Hot Pack
Bring 1 cup of water to boiling for every 4 cups of corn kernels. Add the corn and simmer 5 minutes. Fill your jars with the corn and liquid, leaving a 1-inch headspace in each jar. Wipe the jar rims and adjust the lids. Process in a pressure canner 55 minutes for pints and 85 minutes for quarts.
Meatballs are easy to make, versatile and a great all-round crowd-pleaser. Here, we show you how to make them.
They’re perfect in homemade tomato sauce, served with spaghetti, rice, mashed potatoes, polenta or a nice chunk of crusty bread. They’re easy to freeze, too – why not whip up a double batch and pop the leftovers in the freezer, ready to add straight to the pan for a quick weeknight dinner?
Meatballs are at their best when you use a mixture of meat, such as beef or veal and pork, to really maximise the flavour and texture. Combine with breadcrumbs, egg yolk and your preferred herbs and spices and you’ll have the makings of a nutritious, firm family favourite.
These meatballs with a sweet, chilli-spiked tomato sauce serve four people. Get your shopping list here , then follow the simple steps below. A little tip to make your life much easier; wet your hands before you start rolling your meatballs to stop the meat sticking to them.
HOW TO MAKE MEGA MEATBALLS EVERY TIME
- To make the tomato sauce, peel and finely chop 1 small onion. Place in a pan over a low heat with a splash of olive oil, cover and cook until really soft. Increase the heat, bash and add 1 small fresh chilli, then pour in 1 x 400g tin of plum tomatoes and 1 wineglass of water
- Season lightly and cook gently for 30 minutes, then break up the tomatoes
- Whiz 2 stale slices of bread (crusts removed) in a food processor. Place in a large bowl with 250g each of quality minced beef or veal and higher-welfare minced pork. Separate and add 1 egg yolk
- Finely chop and add the leaves from 1 sprig of fresh rosemary and a few fresh sage leaves. Finely grate in the lemon zest and ½ teaspoon of fresh nutmeg, then s crunch and mix with wet hands
- Season and shape into little balls – roughly the size of gobstoppers
- Add 3 to 4 tablespoons of olive oil to a hot pan. Brown the meatballs all over, but be careful not to break them up
- Add them to the pan with the tomato sauce, stir carefully, cover, and braise gently for 45 minutes or until cooked
- Serve each portion with rice or crusty bread, scattered with a few raw peas, pecorino shavings and fresh marjoram leaves, if you like.
Follow this basic principle and you’ll be whipping up meatballs in no time at all. When you get the hang of it, tweak the flavours to what you like best – try adding parsley, garlic and even grated Parmesan for an indulgent twist or swap out the meat altogether and use fish instead.
If you want to see how Jamie does it, watch him rustle up some delicious meatballs here:
When it comes to cocktails, it doesn’t get much easier than jell-o shots. In their most simple form, they are only three ingredients: jell-o powder, hot water, and alcohol. Below, we’ll walk you through the process so your shots are the best they can be!
Gather Your Ingredients & Supplies
To make your shots you will need: a measuring cup, a whisk, small plastic (or glass) cups, and something to boil water with. For ingredients, all you need is your favorite type of jell-o, water, and the alcohol of your choice.
Step 1: Dissolve Jell-O
Pour all the Jell-O powder out of the box into the measuring cup, followed by 1 cup of boiling water. Whisk together until jell-o powder has completely dissolved into water.
Step 2: Add Your Alcohol
One of the biggest mistakes people make when making jell-o shots is adding the boiling water and alcohol together over heat. You want to make sure your jell-o mixture is cool enough that the alcohol doesn’t burn off when it’s added. Adding alcohol off-heat into a large measuring glass not only protects the alcohol, you can also measure it on the spot! You can add whatever alcohol you like best. If you need some inspiration, check out our 100+ favorite jell-o shot recipes. There’s something in there for everyone. 😎
Step 3: Pour Into Cups
Once you’ve whisked in the alcohol, all that’s left is pouring them into shot glasses! Both plastic or glass shot glasses work, though we don’t know anyone with a shot glass collection big enough to accommodate a whole batch! You could also go the unconventional route and serve your shots in fruit like these pink lemonade jell-o shots, or get really crazy and serve them in PICKLES like our famous pickleback jell-o shots. Place your shots in the refrigerator to firm up for 3 to 4 hours and serve!
Adorning household possibly on the exterior and interior design just is not always easy. There are various points that we have to have to know. It is additionally additionally crucial that you seek the advice of upon many references along with favorite property layout thoughts that stages coming from How To Make Grape Jelly to the modern day pattern so we can receive the very best consequence that will make each of our property looks a lot more secure in addition to interesting.
Probably the most favorite design that usually looked is How To Make Grape Jelly, kitchen is design ideas in addition to master suite suggestions. This kind of space design and style naturally is vital given it can be trusted simply by us. So that you can provide you with a number of assist along with insight about steps to make a fantastic property layout tips, we all recommend one to study this informative article to learn far more precisely to be able to re decorating your home and allow it to be more comfortable.
How To Make Grape Jelly
How To Make Grape Jelly
Right after most of us study some of the info and also knowledge about precisely how indoor along with outside pattern function, most of us surely may put it to use to your property interior in addition to outdoor. Some of that knowledge will give people much easier amount of time in designing each of our household our family room, How To Make Grape Jelly and in some cases our own lawn to become an issue that many of us dream of.
On this information we can easily in addition come up with a well designed house that does not think also congested and really feel healthy. As a result, finally hopefully which our details along with understanding regarding household layout will help you throughout achieving your own personal desire house, so excellent good fortune with decorating your own home both along with How To Make Grape Jelly or perhaps classic style.
11th December 2018 – By Michelle Minnaar
This post may contain affiliate links.
Chinese chicken and sweetcorn soup is a definite winter warmer. It is not the traditional chicken soup or chicken broth as we are accustomed to eating in Europe and the US.
In comparison, this chicken soup recipe has tons of Asian flavour running through it. The best part is that this Chinese chicken and sweetcorn soup only takes twenty minutes to prepare.
Unlike the usual chicken soup that takes hours to cook in a crockpot, with this Chinese recipe you can relax and enjoy your evening. So don’t even think for a second that you should order this soup from a Chinese takeaway. Make your very own fakeaway in the comfort of your own kitchen in just a matter of minutes.
In addition, you can use leftovers from a chicken or a smoked turkey from yesterday’s dinner. This soup is all about being sustainable which I am all about! I hope you enjoy making this classic Chinese chicken and sweetcorn soup. Don’t be afraid to add ingredients to make it your own and use up the leftovers in your fridge. Indulge in this comfort-food chicken recipe!
When it comes to keeping to traditional Chinese cooking, you have to try this Chinese chicken and sweetcorn soup. It is made up of very few ingredients such as garlic, ginger, sweetcorn, chicken stock, chicken and spring onions simmered in a saucepan.
Hence, the soup is perfect for making a cheap meal during the week, as it contains inexpensive ingredients. It is generally seasoned with a variety of sauces. These include soy sauce and of course the addition of sesame oil.
However, if you don’t have these at home you won’t ruin the integrity of the soup. Ultimately, what gives this Chinese soup its nutritional value and originality is the addition of egg, which also gives a creamy consistency.
So, you too can make an authentic Chinese chicken and sweetcorn soup wherever you are, and it will still taste as if it’s been made in China!
products you need for this recipe
Here’s a list of the top products you’ll need to make this classic Chinese takeaway recipe:
- large saucepan – you always need one when making soup!
- soup ladle – this makes life easier when serving soup.
- Chinese bowls – for the authentic Chinese dining experience!
- porcelain soup spoons – to complement the soup bowls.
best chicken for Chinese chicken soup
I always say that the best recipes don’t necessarily have to be made up of gourmet ingredients for them to taste out of this world. My secret to making the best Chinese chicken soup is the main ingredient – which is the chicken, of course!
First of all, as with any chicken recipe, I encourage you to always brine your chicken beforehand for the juiciest and most tender results. The last thing you want is stringy chicken, even if you serve it in a soup. So, check out my ultimate guide on brining chicken.
Next, have you ever eaten smoked chicken in a salad or a sandwich? It makes all the difference when it comes to adding that rich taste! The same goes for this Chinese chicken and sweetcorn soup.
My advice is, make a whole smoked chicken for dinner and serve it the night before. You can toss any leftovers from the chicken into the soup.
Furthermore, even if you separately make smoked chicken breasts or smoked chicken thighs, you can pull the meat off and use it. That smoky flavour will be present throughout the soup. It will pair very well with the freshness of the spring onions and the sweetness of the corn.
Chinese chicken and sweetcorn noodle soup
If you feel like the chicken soup lacks filling, even though it has lots of protein in it, you can still add egg noodles. Consider using the noodles as I did in this Asian recipe.
Alternatively, you can also use rice noodles, which are a little bit thinner and more appropriate for this Chinese soup. In authentic Chinese cuisine, most soups are made with noodles.
Also, it is not uncommon to add ginger, rice wine and dried goji berries. For more extensive information on traditional Chinese soups, click right here.
healthy chicken and sweetcorn soup
If you are cautious about calories, you needn’t worry. You can easily spin this recipe in a lighter direction. Although, the soup itself is already light in calories and quite nutritional.
First, to make this soup more filling but light, add courgetti instead of noodles. The courgetti will fill you up in an instant. Next, you can also consider using a light soy sauce instead of the normal one.
Most importantly, to cut down on sugar, limit the amount of sweetcorn. You can also choose not to include the sweetcorn at all.
Instead, opt for using more green vegetables such as bok choy, broccoli, Chinese cabbage, or similar. I also like including mustards, because they pair excellently with the chicken stock. Feel free to choose the vegetables that you most enjoy.
creamy chicken and sweetcorn soup
For a creamy version of the Chinese chicken and sweetcorn soup, simply add cream – though I recommend blending the cream, chicken stock and sweetcorn together with a blender prior to adding any other ingredients.
The sweetcorn will give it that extra sweet punch of flavour, as found in corn chowder recipes. Otherwise, if you’ve got your hands on a can of creamed corn and some cornstarch, that will also do the trick.
Some people also like to make a version with unscented coconut milk. However, the taste profile of this soup then resembles more of a Thai chicken soup.
I would definitely throw in some lime leaves and lemongrass and steer this recipe in a Thai direction. Ultimately, if you want to, you can do so!
toppings
I adore toppings on any soup, curry, stew, you name it. The best toppings for this Chinese chicken and sweetcorn soup are the classic Asian toppings. These include a few bean sprouts, a dash of fresh coriander or parsley leaves.
For a bit of a kick, feel free to cut fresh red chillies and sprinkle them over. Traditionally, you can also add fresh chives, even more spring onions or fresh mushrooms for an earthier flavour.
Lastly, I love to add a splash of lemon or lime juice for a bit of acidity. Again, feel free to make this Chinese soup your own!
What is your favourite clear soup recipe?
Mango agar agar recipe | how to make mango jelly with agar agar – easy south eastern dessert prepared with tropical fruit mango and agar agar, a seaweed extract.
Singapore is very famous for their hawker center’s. Hawker center is usually a food court selling mainly chinese, malay, indian, western and sometimes other cuisine under one roof. These hawker center’s are usually tightly packed as they serve tastiest food for much cheaper price than restaurants maintaining hygiene standards.
As you walk through these hawker centers you will be taken to a culinary paradise by inviting sights of food and their aroma. My favourite food from these center when I lived in Singapore was chicken rice and agar agar treats.
Agar- agar, I was not a bit familiar with this word untill I tasted these treat in Singapore. You can find these colourfull treats in many flavours like mango, pandan leaves, strawberry, dragon fruit and many such in these hawker center.
The word agar comes from malay word agar-agar meaning jelly. It is obtained from red algae Gellidium and Gracillaria (source: wikipedia).
Agar agar usually can be found in any supermarket as agar agar powder or as sheets. I always wanted to make this treat at home, so summer and mango season made a perfect occasion to try this recipe. After referring many recipes, tweaking them and multiple testing this is best result I’ve settled with.
This summer try this cool mango agar agar recipe and do pack it up if you are planning a summer picnic.
__________________________________________
Mango agar agar recipe | how to make mango jelly with agar agar
Serves : 4-5 people
Preparation time : 15 mins + 5 hrs(refrigeration time)
Cook time : 20 mins
___________________________________________
Ingredients
3/4 cup fresh mango, chopped
1/4 cup fresh orange juice
6 gm agar agar ( sheet)
1 cup water
1/4 cup sugar
_____________________________________________
Step by step method
1. Roughly tear agar agar sheet to small pieces.
2. Soak agar agar in 1 cup of water for 15 mins.
3. Blend chopped mangoes along with orange juice till smooth and creamy.
4. Transfer soaked agar agar along with water to a heavy bottomed vessel, cook it in a medium heat.
5. To this add 1/4 cup sugar and mix it well.
6. Keep the solution whisking in medium flame until agar agar is completely dissolved. It took me about 18 mins for agar agar to dissolve completely.
7. Once agar agar is dissolved completely add mango orange puree.
8. Whisk it such no lumps are formed. Cook it for a minute in medium flame and put off the heat.
9. Transfer the hot mango solution to the desired shape mould. Once the solution cools to room temperature, refrigerate for a minimum of 5 hrs.
10. Once the agar agar is set cut it to desired shapes and serve chilled.
_____________________________________________
Notes
1. While extracting orange juice, make sure to filter it such that it contains no pulp.
2. Agar agar seems to dissolve fast when cooked. But that will not be the case, so make sure to whisk it continuously as there will be small pieces settled at the bottom of the vessel. Keep on whisking it until you find clear solution. If agar is not dissolved completely jelly will not set as required.
The Spruce / Julia Hartbeck
- Total: 14 hrs 30 mins
- Prep: 14 hrs
- Cook: 30 mins
- Canning Time: 5 mins
- Yield: 2 half-pint jars (24 servings)
| Nutritional Guidelines (per serving) | |
|---|---|
| 104 | Calories |
| 0g | Fat |
| 27g | Carbs |
| 1g | Protein |
×
| Nutrition Facts | |
|---|---|
| Servings: 2 half-pint jars (24 servings) | |
| Amount per serving | |
| Calories | 104 |
| % Daily Value* | |
| Total Fat 0g | 0% |
| Saturated Fat 0g | 0% |
| Cholesterol 0mg | 0% |
| Sodium 1mg | 0% |
| Total Carbohydrate 27g | 10% |
| Dietary Fiber 0g | 0% |
| Protein 1g | |
| Calcium 21mg | 2% |
| *The % Daily Value (DV) tells you how much a nutrient in a food serving contributes to a daily diet. 2,000 calories a day is used for general nutrition advice. | |
Currants naturally possess a perfect combination of pectin and acidity, which ensures a good jell without the need to add commercial pectin. The result is a delicious jelly with a color as brilliant as that of the fruit.
This is a small batch recipe because currants can be both difficult to find and expensive unless you grow your own. But if you are blessed with an abundance of them, by all means, double the recipe.
Ingredients
- 2 pounds ripe red currants (still on their stems is fine)
- 2 1/2 cups sugar
- 1/2 cup water
Steps to Make It
Gather the ingredients.
Wash the currants, but don’t bother removing them from their stems. You’ll get rid of the stems and seeds later with you strain their juice.
Place the washed currants in a non-reactive pot (no cast iron unless it is enameled, and no aluminum). Add the water.
Cook, stirring, over medium-low heat until the red currants have released all of their juice, about 20 minutes. While they are cooking, gently crush the fruit with a potato masher or the bottom of a wine bottle to help release the juice.
Drain the red currants and their liquid overnight. (You can do this through a dampened jelly bag, or by lining a colander with butter muslin or several layers of cheesecloth.) Place whichever method you are using over a large bowl or pot (you can prop the colander up on long-handled wooden spoons placed over the bowl). Do not squeeze the jelly bag, muslin, or cheesecloth because that will result in a cloudy jelly. You want your final product to show off the jewel-like ruby red of the currants, right?
The next morning, measure the red currant juice. You should have about 2 1/2 cups.
Pour the measured juice into a large, non-reactive pot and add an equal amount of sugar. In other words, if you had 2 1/2 cups of juice you will add 2 1/2 cups of sugar.
While the jars are sterilizing, bring the red currant juice and sugar to a boil over high heat, stirring constantly to dissolve the sugar. Continue to cook until the mixture reaches the gel point.
If the jelly is ready before the jars are sterilized, simply remove the jelly from the heat until the jars are ready. Reheat the jelly just back to a simmer before filling the jars.
Ladle the hot, liquid jelly into the sterilized jars leaving 1/4 to 1/2-inch headspace.
Screw on canning lids.
Process in a boiling water bath for 5 minutes. Keep in mind that the jelly will still be hot and therefore liquid when it comes out of the boiling water bath. It will gel as it cools.
Once cooled, use it on toast in the morning, as an addition to your cheese plate, or with roasted meats. Enjoy!
Sweet corn soup, also called corn chowder in America is simple and cheap to make, yet delicious. You can enjoy it plain or add some meats and spices to increase flavour. It can be enjoyed hot or cold.
Step One
INGREDIENTS -6 sweet corn cobs, 5 parsley stems, 3 thyme sprigs, 3 black peppercorns, 2 tablespoon of butter, 2 leeks, thinly sliced, Kosher salt, to taste, 3 tablespoons of heavy cream, 2 tablespoons freshly chopped parsley.
Step Two
Shuck the corn and rinse it. Slice off the kernels by running the blade of the knife down the cobs lengthwise. Set the kernels aside.
Step Three
Cut the cobs in half crosswise. Place the cobs in a pot and add just enough cold water to cover them. Tie the parsley stems, thyme and peppercorns in cheesecloth with kitchen twine — to make a sachet d’epices — and add them to the water.
Step Four
Simmer the cobs for 15 minutes and remove them. Strain the corn stock into a bowl and set it aside. Discard the corn cobs and herbs.
Step Five
Melt the butter in a heavy-bottomed saucepan over low heat. Add the leeks to the saucepan and cook until softened and translucent, about 5 minutes. Add the corn stock and kernels, and season to taste with kosher salt.
Step Six
Simmer the corn until tender, about 5 minutes. Blend the soup using a stick blender, or transfer it to a food processor and blend.
Step Seven
Strain the soup through a sieve and a couple of layers of cheesecloth, and into another saucepan. Press on the corn with the back of a spoon to squeeze the juice from it.
Step Eight
Bring the strained soup to a gentle simmer and stir in the heavy cream. Taste the sweet corn soup and adjust the seasoning with salt. Garnish with freshly chopped parsley.
September 25, 2019
You can make these deliciously healthy pea and sweet corn fritters with just a few pantry and freezer staples. Great for lunch boxes or simple dinners. These quick and easy fritters will be ready in 30 minutes.
These healthy Pea & Sweet Corn Fritters are one of those special foods that can be enjoyed at any time of day! Serve them with a side of bacon for breakfast, alongside a salad for lunch or with some veggies for an easy dinner.
You can also pop them in lunch boxes for the kids! They are made with a few pantry and freezer staples that are budget-friendly and easy to keep on hand.
I absolutely love fritters of all kinds – they’re so easy to make and always a crowd pleaser. I’m sure these classic pea and corn fritters will fast become a favourite in your house, as they have in ours.
Why you’ll love this recipe…
- Quick and easy.
- Full of flavour.
- Kid-friendly.
PEA & SWEET CORN FRITTERS INGREDIENTS LIST
I think it’s important to have a few dinner recipes up your sleeve that you can make out of pantry and freezer staples you always have on hand. These pea and corn fritters are definitely that!
- Olive Oil
- Frozen Peas
- Frozen Corn
- Milk
- Egg
- Self-Raising Flour – If you don’t have self-raising flour simply use a mixture of plain / all purpose flour and baking powder. The conversion is 1 cup of flour to 2 teaspoons of baking powder.
- Brown / Yellow Onion
- Salt + Pepper
HOW TO MAKE PEA & SWEET CORN FRITTERS – STEP BY STEP
Bring a small pot of water to boil, then add in frozen peas and corn and boil for 2 minutes. Drain and leave the peas and corn to cool.
Add milk, egg and flour to a large mixing bowl and mix well. Add onion, peas, corn, salt and pepper and mix well.
Heat enough oil to just cover the bottom of a frying pan on medium heat. Place 2 tablespoons of the mixture in the pan. Repeat with the remaining mixture, cooking in batches without overcrowding the pan (I usually fit 3 fritters each batch). Cook for 3-4 minutes each side until golden and crispy. If the pan gets too dry between batches, add some more oil. Transfer cooked fritters to a plate lined with paper towel.
TROUBLESHOOTING – WHY ARE MY FRITTERS SOGGY?
There are a few reasons why fritters might go soggy after being cooked. The first is that the oil wasn’t hot enough before adding the fritters to the pan. The fritters then absorb the oil in the pan.
Another could be that your batter is too thin. If the batter doesn’t hold it’s shape when you spoon it into the frying pan, then you need to add more flour to get the right consistency.
If you are making fritters for the first time try making one fritter first as a test and you can make necessary tweaks (heating your oil more, adding more flour to the batter etc) before making the rest of the batch.
WHAT TO SERVE WITH YOUR FRITTERS?
You can eat Pea and Sweet Corn Fritters on their own or with a simple side of mashed potatoes or a garden salad. If you’re looking for something more, here’s some delicious sides that would compliment fritters well…
CAN YOU FREEZE COOKED FRITTERS?
Absolutely! Individually wrap fritters in cling wrap / plastic film, then pop in an airtight container or freezer bag and store for up to 1 month. Thaw overnight in the fridge when you’re ready to use and follow the reheat instructions below.
HOW TO REHEAT FRITTERS:
Heat oven to 180C / 350F. Pop fritters on a baking tray lined with baking paper or a silicon mat, and place tray in the oven for 10 minutes, or until fritters are heated all the way through.
You can reheat in the microwave, although, I find this method makes the fritters soft and soggy and I don’t recommend it.
TIPS FOR COOKING GREAT FRITTERS
- You want a thick batter for these fritters. If you find it’s a little too thin simply add in some more flour. The batter should be thick enough to hold its shape on a tablespoon without pouring off everywhere.
- Add just enough oil to cover the bottom of your frying pan. Make sure it’s hot before popping the fritters in. If you skip this step, the fritters will take on the oil and become soggy.
- Cook the fritters in batches, about 3-4 at a time so you don’t overcrowd your pan. Add more oil if it dries out completely.
MORE FRITTER RECIPES
If you’ve made these Pea & Sweet Corn Fritters I’d love to hear how you enjoyed them! Pop a comment and a star rating below!
You can also FOLLOW ME on FACEBOOK, INSTAGRAM and PINTEREST to keep up to date with more delicious recipes.
The violations started racking up a few weeks ago, when the first ears of sweet corn appeared at the market.
I’m referring to the egregious but common practice of yanking back the husks to examine the kernels and then, to add insult to injury, tossing the unwanted ears back onto the pile.
3 Fast and Easy Fresh Corn Dinners
Sweet corn will be plentiful into September in most areas. Let’s get our act together, people. I get that we’re all so excited to see sweet corn and get shucking, but this is no way to treat such a summertime staple. To debunk some myths and review proper etiquette, I talked to University of Georgia Extension horticulturist Bob Westerfield and Iowa City farmer Marvin Hotz, who has grown sweet corn since the early 1970s and still harvests his crop by hand, with a knife.
Why pull back the husks anyway? To check for worms, a valid concern. They hatch in the sticky silks and burrow through to the tips of the ears, says Hotz.
The problem is that corn, once harvested, begins to dry out and its natural sugars start turning to starch. Expose the kernels and you’ll speed up the process that much more, not to mention annoy fellow customers and/or the farmer you’re buying from.
Hotz, for one, doesn’t mind if you take a tiny peek at the tip of the ear to check if it’s filled out with kernels. Worse, he says, is when you peel back the husk and jab a thumbnail in a kernel to see if milky liquid squirts out (a good sign, by the way). You don’t need to do this. You’re better than this. [Ahem, says Epi’s Adina Steiman, who begs to differ.]
Look for husks that are green, tight, and not dried out. It’s a good sign if the brown ends of silk poking out at the top also feel moist.
Check for little holes in the husk. Those are worm holes. You don’t want those.
And give the ear a good squeeze from the bottom up. It should feel solid and round and the kernels firm and filled out from end to end.
Corn on the Cob with Chilies, Queso Fresco and Lime Butter
Argue all you want about whether yellow corn, by far the most popular, is sweeter than white or bicolor. Color has nothing to do with it. Sweetness is determined by a corn’s genetic type and its growing conditions, says Westerfield.
Of the three basic sweet corn gene types, the su gene, which stands for sugary, produces a perfectly respectable, delicious, and yes, sweet corn. The se, or sugar enhanced, gene ratchets up the sweetness and tenderness of the kernels. Sh2 or supersweet corn stays even sweeter for even longer.
Then there’s corn with a mix of all three genes, called triplesweet or multi-gene, Westerfield says. It’s next-level corn in terms of flavor, texture, and sugar retention. Mirai, something of a cult favorite at farmers’ markets, especially in the Midwest, is one such triplesweet variety.
All that said, if the soil conditions, watering, or timing of the harvest are off—or if you, dear shopper, keep pulling back those husks!—that can negatively impact the corn, no matter what type it is.
Corn Salad with Hazelnuts, Pecorino, and Mint
Keeping fresh corn from drying out is key. At home, store the ears wrapped tightly in a plastic bag in the refrigerator.
If you don’t plan on eating your corn within three days—and you should unless you like mouthfuls of starch—freeze it.
There are three schools of thought here: blanch and freeze whole ears; blanch and freeze the kernels; or skip the blanching and freeze the raw kernels.
Hotz prefers the second method, but with a shorter blanching time than what most Internet sources suggest. Blanching will minimize the inevitable change in texture that comes with freezing, while retaining that sunny corn flavor.
Fill the largest pot you have with water and bring it to a boil. Drop in the shucked ears—Hotz swears by exactly two and a half minutes—then drain and shock them in a bowl of icy-cold water. Cut the kernels off the cob and pile them into freezer bags. (And don’t toss the cobs, silk, or husks. You can use them all, says Epi’s Katherine Sacks.)
Frozen corn will keep for up to a year, in time for next season and the debut of the new and improved corn-buying you.
The difference between a jam and a preserve is that with jam the fruits are broken up into a spreadable consistency, whereas with a preserve the fruits are, hopefully, preserved whole and suspended in their own jelly. To sterilise the jars for the preserve, wash them in warm soapy water, rinse well, dry with a clean tea cloth, and then pop them on to a baking sheet in a moderate oven for 5 minutes. Remember the jars should be warm when the preserve is added, so don’t do this too far in advance. The following quantities make enough strawberry preserve to fill two 0.5 litre jars – small quantities are better for beginners, and for general preserving most of the time, because larger quantities take much longer to come to the boil, and the longer the boiling, the more the flavour and the colour of the fruit is spoiled.
First of all hull 2 lb (900 g) strawberries and wipe each one with slightly dampened kitchen paper – don’t wash them; wet strawberries will never make a preserve. If you can, always use slightly under-ripe strawberries and discard any that are bruised, or if they are not too badly bruised you can always eat them! Then layer them into the pan you are going to use, sprinkling them with 1½ lb (700 g) preserving sugar as you go. Always use a preserving pan if possible because it has a wide base so the juices will reduce down more quickly, and also when you’re boiling the mixture furiously there will be no danger of it boiling over. Leave the fruit to soak in the sugar overnight, giving everything a stir around before you go to bed. When sugar comes into contact with the strawberries it does a wonderful job of hardening them, so that when they’re subjected to fast boiling they have become tough enough not to disintegrate.
When you’re ready to make the preserve, put four small plates into the freezer – these are to test for a set later. Place the pan over a fairly low heat and allow the sugar to dissolve slowly. Give the pan a shake from time to time, but only give very gentle stirs, as you want to try very hard not to break the fruit up.
Before you begin to boil the mixture, it is absolutely necessary that all the crystals of sugar should be dissolved. To check this, you need to coat the back of the spoon with the juices and make sure that there are no crystals visible.
When the sugar has dissolved, turn the heat up to its highest setting, add the juice of 1 large lemon and as soon as the mixture is up to what old-fashioned cooks used to call a rolling boil, put a timer on for 8 minutes exactly.
Then when the 8 minutes is up, remove from the pan from the heat, put a teaspoonful on to one of the chilled plates and allow it to cool completely. Then push the mixture with your little finger – if it begins to crinkle and sit up proudly without any liquid running out, the preserve is set. If not, re-boil for 3 minutes, remove from the heat, do a further test, and so on until the preserve is set.
Whatever you do, don’t pour it straight into the jars; otherwise the strawberries will float to the top. You must leave it aside to settle for 15 minutes first. Gently stir in a small piece of butter (½ oz/10 g) if there’s any scum – this should disperse it. Then pour into the warm sterilised jars. It’s wise to invest in a proper jam funnel for this, as filling jars can be a very sticky business indeed without one.
Seal immediately with waxed discs, then cover with the lids or with Cellophane and elastic bands. Wait until the preserve is completely cold before labelling the jars, as the heat will prevent the labels sticking.
While the kids and workers at CSC are safe, there are so many people in this familiar-to-me corner of the Philippines that need help to recover and rebuild. I so appreciate your willingness to consider helping the Children’s Shelter of Cebu as they serve people with disaster response.
That picture above is one that a friend of mine took yesterday outside the hospital where she is a doctor in Cebu. These people are in need of medical care and unsure of whether or not their hospitals will safely hold them so they have been displaced to the surrounding area OUTSIDE of the hospital. This is just one example of the chaos in Cebu right now. It’s raw and it’s real.
THANK YOU for your thoughts, prayers, and general care for this part of the world and these precious kids. I’ve received many kind emails asking about the safety of the kids during the last few days, which just makes me feel like we all really know each other and care about the same things. ♥ You all are amazing. I’m leaving my regular recipe post up today, which feels a little weird, but it’s with the hope that I can shine some light and joy on yet another piece of this country even in the midst of turmoil.>
MA-HA. That’s how you say the name of this Sweet Corn Maja yummy little dessert that is the better cousin of Jell-O.
It’s actually not Jell-O at all. If you have a coconut tree right outside, then maja is fresh creamy coconut gelatinous little squares studded with nibs of sweet corn, which, BTW, is one of the crops that the island of Cebu is known for. Deliciously fitting.
Like many of the Filipino recipes from the Children’s Shelter of Cebu that I’m sharing here, this was one of the more popular menu items at kids’ birthday parties at the orphanage throughout the year. The aunties must really love those kiddos because they’d stand over a pot of bubbling coconut milk in the world’s hottest kitchen as it thickened, and thickened, and thickened. Annnd thickened. When I watched them make this, Auntie E would keep lifting the spoon out of the pot and flicking it back down to test the consistency of the maja as it dripped off the spoon. It was the kind of motion that could put you in a trance: stir, flick. stir, flick. stir, flick.
I made this at the cabin with my family this summer for our Filipino feast night which also happened to be my parents’ 25 wedding anniversary. My brothers and sister grew up in the Philippines and lived at CSC for a few years before joining our family, the first words out of my brother’s mouth when he bit into the maja: “You have no idea how good this is when you haven’t had it in five years.”
On that same line of thought, I just got an email from a reader yesterday that she has wanted to cook Filipino food for her kids who were adopted from the Philippines, but her kids are too young to articulate what kind of Filipino food they like. She said that these recipes were helping her kids remember and be able to describe the kinds of Filipino food they liked because of all the pictures, and I smiled like a fool for the rest of the day.
These recipes have always been intended to build bridges and open doors, and seeing that happen and even in my own family is just The Best.
This post, Ultimate Holiday Hot Chocolate Bar, is sponsored on behalf of Campfire® Marshmallows. All opinions are, as always, my own.
One of my favorite things about the holiday season is the sheer amount of opportunities there is to get together with friends and family! Whether it’s a super duper planned out, menu planned shindig or an impromptu wine and cheese party – they are ALL good in my book.
One of my favorite things to do during the holiday season is to have some epic hot chocolate bar fixings on hand. Now, before you get worried, this is nothing intimidating! Basically it’s having a somewhat stocked baking pantry and a few Christmas candies gathered. Oh, and marshmallows – you canNOT forget the marshmallows!
Campfire mini marshmallows are my favorite for an ultimate hot chocolate bar situation, but feel free to get fancy – pumpkin spice, gingerbread, regulars – whatever you have or are in the mood for is great! In addition to mini marshmallows, here are a few other hot chocolate fixings I like to keep handy:
Hot Chocolate Bar Fixings
- whoppers
- mint chocolate candies
- chopped peppermint bark
- chocolate chips
- toffee bits
- candy canes (crushed or whole for stirring)
- cookie wafer sticks
- truffles
- mini marshmallows (it had to be said again)
- whipped cream (homemade or from a squirt can for a super convenient topping)
Pumpkin Spice Hot Chocolate & Thanksgiving Ideas
This post is sponsored on behalf of Campfire® Marshmallows. All opinions are, as always, my own. I have a bad habit of being a day late and a dollar.
Caramel S’mores & Video
Chocolate covered caramel s’mores – because you can’t have too many ways to eat roasted marshmallows! This recipe is sponsored on behalf of Campfire® Marshmallows. All opinions are, as.
S’mores Party Platter & Awaiting Fall
This post is sponsored on behalf of Campfire® Marshmallows. All opinions are, as always, my own. Hi!! Hello! How have you been? It feels like it’s been a while.
living my best summer life & s’mores cones
This post is sponsored on behalf of Campfire® Marshmallows. Thank you for supporting the brands I love and that make Jelly Toast possible ❤ This summer is all about.
How to make the perfect milkshake + Turtle Milkshake
This post is sponsored on behalf of the American Dairy Association Mideast. All opinions are, as always, my own. One of my favorite parts of being a parent is.
Cherry Almond Butter Cup S’mores
This post is sponsored on behalf of Campfire Marshmallows. It turns out that I’ve turned into an accidental collector of muffin liners. Like, anytime there are seasonal or even.
Gluten Free Graham Crackers
Gluten free graham crackers are an awesome treat to break into gluten free baking. Simple and delicious these graham crackers will sweeten up your s’mores season! This post, gluten free graham crackers.
Toasted Coconut Marshmallow Treats & a Video
Toasted Coconut Marshmallow Treats are a gateway into Spring desserts! These simple no-bake treats are full of fruity marshmallows and toasted coconut chips making them a sweet treat for.