How to make garlic oil
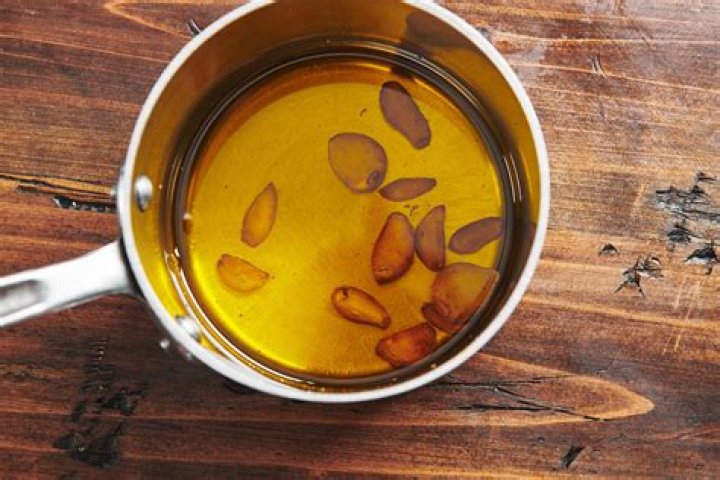
Once you learn how to make garlic oil it can be used both medicinally and for culinary practices. This potent oil is for garlic lovers only!
Hippocrates and many other historical healers mention the use of garlic (Allium sativum) for many conditions, including parasites, respiratory problems, poor digestion, and low energy. Today we know it good for the heart, high blood pressure and even can help regulate high blood pressure. It can also combat Candida albicans when used medicinally.
Fresh garlic is always best to obtain the highest nutrional and medicinal value!
Here’s a very simple fresh garlic oil recipe:
- Find a glass jar (with a tight fitting lid) about the same size as the amount of oil you wish to make.
Peel and mince enough fresh garlic to nearly fill the jar.
Cover the garlic with high quality, organic, cold pressed olive oil. Using preferable a wooden stir stick (chopsticks or skewers work great) gently stir the mixture to release any air bubbles.
Make sure the garlic is completely submerged in the olive oil then cap tightly.
Label & date the jar then store in a warm place for 3 – 5 days.
This oil can be used in the kitchen freely!
This fresh garlic oil also makes a great spring tonic or blood purifier when used in medicinal doses. (Please check with your doctor before using herbs medicinally!)
The dosage would be anywhere from a few drops of garlic oil up to 1/2 teaspoon 3 times daily. Keep this up for 2 – 3 weeks for a complete cleansing. Be aware that when your ingesting this much fresh garlic oil you’re going to smell like your trying to ward off vampires! This in mind, it might be good for everyone in your household to do this at the same time. Chewing on fresh parsley, sucking on cloves or drinking wheatgrass juice can help with your breath but it probably won’t help with the odor coming out of your pores.
Another option would be to buy a garlic oil supplement but I believe nothing has the same effect as something that is fresh and homemade!
If you enjoyed this page on how to make garlic oil you might also enjoy my generic page on making homemade oils!
Oh yeah, another garlic oil remedy to fight off colds and flu is to rub the oil into your feet before bed, slip on a thick pair of socks and get a good night’s sleep. This is great for children who don’t like the taste of garlic. Haven’t tried this myself but let me know if you have!
Comments for How to make Garlic Oil
| Garlic Knot Recipe by: Anonymous |
I sooo love garlic! Here’s one of my favorite garlic recipes I got off a website.
Garlic Knot Recipe
Ingredients
1 (10 ounce) can refrigerated pizza crust dough
1/3 cup garlic infused olive oil (can’t wait to try the garlic infused oil recipe!)
6 tablespoons finely chopped fresh garlic
5 tablespoons grated Parmesan cheese
3 tablespoons chopped fresh parsley
1 teaspoon crushed red pepper
1 teaspoon salt
Directions
1. Preheat oven to 450 degrees F (230 degrees C).
2. Roll out pizza dough to form a 10×16 inch sheet of dough. Cut the sheet into 3/4 inch parallel strips. Then cut these strips in half making about 24 pieces. Tie each strip into a knot and place these knotted strips of dough close together in a greased pan.
3. Bake in preheated oven until golden brown. Remove the knots from the oven, place them in a big bowl. While the knots are still hot, drizzle them with garlic olive oil. Sprinkle with garlic, cheese, parsley, red pepper and salt. Toss well and serve while still warm.
Can’t wait to make my own garlic oil and still have time to do it before Super Bowl Sunday!
| Danger by: YinYang |
While I agree wholeheartedly with the healing benefits of garlic and other infusions, ther is a caveat. Potential botulism.
January 21, 2014 by Chrystal Johnson
We often use home remedies for ear aches as long as they’re minor. Learn how to make our family’s garlic infused olive oil recipe for minor earaches in this easy tutorial.
I’ve been very fortunate that we haven’t had many ear infections with our daughters. When I was a kid, I was constantly on antibiotics for ear infections.
When the girls were little, I read many places online about using garlic infused olive oil as a home remedy for ear aches. Since it is so quick and easy to make, I whipped up a batch the first time one of them got an ear ache.
The first time we tried homemade garlic oil for an ear ache, my daughter was a bit nervous, but agreed because she was in a lot of pain. I rubbed a small amount around the outside of her ear canal and allowed a couple of drops to go into her ear canal. Within two minutes, she was fast asleep when she’d been struggling to rest previously.
After about three doses of garlic oil in her ear, she was getting back to her normal self. At this point, I was able to ask her whether the garlic oil helped. She said it felt weird when I first put it in, but when it dried, the pain would go away. We’ve successfully used this DIY garlic oil recipe several times for earaches since.
I would never use this recipe as a substitution for medical advice or medical treatment for a severe ear infection. We always have the girls looked at by a doctor when they have an ear ache to be sure it’s not something that needs medical treatment.
This DIY garlic oil is helpful though for relieving pain related to ear aches though, and will often clear up the pain without the need for a doctor’s visit. If you don’t want to make your own, you can also purchase ready-made garlic oil.
It all sounded so innocent at first. While working at New York City’s Hearth, Food Editor Rhoda Boone learned a quick and simple trick to adding maximum garlic flavor to any dish. How simple? We’re talking two ingredients. How quick? Just five minutes. Cooking garlic in olive oil over low heat for just a short amount of time creates a flavor-bomb ingredient that delivers savory flavor to pretty much anything.
Soon, though, Rhoda found herself doing it at home, too.
Meet the Spicier, Smokier Red-Pepper Flakes
“The key is to start the oil cold, which lets the garlic infuse the oil as it gently heats up,” says Rhoda. “That way, the finely chopped garlic becomes crispy and golden instead of burning.”
It’s a bit hard to believe that in just five minutes the oil can take on incredible flavor, but it does. You can supercharge the oil even more by adding your favorite whole spices and herbs to the oil along with the garlic. Fair warning: You’re going to want to make a lot of this. Here’s how Rhoda does it:
Pour 1/2 cup olive oil into a small sauté pan and use a garlic press to crush 4 medium garlic cloves directly into the oil. Add 1 to 1 1/2 tsp. of your favorite herb or spice (such as crushed red pepper flake, cumin, or dried oregano). Gently warm oil over medium low heat, stirring often, until garlic is crispy and golden brown and aromatics release their fragrance, 3-5 minutes. Resist the urge to walk away from the stove as the oil cooks—you want the garlic to become crispy and light brown, not dark and bitter. Once the garlic is ready, immediately scrape the oil into a bowl to cool. The flavored oil can be stored in an airtight container, refrigerated, for up to 1 month.
How to use this crispy garlic-studded oil? Licking it straight from the pan is pretty tempting, but here are some options for when that behavior isn’t necessarily an option, i.e. company is present.
Make A Quick Dressing
Upgrade your oil-based salad dressing by swapping this in your DIY garlic oil for the regular stuff—it’s a much milder way to get garlic flavor into your salad bowl. To customize the pairing even further, make a garlic-thyme oil for a French-style bean salad or spoon a spicy chili-garlic oil over a classic tomato and mozzarella salad.
Grilled Flatiron Steak with Toasted Spice Vinaigrette
Serve It for DIY Garlic Bread
For the easiest appetizer ever, set out a plate of toasted or grilled bread and a bowl of this oil. Stir in a handful of chopped fresh herbs to add in some bright color. Or drizzle the oil over hummus and serve with pita bread.
Old-School Garlic Bread
Drizzle It Over Meats And Vegetables
An oil this flavorful nearly begs to be drizzled over something meaty or smoky. Use it as the finishing touch, sort of like a dressing, for your roasted or grilled meats or vegetables, adding stellar flavor and a glistening final garnish.
Lamb Chops with Everything-Bagel Yogurt and Chickpeas
Toss It With Grains/Rices/Lentils
Infusing flavor into starchy grains, rices, and lentils can be tough. This flavor-packed oil is a great way to do that. For her lentil salad, Rhoda particularly likes to use a cumin version of the oil.
Wild Rice, Farro, and Tangerine Salad
Use It As a Simple Sauce
Take your basic spaghetti aglio e olio (spaghetti with garlic and oil) up a notch by adding the crunch of this garlic oil (it’s especially good with chili flakes, too). You can also spoon it over soups, stir it into yogurt for a creamy sauce for grilled meats, or use it as a base for pizza or flatbread.
How to Make Garlic Confit and Homemade Garlic Oil. This delicious kitchen staple will take your dishes to the next level!
Happy first day of spring! Ummm, it’s snowing outside.
Let’s pretend that’s not true and talk about this incredible garlic confit instead. Have you heard of garlic confit? Your life will be forever changed after this post.
Until a few years ago, my understanding of the term ‘confit’ was pretty limited. Sure, I knew that duck confit was a thing (a very delicious thing) and it was French–most likely learned when I butchered the word at some point or another, and someone in my family corrected me. Other than that, I was not intimately familiar with the cooking technique.
What Does It Mean to Confit Something?
When I started culinary school, I was introduced to all sorts of delicious French cuisine and classic cooking techniques. After school, I worked in a restaurant under a French-trained chef.
To confit became part of my daily routine. We confited so many foods. Garlic, tomatoes…you name it and we probably confited it.
For those unfamiliar, confit is a French cooking technique that involves submerging and cooking a food in fat over low heat for a long time. It was originally used as a preservation technique. For the most part, the fat is usually butter, oil, or animal fat (e.g. duck confit, which is cured duck legs cooked in duck fat).
Confiting is the polar opposite of frying, which is cooking a food in fat over high heat for a short amount of time.
What is Garlic Confit?
Of all the things I learned to confit over that year, garlic confit remains as one of my absolute favorites!
Whole garlic cloves cooked in lots of fragrant extra virgin olive oil, for about 20 minutes, until they are incredibly tender. While I’m partial to cooking these in olive oil, you can also use avocado or other oils.
Similar to roasted garlic, the cloves become very sweet, soft, and extremely flavorful. They take less time, are far less messy, and can be stored in the fridge (in the oil) for several weeks at a time.
What To Use Garlic Confit For?
As far as what you can do with garlic confit, the possibilities are endless. Since the garlic cloves are cooked through and soft, you can mash the garlic cloves easily and spread them on top of bread for a delicious spread or garlic bread. You can also add them to dips, such as homemade hummus, salads, mashed potatoes, or roasted broccoli or other vegetables!
You can also leave the cloves intact and sprinkle them on top of homemade pizza, add them to a marinade (such as my easy chicken marinade), put them under the skin of roast chicken, or just add them to a hot pan for sautГ©ing with any number of vegetables.
If you’d like to infuse the oil and garlic cloves with fresh herbs, such as rosemary or thyme, you can do that as well. Just follow the instructions in the recipe below!
Use the remaining homemade garlic oil for delicate cooking, drizzling on top of soups or dishes, adding to salad vinaigrette, or serving with a crusty baguette for dipping.
Does Garlic Confit Need to Be Refrigerated?
Yes, garlic confit should be refrigerated, particularly the confit garlic cloves. It can keep in the fridge for at least 2 to 3 weeks. If you wish to keep a small portion of the garlic oil on the counter for cooking on a regular basis, feel free to do so.
However, infused oils are more delicate and will keep better if stored in a cool place away from direct light and heat.
How to Make Garlic Confit and Homemade Garlic Oil. This delicious kitchen staple will take your dishes to the next level! Use the confit garlic cloves Since the garlic cloves are already cooked and soft, you can mash the garlic cloves on top of bread for a delicious spread or garlic bread, or even add them to dips, sauces, spreads, or roasted vegetables! Use the garlic oil for vinaigrettes, drizzling, or in numerous ways.
Start to Finish: 1 hour 15 minutes total; 10 minutes hands-on
Servings: approximately 8
Difficulty Level: Beginner
Deeply aromatic and rich, garlic oil is one of those simple ingredients that can pull a whole meal together. Homemade garlic-infused olive oil is safe if you use it right away. But because botulism — a deadly source of food poisoning — thrives in homemade garlic oil, careful storage is critical.
Ingredients
- 4 to 6 garlic cloves
- 1 cup olive oil
Directions
Baking the garlic releases its flavor, but if you’re pressed for time, you may opt to add raw garlic to oil.
Roast the Garlic
Heat the oven to 325 degrees Fahrenheit. Cover a baking sheet with foil.
Cut off one end of each garlic clove. Don’t remove the peels. Place the cloves on the baking sheet and drizzle them with about 1 tablespoon of olive oil.
Roast the garlic for about 20 to 30 minutes, or 30 to 40 minutes for a full bulb, until soft. Let the garlic cool for about 5 minutes, then squeeze the softened garlic out of the peels.
Infuse the Oil
Mash the softened garlic with a fork. If you’re using fresh cloves, finely mince them. Add the garlic to a small saucepan. Pour the oil over it and stir.
Warm the oil over medium heat for about 5 minutes, until it starts to bubble. Remove it from the heat and let it cool for about 30 minutes. You may leave the garlic pieces in the oil or remove them with a fine mesh strainer.
Safe Storage
If you’re not going to use the oil right away, pour it into a glass container with a tight-fitting lid. Refrigerate it for up to 3 days. This oil may also be frozen in glass jars or plastic food storage containers for several months. When you’re ready to use the stored oil, let it come to room temperature and use it immediately.
Garlic hair oil is the best remedy for hair fall and to promote new hair growth. If you have been balding in patches, there isn’t a better cure than a garlic hair oil. Very soon your hair will grow dark and shiny and you won’t have to rely on fancy hair spa or other chemical treatments to cure your hair fall. The greatest advantage of this recipe is that your hair will grow three times faster than usual naturally. Just try it for a month to see visible results.
You need only three ingredients to make this hair oil, and each of these are readily available in your kitchen. Since pure garlic juice can irritate the scalp, we dilute it with two other oils that are equally beneficial for hair growth. Here is how you can make garlic hair oil at home.
Ingredients:
6-8 cloves Garlic
1 tsp Almond oil (You can also use coconut, olive or mustard oil)
1 tsp Castor oil
2-3 drops of essential oil (peppermint, lemon or grapeseed) (Optional)
Method of Preparation:
1. Crush the garlic cloves in a blender without adding any water.
2. Take a clean bowl and place a muslin or cheese cloth over it and put the crushed garlic on it.
3. Squeeze the juice out of the garlic into the bowl.
4. Add to the garlic juice almond oil, castor oil and essential oil.
5. Blend thoroughly till all the oils are well incorporated.
IMAGES CREDIT: YOUTUBE/MAMTHA NAIR
How to Apply:
1. Comb your hair and free it of any tangles.
2. Soak a cotton swab into the mix and squeeze out the excess oil.
3. Dab the oil generously on your scalp. You need not apply it on your entire hair, this is essentially a scalp treatment.
4. Make sure you part your hair and apply it all over your scalp.
5. Wear a shower cap or a towel and allow it to seep in for about one hour.
6. Rinse off with a mild shampoo and then condition your hair.
Repeat this ritual of using the garlic hair oil twice a week for about a month to see best results.
Why Garlic: The sulphur and selenium in garlic nourishes the hair roots, strengthens hair follicles and prevents hair fall. It is rich in vitamins and minerals that naturally conditions the hair.
Why Almond Oil: Loaded with Vitamin E, Omega-3 and Omega-6 fatty acids which easily penetrate the roots and makes the hair follicles strong and fights breakage.
Why Castor Oil: Castor oil is a magical ingredient that boosts hair growth by three times. In addition to that it has anti-fungal and anti-bacterial properties including Omega 6 and 9 fatty acids, proteins, Vitamin E and minerals that stimulates hair growth and naturally conditions the hair.
Why Essential Oil: Essential oil can stave off the garlic stench to a great degree.
Blog Categories
Latest Blog Posts
Posted on 11th Jul 2019
Posted on 18th Jun 2019
Posted on 09th May 2019
Hot Sauces Don’t Scare Us
We’ve Got Just The Bottle!
SUBSCRIBE TODAY
FURTHER INFORMATION
BUY IN PALLETS
Olive oil is one the most versatile products we have in our kitchen. The only thing that can make it better is by adding garlic! Garlic has the ability to make any type of dish taste incredible, thanks to it’s salty, onion-y flavour profile that leaves you wanting more. You can use it by itself as a cooking oil, or as a central component of a salad dressing, pasta sauce or marinade. You can buy ready made garlic-infused olive oil at most major supermarkets, but we think you can have more fun and create nicer flavours by creating your own at home.
How To Make Garlic-Infused Olive Oil
It’s fairly simple to infuse any type of flavour into olive oil, but you do need a little bit of patience. The quickest way to infuse garlic into olive oil is to simmer your garlic cloves in the oil.
Step 1: Take fresh garlic cloves, peel them and then crush them with the back of a thick knife to release the flavour. Place the cloves into a pan.
Step 2: Pour enough olive oil into the pan to give it a thin coating, then sauté them over a medium heat for between 3 – 5 minutes. If the garlic starts to go brown around the edges, make sure to lower the heat, as you do not want to garlic to actually cook through yet, just sizzle.
Step 3: Add the remaining amount of olive oil that you want to infuse into the pan and turn the heat down to a lower setting. Wait until the oil begins to slightly bubble, then let the oil simmer at this level for around 20 minutes. This gives the garlic time to release it’s flavour to infuse into the oil. Again, make sure that the garlic is not starting to burn, if so, turn the heat down slightly.
Step 4: Turn off the heat to let the oil cool down, in order to become even more infused with the garlic. You will need to make sure that the oil is cold before straining as hot oil can burn your skin very easily!
Step 5: Take a fine sieve and strain the oil into an airtight bottle. The oil can now be stored in the fridge and kept for up to a week! It’s good to make frequent, small batches of infused oil, in order not to waste any that ultimately goes unused.
This process can be repeated if you want to infuse other ingredients into oil, from rosemary to cooked bacon!
Tasty Recipes
Garlic oils taste amazing when used in marinades, sauces and dressings, so we’ve compiled short list of recipes for you to test out your new homemade garlic-infused olive oil with!
Chicken Marinated in Garlic-Infused Olive Oil
Ingredients: chicken, garlic-infused olive oil, fresh parsley, whole lemons (sliced into thin rounds), salt and pepper.
Garlic and chicken is a classic combo of flavours, with the famous Chicken Kiev being the most obvious dish that comes to mind. This roast chicken recipe from Martha Stewart consists of only 6 basic ingredients and you don’t need to be a genius in the kitchen to be able to make it yourself! Serve the chicken with rosemary covered roast potatoes for a hearty evening meal, or with a side salad for a healthy, light lunch.
Find the full recipe at Martha Stewart.
Grilled Steak with Rosemary & Garlic Infused Olive Oil
Ingredients: skirt steak, rosemary and garlic-infused olive oil, rosemary, garlic cloves, lemon, fresh basil, fresh parsley, salt, pepper and lemon-infused olive oil.
If red meat is more your thing, then this grilled steak recipe will get your mouth watering… The best cut of meat to use for this is skirt steak, as this cut of meat has a lot of flavour and texture that is able to fully absorb marinades.
Find the original recipe at La Barre.
Honey & Garlic Salad Dressing
Ingredients: honey, garlic-infused olive oil, white wine vinegar, a pinch of salt and a pinch of black pepper.
If you want to liven up your salads, then this honey-based salad dressing is what you need! Simply mix together your honey, salt and pepper in a jug. Then add the garlic-infused olive oil and white wine vinegar and whisk until it is well combined. Leave the fridge for 5 minutes before adding to your salad.
Find the original recipe at All Recipes.
Glass Oil Bottles
Here at Glass Bottles, we’ve got a fantastic range of glass bottles that are ideal for storing your homemade infused oils. Why not take a look at our range?
Liked this post? Then we think you’d also love to take a look at our other recent post about the history of pickling.
JOIN OUR MAILING LIST
And Be The First To Hear About Our Next Event, Product News And Savings!
Garlic Oil for Hair: Garlic is known for its amazing smell and the benefits and has been used as the main ingredient of your kitchen. In many countries, garlic is used as a prior spice for main courses, stew, and soup.
But have you ever heard about garlic oil for hair growth? If we talk more specifically, yes garlic is a tremendous home remedy that can improve the hair’s health and repair them well and force them to re-growth.
If you are suffering from any hair issues like hair fall, split hairs, dandruff, itching in the scalp, premature grey hairs, thin hairs, rough hairs then using garlic oil can solve all of these troubles and it is far better way rather than using harsh expensive products on your hairs.
We all know that garlic contains anti-microbial and anti-bacterial properties that stimulate natural immunity and make you healthy from the inside except that, garlic includes many minerals and components like selenium, sulfur, calcium, and many others that are good for hair growth.
In this article, we will discuss the benefits of garlic oil for hair, how to make garlic oil and how to use it for making your hairs like saloon look, so let’s have a closer look at the information and read it carefully till the end.
How to Make Garlic Oil:
You can easily prepare garlic oil at your home without any extra effort.
Ingredients needed:
- Half bowl of organic coconut oil
- 7 to 8 cloves of peeled fresh garlic
Preparation:
- Add the coconut oil in a pan and heat it up.
- Add all the garlic cloves and let them boil with coconut oil for 10 to 12 minutes.
- Let all juice of garlic mix with coconut oil and after 10 minutes off the flame and strain the oil into another bowl and let it cool for a while.
- You can store this oil into a container or make it fresh whenever needed.
How to use Garlic Oil for Hair:
- Use your hands and apply garlic oil into the roots. Scalp and massage well for 10 to 15 minutes.
- Cover the whole area of your hair and leave it for an hour or at least 45 minutes.
- After that, wash your hair with a mild shampoo. One can also use conditioner but not needed as coconut oil works as a natural conditioner.
- Repeat the process twice in a week for the best results.
Benefits of Garlic oil:
1. Promote Hair’s Health:
Raw garlic includes plenty of components and antioxidants that remove all the impurities, bacteria, and dust from your hair and promote hair health.
If your hairs are thin, rough, and dull then you must use this remedy as it will provoke all the needed factors and make your hair shinier, thicker, and healthy.
2. Helps in re-growth of Hairs:
Garlic contains a special component called selenium that is known for its working benefits and lead to hair-re-growth.
Millions of people are facing baldness before the age and without hair you look old and it decreases your confidence as well.
People are spending millions of bucks on wigs or hair transplants so they can look good and young. You must know that garlic can eliminate hair fall and helps in re-growth.
Apply garlic oil to your hair as described and you will see the results within a few weeks.
Even apply to the bald area and see the positive results, not even we are saying even studies are also claiming the fact.
3. Removes Dandruff:
Garlic and coconut oil both have anti-bacterial and anti-microbial properties and both are great to reduce inflammation and itchiness. After mixing them together you will double the benefits.
Garlic oil kills all the bacteria and germs that cause hair issues and dandruff. It makes your scalp healthy and clean that plays an important role in healthy hairs.
4. Prevent Early Grey Hair:
Premature grey hairs have been one of the biggest beauty issues and it has triggered every generation even young children too.
Using wrong products, poor lifestyle, eating junk foods, any disease or mall nutrition is the basic cause of premature grey hairs.
Using garlic oil can eliminate early grey hairs and prevent their growth. The regular use can solve the trouble from its roots.
5. Improves Blood Circulation:
Proper blood circulation is required for healthy hairs and proper nourishment of your hair. Garlic oil purifies the follicles and repair cells so they can grow better and fast.
It also detangles the hairs and prevents clogging and stimulates keratin and biotin level that is a must for hair growth.
Using garlic oil can generate a secure shield around hairs that will keep them healthy and also treat split hairs and hair breakage.
6. Works as a Natural Conditioner:
Coconut oil works as a natural conditioner and it tones the scalp well. If you don’t like coconut oil then you can also use olive oil.
Many studies have shown that garlic oil protects the outer layer of the hairs and coconut oil enhances the real benefits after missing up with garlic cloves.
Special Note:
Garlic is a strong spice with a strong odor and effects. If your skin is much sensitive or you are allergic to garlic then try to avoid this remedy or test this at a small part of your body.
You can also consult an expert before using this remedy.
Conclusion:
Eating garlic is beneficial for overall health and mixing garlic with coconut oil can become a wonderful home remedy for your hairs.
The other great part of this remedy that you only need two ingredients for preparing it and it can be ready to use within ten minutes. also, always use mild shampoo and conditioner that includes less-ammonia and other harsh components.
You can know easily about your hair type and never do many experiments with your hairs or it can ruin all the efforts that you have done for your hairs.
We hope this information would be beneficial for you so please share your experience with us and ask your queries here.
December 24, 2015 By Elise Leave a Comment This post may contain affiliate links. Please read my disclosure policy for more info.
I’m not a doctor, or even a certified herbalist, so I can’t give you any scientific facts, or cite studies or anything like that, but what I can tell you is that my mother use to make garlic infused oil anytime one of my siblings or I started complaining of an earache, and it worked on almost a miraculous level of effectiveness.
It’s been years since I’ve even thought about garlic oil, much less made any, but this morning, Garrett woke up complaining about his left ear. I guess our healthy streak is over.
Fortunately, garlic oil is super easy to make, and only takes a few minutes of active preparation – after that, it’s just a matter of letting it marinate for an hour or two. Easy peasy, and the best way I know of to fight earaches!
Of course, I’m not saying it’s easy to get your kids to sit still and let you drop oil down their ears. You’re on your own with that one. 😉 An eye dropper is the obvious answer, but if you’re like me, you don’t exactly have droppers lying around waiting to be used, so I’ve found that a spoon will work in a pinch.
How To Make Garlic Oil
You’ll need:
- 1 clove of garlic
- 2 tablespoons – 1/4 cup olive oil
- cutting board
- knife
- glass jar
- warm area
Instructions:
Smash a garlic clove with your knife, and then chop finely (or just mince with a garlic press).
Scrape garlic into a glass jar, and cover with olive oil.
Cover, and place in a warm area for an hour or longer.
To use:
Have your child lie down on his or her side, and drop a few drops of oil down the offending ear.
Try to have them lie still on their side for a while to let the oil get down into the ear canal as far as it can and do its work.
Recipes everyone can make!
Nourish your body with ingredients you already have in your kitchen!
Success! Now check your email to confirm your subscription.
Sushmita Sengupta | Updated: June 08, 2018 17:44 IST
- Garlic has been proven to bring down high cholesterol and Blood Pressure
- Garlic oil has been used as a traditional remedy for a various things
- Ingesting Garlic oil can cure cold, cough and ear infection
Here are 9 amazing ways you can put the garlic oil into use –
1. Treats Acne
Garlic oil can serve as a great remedy to treat acne. Garlic contains selenium, allicin, vitamin C, copper and zinc, all of which can boost your skin health. Zinc especially has abilities to control sebum production, which is a major contributor to acne. The anti-inflammatory properties of garlic further relaxes the skin. Just combine a few drops of garlic oil to a mud pack. Apply the smooth paste on your face. Let it rest for 10 minutes and rinse it off with cold water.
How to make garlic oil: Garlic oil can serve as a great remedy to treat acne
2. Immunity Booster
According to the book Healing Foods, garlic oil is antibiotic in nature and can be used to treat cold and cough. In India especially, garlic oil has been long used to treat infections and fever. Rich in immunity-boosting nutrients like vitamins C, B1, and B6, allicin, iron, and phosphorous, garlic oil is a great remedy to boost overall health. Have home-made garlic oil or garlic oil capsules as per the recommended dosage and see the wonders for yourself.
3. Relieves Ear Infection
Garlic oil for ear infections is another traditional remedy your mothers and grandmothers would vouch for. And they have a good reason for it too. The strong antibacterial and antiseptic properties fight against bacterial infection, while also easing the pain caused by the nasty infection. Mix a few drops of garlic oil with a few drops of olive or mustard oil and warm it on low heat. Let it cool, and store the concoction in a small bottle. Carefully dab your cotton in the oil, just a bit, or you can also sprinkle a few drops on the cotton ball and place it inside your ears for some time. Remove the cotton ball immediately if the pain persists, or is worsening the infection.
4. Natural Mosquito Repellent
Fed up of mosquitoes hovering around your house? Most market-based repellents fail to do their job efficiently, which is why it is best to make your own home-based natural mosquito repellent. You need just some drops of garlic oil and a cotton pad. Rub the cotton pad on your skin and walk free without the fear of mosquitoes running after your blood. Garlic oil works very well to keep the nasty mosquitoes at bay due to its smell. You can also spray it around to ward off mosquitoes. A patch test on your skin is recommended to avoid any allergic reaction.
(Also read: 8 Genius Home Remedies for Mosquito Bites That Really Work!)
How to make garlic oil: You need just some drops of garlic oil and a cotton pad
5. Relieves Toothache
Toothaches can be quite nasty. You can’t eat anything or even sit in peace because of the excruciating pain that refuses to fade away. Here again garlic oil can help. The active compound allicin helps reduce tooth pain and inflammation and also bacterial activity thereby prevents tooth decay. Sprinkle a few drops of garlic oil on a cotton ball, and press it in the affected toot area for about 15-20 minutes. This should ease your pain instantly.
(Also read:4 Natural Home Remedies for Toothache)
How to make garlic oil: Toothaches can be quite nasty
6. Prevents Hair Loss
Rich in sulphur, vitamin E, vitamin C, vitamin B6 and vitamin B1, garlic oil can not only prevent hair loss and damage but also strengthen hair roots and follicles, boosting faster hair growth. Regular oiling of your hair and scalp with garlic oil can improve blood circulation in the scalp area, further boosting hair health and preventing hair breakage and loss. For best result, massage your hair and scalp with garlic oil and leave it on overnight. Rinse it away with mild shampoo and water the next day.
How to make garlic oil: garlic oil can not only prevent hair loss and damage but also strengthen hair roots and follicles
7. Treats Dandruff
Dandruff is nothing but the dry flakes of your scalp chipping away due to high inflammation under your scalp. Garlic oil with its high anti-inflammatory properties and sulphur helps calm inflamed skin, and prevents itchiness caused by dandruff. Massage your scalp thoroughly with garlic oil. Leave it overnight and rinse it off with cold water and shampoo the following day.
8. Treats Itchy Skin Ailments
Garlic oil can be applied on the skin to treat a multitude of skin ailments. Due to its high anti-fungal properties, fungal infections, warts and corns can be kept at bay. Fungal infections like ringworm and athlete’s foot can also be treated with garlic oil. Soak your feet in warm water bath and crushed garlic to get rid of the infection. For its high anti-inflammatory properties, it can also relieve itchy psoriasis outbreaks on your skin. Psoriasis is a condition in which skin cells combine and form scales and itchy, dry patches on the skin. Just dab and rub a little garlic oil on the affected areas and see the result for yourself.
9. Natural Pesticides for Garden Pests
Fond of gardening? Protect your beloved plants from pesky garden pests with the help of garlic oil. Garden pests cannot stand the smell of garlic. Try making a home-made, all natural pesticide by combining garlic oil, water, liquid soap and mineral oil. Spray some of the concoction on your plants to keep the critters at bay. It is always good to make use your own pesticide so that you grow healthy plants. Ensure that you use the home-made pesticide every day.
How to Make Garlic Oil
You would need 1 clove of garlic, and 1/4th cup of olive oil. Peel the clove of garlic and mince it. Transfer the minced garlic to a medium pan and add oil. Warm the oil slightly on the stove. Make sure you don’t overheat the oil, else you will end up burning it. Collect the oil in a small container with a lid. Let the oil and garlic infuse overnight .
About Sushmita Sengupta Sharing a strong penchant for food, Sushmita loves all things good, cheesy and greasy. Her other favourite pastime activities other than discussing food includes, reading, watching movies and binge-watching TV shows.
By Howard Parker Last Updated July 25, 2020 Leave a Comment
Do ants invade your garden or kitchen? Do insects feast on your young shoots? And you want to make an insect-free organic garden?
Natural gardening is not so difficult if you know simple, practical, effective and non-polluting recipes based on natural products.
You can naturally fight against snails and slugs with the coffee grounds. We also have another natural weapon ultra-effective against insects: Garlic(contain sulfur). Here I have discussed how you can fight against destructive garden pests like snails, slugs. aphids, beetle.
Let’s dive into the discussion about how to make garlic spray.
Quick Tips:
- To keep the ants away from the house, place the crushed garlic or garlic clove on their way.
- To protect fragile seedlings and plants from insects, surround them with garlic spray.
The garlic decoction mainly use in the vegetable garden and the orchard (also on some flowers such as roses) to fight:
- Preventively against damping off.
- Curative against aphids, mites, ants, moles, voles, slugs, caterpillars, and diseases such as peach blister and vine, mildew, rust, powdery mildew, strawberry gray mold.
How to Make Garlic Spray Quickly
The preparation of the garlic spray is effortless. Here is the step by step guide on how to make and use a garlic spray
Steps :
- Roughly chop 15-20 cloves of garlic and place in a pot.
- Add to 1 or 2 liters of water.
- Stirr the water while boil and let it simmer for 20 minutes with a lid on the pot.
- Leaving covered and let cool it for an hour.
- Then filter to remove all residues.
- Add few drops of dishwashing soap.
- Pour it in a spray bottle and the store remaining part in a plastic container.
Good to know: the garlic spray cannot be preserved more than a few days. Store in the refrigerator for a few days.
You can also make purines from garlic. Purines make from leaves of garlic. Put some leaves for at least a week in cold water for fermentation. Filter it and spray the infected plants. Some plants give better results in purines (ferns, comfrey).
Make Garlic Insecticide By Maceration
Steps
- Macerate 80 gr. crushed garlic in 1 liter of water
- Let stand for 12 hours. (For quick and better result boil it over high temperature and let it cool )
- Filter the mixture and add 4 ml of strong alcohol.
- Spray maceration of garlic on your infected plants
Additional Ingredients
You can also add some ingredients to boost the power of your garlic spray. Most effective ingredients are:
- Crushed hot pepper
- Vegetable oil
- Neem Oil
- Liquid soap
- Eggs
Another Garlic Recipe with Cooking oil:
Learn from the Epic Gardening blog podcast on Garlic spray
Use The Garlic Spray
Garlic spray use according to one of the two following methods:
- Use a watering can for preventive treatment of damping-off.
- Spraying foliage using a pressure sprayer in other cases (curative treatments of various targeted diseases).
- For best treatment, repeat watering or spraying 3 or 4 times at 3-day intervals
Warning: Keep your eyes and hand safe from the spray. Especially when adding additional ingredients like hot pepper and don’t spray to the foliage in full of sun.
These natural and effective techniques avoid the use of synthetic products that are harmful to the environment and our health. If you have decided to grow your garden in the most natural use the natural insecticides like garlic, soap, coffee ground.
Pin It
Embed This Image On Your Site (copy code below):
My passion for cooking leads me to travel to different places, eat authentic local dishes, and inspire everybody to enjoy their lives!
Chili garlic oil is a twist of a famous Asian condiment—chili oil. The combination of the spicy chilies and the crispy garlic bits perfectly match with dumplings, noodles, and any steamed or fried dishes. Turn any of your favorite dishes to delicious spicy treats with my version of homemade chili garlic oil.
Cook Time
Utensils
For Preparing the Ingredients:
- 1 large bowl
- 2 medium bowls
- 2 small bowls
- Measuring cups
- Measuring spoons
For Cooking the Dish:
For Storing the Finished Product:
- Empty container or bottle
Ingredients
- 1 cup garlic oil
- 1/4 cup garlic, fried
- 1/4 cup bird’s eye chilies, roasted and chopped
- 1 teaspoon salt
- 1 teaspoon sugar
Instructions
- Pour the garlic oil in a preheated pan.
- Add the bird’s eye chiles, salt and sugar. Bring to a boil.
- Remove the mixture from the heat. Let it cool.
- Mix in toasted garlic.
- Store the chili garlic oil in a clean bottle or a container.
Finished Product
Tips and Techniques
- Roasted chilies give that charred aroma and color.
- Fried garlic bits provides the crunchy texture.
- Reserved garlic oil contribute to the taste of the condiment.
- Save some cooking time by directly frying the chilies and the garlic.
- Add chili garlic oil when making sauces like the spicy soy-vinegar dip.
How to Roast Bird’s Eye Chilies
Ingredients:
Utensils:
- Baking pan or baking sheet
Instructions:
- Preheat the oven to 200 ºC or 390 ºF.
- Lay the chilies in a baking pan or baking sheet.
- Drizzle the chilies with a little amount of garlic oil.
- Bake it for 10 minutes.
Step-by-Step Procedure: Chili Garlic Oil
Related
How to Make Garlic Rosemary Pork Belly With Fried Tofu
by Travel Chef 0
How to Make Fried Chicken Gizzards With Garlic Butter
by Travel Chef 6
Wild Mushrooms With Homemade Fried Garlic Bits in Oyster Sauce
by Travel Chef 10
How to Make Creamy Coconut Garlic Mushroom Pasta
by Travel Chef 6
How to Make Special Garlic Fried Rice
by Travel Chef 10
Popular
Which Brand of Apple Cider Vinegar Should I Buy?
by Alana Niall 123
Ideas for Cooking With Walnut Oil
by Audrey Kirchner 21
When to Use Extra Virgin Olive Oil
by Penelope Hart 92
Comments
Travel Chef
2 years ago from Manila
Thank you Miebakagh! Happy hubbing!
Miebakagh Fiberesima
2 years ago from Port Harcourt, Rivers State, NIGERIA.
Hi Dred Cuan, Yes, I will read and I am following you on HubPages!
Travel Chef
2 years ago from Manila
You are welcome. Hope you keep following my hubs. My big thanks to you. Cheers!
Miebakagh
Hi, Dred cuan, yes you’re doing the right thing. Most of the time, I eat at home, except when I am traveling. To me, homemade meal seems the best and more satisfied. Many thanks.
Travel Chef
2 years ago from Manila
Thank you for your kind words. Based on my experience, I can say that home cooking is quite different in Restaurant or Hotel cooking. So as much as I could, I’m trying to help home cooks to recreate their favorite restaurant dish within their budget. I hope I’m doing the right thing to help others.
Miebakagh Fiberesima
2 years ago from Port Harcourt, Rivers State, NIGERIA.
Hi Dred CAun, thank you. I will always watch out for your cookings. Most of the time you are coming up with exotic dishes and herbs. I had it in mind I will later make up a hub about garlic. Happy cooking!
Travel Chef
2 years ago from Manila
You are right. I love it with fried rice too. Actually, I used to eat this with any dishes. The aroma, taste and texture are really great. Glad you enjoyed it!
Miebakagh Fiberesima
2 years ago from Port Harcourt, Rivers State, NIGERIA.
Hi Dred Cuan, thanks. Just after, I post, there was a power surge, and my laptop shut down, and I went into the kitchen to practice. My family had to throw open all the living room windows! Now, I will take on your recommendation. The product is very delicious, and I enjoyed it with fried rice! I like garlic, the queen of all herbs much.
Travel Chef
2 years ago from Manila
I haven’t tried that version, but I can’t see any problem of adding the two. In other countries, they have their favoured vinegars served with this chili garlic oil. For example when eating dumplings, they have a sauce mixture and they drizzle this condiment on top.
Eric Dierker
2 years ago from Spring Valley, CA. U.S.A.
Can I add a bit of ginger and a splash of vinegar?
Travel Chef
2 years ago from Manila
I assure you that if you follow this recipe, you won’t regret it. There is a kick of spiciness, but very tolerable. I don’t like eating too spicy foods just like you. My stomach is getting upset when I eat too much food like that. LOL
Travel Chef
2 years ago from Manila
Yes, you are absolutely right! So I suggest to cook it in the oven first as it will lessen the impact of the aroma when you infuse chilies into the oil. I love garlic as well!
Mary Norton
2 years ago from Ontario, Canada
I will have to try the finished product first to make sure it is not so hot I can’t tolerate it. I like the taste of these chillies in Szechuan cooking.
Miebakagh Fiberesima
2 years ago from Port Harcourt, Rivers State, NIGERIA.
Hi dred cuan, I have a question here. Frying the bird eye chillies in hot oil,will give a burning smell that can affect even your neighbors sense of smell, right? What do you say?You are very good at cooking. Garlic, garlic, garlic my favorite herb!
Copyright © 2020 HubPages Inc. and respective owners. Other product and company names shown may be trademarks of their respective owners. HubPages ® is a registered Service Mark of HubPages, Inc. HubPages and Hubbers (authors) may earn revenue on this page based on affiliate relationships and advertisements with partners including Amazon, Google, and others.
HubPages Inc, a part of Maven Inc.
Sauces, Condiments & Preservation
Connect with us
About Us
Copyright © 2020 HubPages Inc. and respective owners.
HubPages Inc, a part of Maven Inc.
Garlic, scientifically known as Allium sativum, is an herb that has many nutritional and medicinal properties to it. These include antibacterial and anti-fungal properties, along with being an immunity strengthener. There are many ways to get more garlic into your diet, as it is available in whole, powdered and oil form. There are also extracts which can be pricey. If you have a little extra time and a few materials, you can make your own garlic extract from scratch for a fraction of the cost.
Peel several cloves of garlic, making sure to remove all the papery skin both from the outside of the head of garlic and from between the individual cloves.
Press each clove of peeled garlic through a garlic press. Dump the pressed garlic into a food processor. Repeat this until you have used as many cloves of garlic as you wish. Each 1 lb. of garlic cloves will give roughly 1 g of highly concentrated garlic extract.
Pulse the pressed garlic until you see some of the oil separate from the garlic pieces.
Strain the garlic pieces from the oil using a fine mesh strainer. The liquid leftover is garlic extract. Discard the garlic pieces or use to cook.
Store the garlic extract in an airtight container in the refrigerator for up to a week.
To dilute the extract, instead of straining through the mesh strainer, add 1/2 cup of pulsed garlic to 1 cup of olive oil and let sit for 24 hours. Strain and you now have garlic oil from the garlic extract.
Warning
Garlic extract is highly potent and concentrated and may not be appropriate for all your garlic needs. The extract is usually diluted using an oil like olive or grapeseed. If it is being used in pill form, it may be added to other substances to make the pill. Only use pure concentrated garlic extract if you specifically need that kind.
Creating garlic-infused olive oil is a popular practice for many chefs who want some extra spice and nutrients in their recipes.
Garlic
Garlic is one of the most popular herbs to add into any dish, both for its unique flavor and the wealth of nutrients and health benefits that it can provide. Thanks to its active ingredient, allicin , as well as other sulfuric compounds and nutrients, garlic are known for its antibacterial , antioxidant , anti- inflammatory , and immunoprotective effects. Considering that olive oil is praised for its benefits, combining garlic and olive oil seems like a logical choice.
Garlic-infused olive oil is an excellent ingredient in marinades and other sauces, while also making for a surprisingly flavorful salad dressing or another drizzle for vegetables and fruit. You can pour small amounts of this oil over French bread to make your own garlic bread, and many people even enjoy topping their pizza with this tangy homemade oil variety.
Garlic infused olive oil Photo Credit: Shutterstock
How to Make Garlic-Infused Olive Oil?
You can make delicious food using garlic-infused olive oil because garlic in itself has the potential to add so much flavor to the food you’re cooking. The delightful garlicky taste enhances the palate of the dish that’s being cooked or roasted. This flavorful oil is also used to sautee veggies or garnish salads. So how do you make this oil at home? Let’s find out.
Few foods metamorphose as dramatically or alluringly as garlic when it is roasted. Hardly a savory recipe exists in which one could not imagine this substance. I always have these garlic preparations on hand.
Social Sharing
Add to collection
Add to menu
Ingredients
- 3 large heads garlic, cut horizontally in half
- 3 cups pure olive oil
- 4 sprigs thyme
- 1 1/2 teaspoons black peppercorns, toasted
Preparation
- Preheat the oven to 300 degrees.
- Put the garlic heads cut side down in a small casserole or ovenproof pot and pour the olive oil over them. Add the thyme and pepper. Cover with a lid or foil and bake for 45 minutes to 1 hour, until the garlic is soft enough to mash.
- Remove garlic from the oil and set aside.
- Strain the oil into a bowl and let cool, then pour into an airtight container. The oil will keep for at least a month. To make the garlic mash, squeeze the cloves out of their papery husks into a bowl. Mash the roasted garlic with a fork. Store mash in an airtight container in the refrigerator for up to 1 month.
Reprinted with permission from New World Kitchen by Norman Van Aken. © 2001 HarperCollins Publishers, Inc.
Related Video
Menus & Tags
Leave a Review
Reviews
I put rosemary and thyme in, plus mixed cracked peppercorns. I use a 750ml bottle of medium to high end oil and we usually use it all in 1 to 2 months. Make sure to cook it at a lower temp, 300 or so like the recipe says, otherwise you will burn the garlic.
Hi. Thank you for the post. The beneficial values of garlic are out of the question. But. I¿ve read much about it even including recipes like here http:// Thus, can you offer any way how to fight against the smell of garlic? Thanks.
Essential to any kitchen. I make this once a month.
a simple classic, nothing to mess up.
I usually make a double batch to share with a friend, and I freeze the mash in 1 tsp drops to pull out whenever I need it, so there’s no worrying on how quickly I need to use it up before it spoils. I’ve found the oil lasts much longer than 1 month, though I use it up fairly quickly, as it just mellows out anything you could make where you’d use garlic. Perfect recipe for my kitchen!
I used rosemary sprigs instead of thyme (and used the garlic to spread on bread, versus using the oil for other purposes). Was very easy and turned out great. Cooked it for about an hour (I think the recipe said about 45 minutes+).
A simple and easy approach to making an essential ingredient for every kitchen. Personally, I add a bit of sea salt, rosemary and a hint of red pepper and it seems to keep the oil from spoiling for 6 months or so.
This is wonderful to have on hand – both the oil and the garlic. For such a simple recipe, it has myriad uses. I use the roasted garlic for everything – it is especially delicious (with a little rosemary and salt) rubbed under the skin of a chicken breast before baking. The oil is perfect for sauting vegatables or using in a salad dressing, and a little goes a long way. Enjoy!
How to Make Garlic and Oil Pasta
A chef friend of mine once described a good cook as “one who can make a great dish with only a few ingredients.”
This dish is a great starter because it only has a few ingredients but they must be chosen and prepared carefully to make it work. When you sauté the garlic in the oil, make sure you get a good whiff, it’s one of the greatest aromas in cooking and one you will never forget.
Online Steak Buying Resources
Convenience – Selections – Quality – Ratings – Gift Giving – Corporate Events
Steaks – Chicken – Pork – Seafood – Lobster Tails
Pasta with Garlic and Oil also called Aglio Et Olio
Let’s look at the ingredients more closely:
Pasta
The best pasta for this recipe is either a dry factory-made spagetti or very thin spaghettini because it’s ability to stand up and not be overpowered by the oil-based sauce. A fresh homemade, egg based pasta would be over powered and absorb too much of the sauce.
When cooking pasta :
- Figure about 4 ounces of dry pasta per person in other words a 1 pound package should yield 4 servings.
- Use plenty of water (at least 4 quarts per pound) so that it doesn’t stick together.
- Add approx. 1 tablespoon of sea salt per pound of pasta. This will bring out the flavor of the pasta. When the water returns to a boil, add the pasta.
- Don’t break the pasta to fit the pot, use a spoon (wooden) to bend it as it cooks.
- Stir the pasta often to prevent sticking.
- DON’T Over Cook the Pasta!
- One pound of spaghetti takes approx. 8 to 10 minutes to cook but check it frequently until it’s “al dente” (firm to the bite).
- As soon as the pasta is done, drain it in a colander.
- Saucing – depending on the recipe, sometimes I plate the pasta and top it with sauce or I will combine the sauce and pasta in a bowl, mix well, and then serve. For this dish, I combine the two immediately.
- DON’T over sauce the pasta! Let the flavor of the pasta stand out.
- Adding cheese – if the recipe calls for grated cheese (this one doesn’t), add some before tossing and have some extra at the table.
Used throughout the ages, the salt I prefer is sea salt. It comes from the process of evaporating seawater and is more expensive than mined salt but I think adds more depth and character to whatever you’re cooking. Because we don’t add any salt to this recipe, it’s vital to add it to the water when we cook the pasta.
Extra Virgin Olive Oil
There is more to know about olive oil than I will ever learn in this lifetime. With so many types of olives and different growing areas, I hope to spend many enjoyable hours tasting and educating my palate.
This recipe calls for Extra Virgin which is cold pressed (no use of heat or chemicals allowed) comes from the first pressing, and has a maximum Oleic Acid (bitterness) content of 1%.
Virgin olive oil on the other hand comes from the 2nd or 3rd pressing with a maximum Oleic Acid content of 4%. Which oil you use depends on what you like and how deep are your pockets.
Garlic
What can I say, I love it! I grew up on garlic powder like many of you may have. But when I started cooking with real garlic, I was hooked for life.
There are basically three types of garlic and which one you use will depend on taste and availability. The three are:
- American garlic, which is white skinned and has the strongest flavor.
- Italian garlic, which has mauve colored skin and is more mild flavored.
- Elephant garlic which is huge and has the mildest flavor of the three.
When choosing, look for firm heads with dry skins that feel heavy for their size. Stay away from any that are shriveled, brittle, turning yellow, or comes in a jar already cut up. For the record, after years of effort, I was finally able to persuade my folks to make the switch.
Parsley
Although there are more than 30 varieties, there are two types of parsley that I’m familar with; flat-leafed Italian parsley and curly-leafed parsley. Is there a difference in flavor? I think so. I like to cook with flat-leafed parsley and use the curly leafed to decorate my plates. And in most recipes, fresh is better than dried.
Black pepper
Comes from black peppercorns that are picked slightly unripe and dried until they shrivel. The best black peppers are know to be the Tellicherry and Lampong and have a spicy hot but sweet flavor. Note once you grind a peppercorn, it will quickly loose its aroma.
Make It Even Better
Check out my post on making this dish even better – Pasta with Garlic & Oil Add Ons
I use olive oil for so many things, it’s quite funny really. I use it for cooking, for baking, drizzled over salads. It’s seriously my go-to if I want to add a punch of flavor just like that. In cooking, it helps synthesize all the flavors in the dish right from the get-go. From sauteeing to the final stages of any dish, cooking with infused olive oil can really make a difference sometimes. This recipe is good for people who aren’t too fond of the flavor of olive oil, but would still like to incorporate it into their meals for health purposes.
Garlic and Olive Oil — A Winning Combination
It’s such a shame that in this day and age with so much information available to us that there are still many people out there who religiously use vegetable oil for cooking. When you consider that heart disease is the leading cause of death worldwide, you would think more people would be conscious of the effect that the food has on their health. When you heat vegetable oil, it causes oxidation, and once consumed it can increase blood pressure and total cholesterol, inflammation, and it can also increase your risk of developing cardiovascular diseases. (1)
By swapping out harmful vegetable oils for olive oil though, you are actually consuming a good amount of omega-3 fatty acids that not only protect your cardiovascular system, they provide many other health benefits as well. (2)
Regular Olive Oil vs. Extra Virgin Coconut Oil
Olive oil is graded according to its oleic acid content. They are all the same type, but vary in color, quality, and taste. Changes in appearances are common, even when they are the same ‘type’ of olive oil. Regular olive oil typically has more oleic acid and is lighter in color. Extra virgin olive oil contains less than 1% of oleic acid, and is darker and more bitter than regular olive oil. However, it contains more antioxidants and fewer sensory flaws.
For this recipe, be very careful about choosing the type of garlic you use. Do not use bottled or canned garlic as this has been soaked in water, so the flavor is not quite the same. Also, fresh garlic has a more pungent aroma, which is what you want when infusing oils. You want both the smell and juices to permeate the solution for maximum absorption. Aside from adding flavor, garlic adds an extra level of protection in the body thanks to its anti-inflammatory and immune system boosting properties. (3)
Garlic infused olive oil can be made quite simply by simply cooking garlic cloves over very low heat with olive oil. However, it’s also possible to spruce up the recipe even more by adding in a couple of optional ingredients. Give it a try with thyme sprigs and dried chili peppers as well for a real treat. When stored in a cool, dry place, this can keep for up to 1 month.
Now that you have your garlic infused olive oil, it’s time to test it out. Try cooking these paleo recipes with it.
Sharing is caring!
Crispy fried garlic is such a treat!! I love to sprinkle it on chicken, veggies, or anything that could use a kick of flavor!
This “secret” microwave shortcut gets the job done in minutes without a mess or hassle of traditional deep frying.
How to Make Fried Garlic (in the Microwave!)
My husband (the chef in our family) taught me this amazing kitchen hack that I just had to share: how to make fried garlic in the microwave.
Yes, “fried” garlic – in the microwave – ready in less than 5 minutes from start to finish!
BONUS: you also make garlic-infused oil at the same time!
For your convenience I’ve included shop-able ad links to products used to make this recipe; disclosure policy available here.
You’ll need:
- 1 head garlic
- 1/2 cup cooking oil (not olive oil)
- microwave-safe bowl
How to Cook Garlic in the Microwave
A free printable copy of this recipe is available at the bottom of the post.
Keep reading for photo step-by-step instructions and cooking tips or click here to jump to printable recipe.
Peel and dice one head of garlic and place in a medium microwave-safe bowl.
Add vegetable, canola, or coconut oil until garlic is fully submerged (at least 1/4-1/2 cup).
Tip: Avoid using olive oil because it has a lower melting point and could burn, leaving an undesirable taste.
Microwave for 2-3 minutes (cooking times will vary depending on your microwave’s power), checking every 30 seconds after the first minute.
Don’t be alarmed if the oil starts to bubble — this is how the magic happens! The garlic is done cooking when it is a gorgeous shade of golden brown — it will look similar in color to roasted cashews.
Allow fried garlic to rest until oil is no longer bubbling before removing carefully from microwave. (Always use caution, as both the oil and bowl will be hot).
You can now separate the fried garlic pieces from the oil. Sprinkle fried garlic to any dish while cooking for an extra dose of flavor. Any unused garlic can be refrigerated and saved for another time.
Easy Garlic Infused Oil
Wait! Don’t toss the “leftover” oil! After cooking the garlic, this oil is infused with rich garlic taste and is perfect for sautéing meat, veggies, and more.
My husband uses the garlic infused oil to cook both chicken and cashews for this delicious Thai Glass Noodle Salad. Love this Bormioli Rocco Bottle for making your oil look like a work of art on your counter!
This is a super useful little recipe for French style preserved garlic in oil. Great to have on hand for those cooking emergencies when you can’t get to the shops and need flavour fast!
French Style Preserved Garlic In Oil
This simple recipe for preserved garlic in oil is very much a French thing and an extremely useful thing to have around the kitchen for making all sorts of dishes. It makes a great foodie gift for Christmas too, perfect for those Christmas hampers.
Type of garlic
Choose your garlic carefully here. You don’t want to use old soft garlic for this. Go for nice crisp fresh garlic that does not give when you squeeze the bulb.
Cook the garlic first
Now, before all the Americans out there start jumping up and down about garlic in oil and botulism etc I am cooking the garlic first, cooling it and then adding it to the oil. It isn’t just chucked in there raw.
The French have been making preserved garlic in oil for hundreds of years and there are still rather a lot of them about.
Ingredients for preserved garlic
- garlic cloves
- pepper corns
- olive oil
- pickling spice mix
- sea salt
How to make preserved garlic in oil
The cooking part takes approximately 2 minutes!
You are just going to put the garlic cloves (peeled but whole) in water and boil for 2 minutes.
Then it is just a case of letting the garlic cool completely before packing it into sterilised jars and adding your spices.
Pop on the lid and set aside in a cool cupboard for 2 months (make it now for Christmas gifting) to allow everything to come together flavour wise.
How long will preserved garlic last?
It will last for about 6 months in a cool cupboard. Once opened store in fridge and use within a month. The garlic will be crisp in the oil for about 3 months then it will become softer.
How to use preserved garlic
This preserved garlic in oil is easy to use, just mash the cloves and stir into mashed potatoes. Slice and use in any cooking that requires garlic Chop or slice for salads.
And of course use that oil for everything from salad dressings to cooking.
Looking for more quick and easy ways to preserve veggies in oil? Then check out these recipes before you go;
PIN ME FOR LATER
Finally, if you do try this French style garlic preserved in oil recipe don’t forget to leave a comment/rating below. I love hearing from readers and respond to everyone. Want more Larder Love? Then follow me on Instagram, Facebook and Pinterest and sign up for my newsletter too and get free E books.
This post contains affiliate links. If you buy through these links, I may earn a small commission.
We grow a lot of garlic here on our homestead. We have always loved eating garlic and every year I just kept planting more and more.
Eventually we decided to start an actual garlic farm.
So yes, we eat a lot of garlic. We also sell a lot of garlic.
We deal with all the garlic bulbs and we also make garlic products.
These are Garlic Scapes which need to be removed from the plant. Every hardneck garlic plant grows one scape.
This is how we preserve the scapes so we can eat them all year round.
We simply HAVE to have Garlic to cook with, even while we are away.
And since we like spending part of the winter in California, we had to come up with a way to preserve peeled garlic.
We are true Garlic Heads and that’s how we came up with the perfect logo for Bradley Creek Garlic Farms!
However, we are not allowed to bring Garlic bulbs with us into the USA, unless they are completely peeled.
Totally understandable, as they are trying to keep foreign dirt (and bugs) out of the country.
Side note: Chinese Garlic has all the roots completely shaved off. This is an easy way to tell where the grocery store garlic comes from.
And we refuse to ever eat garlic from China.
We decided to bring along a few quart Mason jars full of Garlic along with us, so we would have it on hand for cooking.
Look how huge those cloves are!
How to Preserve Garlic in Oil
Here’s how we did it. We filled a quart mason jar with the garlic cloves.
Make sure your mason jar is clean but you don’t need to sterilize the jar for preserving the cloves.
We poured extra virgin olive oil over the cloves.
We only use extra virgin olive oil in our house; it is by far the best oil to use.
We don’t use it for deep frying but we do use it for any other cooking that calls for oil.
Add enough olive oil to completely cover the cloves.
Make sure they are submerged and that no part of the cloves are exposed to the air.
The garlic MUST be completely covered.
Storing Garlic in the Fridge
Add the seal and ring to the mason jar and close tightly.
Then, put the jar in the refrigerator and keep it there.
Remove the cloves as needed for cooking, but be sure to return the jar to the fridge.
The olive oil will solidify and it doesn’t look as pretty as when you first added the oil, but it is much safer to store the jar in the fridge.
We eat a lot of garlic. By far, most of our dinners include garlic.
It is healthy for us and so delicious.
So if you need to preserve garlic in oil, give this a try. At home we just store our garlic in a basket.
It sits on our counter and the garlic last for many months.
Want more Garlic articles?
This Bacon and Garlic appetizer is sure to please and it is so quick to make!
Add this Garlic Scape Pesto to any pasta dish or serve on crackers.
Grow your own Garlic. Here’s everything you need to know! A 4 part series on growing, harvesting, curing and more.
Here’s What You’ll Need to Make Roasted Peppers in Oil
- 4 red peppers (washed and dried)
- 1/2 cup sunflower or olive oil
- 2 tablespoons vinegar (or more to taste)
- 4 garlic cloves (finely chopped)
- Salt (to taste)
- Black pepper (to taste)
This recipe makes 4 servings.
Roast by broiling, grilling or baking in the oven
Peppers can be roasted by baking, broiling or grilling. If baking, heat the oven to 400 degrees. Line a baking sheet with aluminum foil. Place peppers on pan and bake, turning occasionally until all sides are blistered and slightly blackened.
If broiling, turn the oven to broil and follow the directions for baking, above. If grilling, set the heat at medium-high. Place the peppers directly on greased grates and continue cooking as for baking.
Steam the peppers
Place roasted peppers in a heatproof bowl and cover with plastic wrap. Let steam for 15 minutes or until cool enough to handle. This steaming period will help the skins slip off more easily.
Remove the stems, skins, seeds and membranes
When the peppers are cool enough to handle, remove the stems, skins, seeds, and membranes. The peppers can be left in large pieces or cut into strips, although large pieces are more traditional. Transfer to a serving bowl.
Dress the peppers
Add garlic, oil, vinegar and liberal amounts of salt and pepper to roasted peppers. Toss until well coated. Allow peppers to marinate at room temperature for 30 minutes. Then serve or refrigerate.
Roasted peppers in oil have cross-cultural appeal
Not all Eastern Europeans count roasted peppers in oil as part of their culinary repertoire. But, certainly, Serbians, Croatians, Bulgarians, and others enjoy them immensely. Sunflower oil is traditional since olives aren’t indigenous to this region. But I think the dish is delightful either way.
This is sort of… part 2 of last week’s whipped feta.
Oh wait. That was two weeks ago. TWO WEEKS? What is happening? Time is flying before my eyes. Before I know it I’ll have the heat turned up too high with a bowl of Grape Nuts on my lap while Steve Tyrell plays in the background.
Errr. Yeah right. Too late for that.
This is so simple. So easy. Yet so… satisfying? It’s fun making flavored oil and feels domestic. It tastes complex which makes it feel even more special. It’s like you trick yourself into doing something cool that everyone else in the universe already knows how to do, but you still feel awesome.
At least that was my experience.
I have been using this oil on everything. Most notably, on this salad that is making me want to eat salads. I’ve already eaten three this past week, which yes, means that I will probably be sick of it after my fourth considering I don’t know how to pace myself, but let’s relish in the moment, okay? Four salads. Four, people. Probably a record.
For a super easy treat, you can mix in a bunch of extra dried herbs and seasonings and use this as a dip for some bread. That makes a lovely meal. Or, uh, I mean appetizer. (Or meal.)
And obviously, this is the oil that I drizzled over my whipped feta that was layered on the thickest, grainiest toast ever.
It’s a miracle I have not slathered it on my face as moisturizer.
This is where all of my roasted garlic came from, FYI. It’s like a two-for-one deal, because you not only end up with oil but roasted garlic too! Excellent problem to have. I’m going to try to have this problem every week.
By Kris Vaughan, CH
It’s 1:00 in the morning and your child wakes up with an earache. It’s the middle of the night, no doctors are open, what do you do? This usually involves a long night of tears, from both the child and the mommy, but you have a natural earache remedy right in your kitchen and you didn’t even know it.
Garlic oil has saved the day (or night) many times in my house. Garlic is highly antibacterial and the oil is also soothing. In most cases I have been able to completely avoid having to do any antibiotics by using this simple remedy although a few times the infection was already too progressed and a trip to the doctor was needed. In these cases the garlic oil made the earache less painful until we could get medical treatment.
Here are a few disclaimers: Only use garlic oil in the ear if you know the eardrum is not perforated. If symptoms persist or get worse, seek medical attention.
What You Need
1 small mason jar with lid
1 head of garlic
Organic olive oil
small piece of cheesecloth
piece of unbleached cotton muslin
strainer
How You Make It
1. Peel each garlic clove and mince. Place the garlic in the jar.
2. Pour in enough olive oil to come above the garlic by about 1/4 inch.
3. Lightly cover the jar. I like to use a piece of cheesecloth so the oil doesn’t get rancid but to also keep debris out. I have also just placed a small sandwich bag over the top when I didn’t have cheesecloth.
4. Warm the oil gently for 3-5 days. You do not want the oil to get over about 105 degrees so there are a few ways you can do this. I like to use a coffee mug warmer but you can also do a water bath in a crockpot if you can control the temperature. Another way is to place the jar in a dehydrator and set the temperature.
5. Strain the finished oil through a strainer lined with the unbleached cotton muslin and seal the finished oil in the jar.
You can also add some mullein into your oil if you want extra benefits. Read about mullein. If you don’t want to make your own oil you can purchase it from our apothecary.
How To Use It
- For treating an earache or ear infection, use 2 drops in the ear 4-5 times a day.
- To prevent colds and flu use 1 drop in each ear each day during cold and flu season.
- The garlic oil is also good when rubbed on the bottom of the feat to help with colds and flu and to tame a cough. You will smell like pizza but you will feel better.
- Garlic oil is also anti-fungal so you can use it for toenail fungal infections or Athlete’s Foot.
This simple home remedy is a must have for your herbal medicine cabinet and a little bit goes a long way. Just remember when using it for earache, if the symptoms worsen seek medical attention.
I would love to hear how it goes when you make and use your oil so be sure to leave a comment below. If you would like to schedule a consultation with an herbalist, contact our wellness center.
[Photographs: J. Kenji Lopez-Alt]
What’s New On Serious Eats
- Yield: Makes 1/2 cup
- Active time: 15 minutes
- Total time: 15 minutes
Ingredients
- 1/4 cup canola or vegetable oil
- 10 medium cloves garlic, minced (about 3 1/2 tablespoons)
- 1/4 cup roasted sesame oil
Directions
Combine canola oil and garlic in a small saucepan and cook over medium-low heat, stirring, until it starts to brown. Reduce heat to low and continue to cook, stirring frequently, until garlic turns completely black, about 10 minutes (garlic will become very sticky in the process).
Transfer mixture to a heat-proof bowl and add sesame oil. Transfer to a blender and blend on high speed until completely pulverized, about 30 seconds. Transfer to a sealable container and store in the refrigerator for up to 2 months.
Special Equipment
More Condiment and Sauce Recipes
More Garlic Recipes
More Japanese Recipes
This Recipe Appears In
All products linked here have been independently selected by our editors. We may earn a commission on purchases, as described in our affiliate policy.
J. Kenji López-Alt is a stay-at-home dad who moonlights as the Chief Culinary Consultant of Serious Eats and the Chef/Partner of Wursthall, a German-inspired California beer hall near his home in San Mateo. His first book, The Food Lab: Better Home Cooking Through Science (based on his Serious Eats column of the same name) is a New York Times best-seller, recipient of a James Beard Award, and was named Cookbook of the Year in 2015 by the International Association of Culinary Professionals. Kenji’s next project is a children’s book called Every Night is Pizza Night, to be released in 2020, followed by another big cookbook in 2021.
Whether you prefer smoky Ancho chilies or spicy Thai chilies, they’ll both make a kicky finishing oil for risottos, pastas and seafood.
By Kristen Eppich Updated June 10, 2020
Photo, Roberto Caruso.
Chili oil is essentially dried chilies, preserved in oil. It adds a delightful kick to whatever dish you’re using it in. Commonly used as a finishing oil for risottos, pastas and seafood, it’s also a great oil for any stir fry or sauté.
As you’re about to learn, making chili oil is very easy. Using it however, requires a little more consideration. Fresh chili oil—or chili oil that has just been made—will be relatively mild. But once the oil is stored, the chilies will continue to release heat. Rule of thumb? Test your oil before using: A little goes a long way.
How To Make Chili Oil
The key to making chili oil is to expose the chilies to enough heat that they begin to release their flavour, but not so much that they start to cook or—even worse—burn. If you burn your chilies in the oil you will have to toss it and start over. (Just stay mindful and all will be well.)
Before You Start
1. Choose your chili peppers wisely
The variety of chili you use will also impact the flavour of your oil. A dried Thai red chili will have an acute spiciness to it, whereas an Ancho chili will be spicy with a hint of smokiness. Decide what flavour you’re looking for when you’re selecting the chili.
2. Pair chilis with a neutral oil
The oil you use to preserve them with will have a similar impact. Vegetable and peanut oils are good, neutral oils to use if you intend to cook with the chili oil. If you think you’ll be using it more as a finishing oil or garnish, you may want to look for more flavourful oils—like a good-quality olive oil. Sesame oil is also nice to use, but it’s quite unique tasting. It also breaks down when exposed to high heat, so it’s best to use it as a garnishing oil.
Hot chili oil can be used in stir fries, drizzled over pizza, pasta and roasted vegetables for a little extra kick. Photo, Kristen Eppich.
Chili Oil Recipe
Ingredients
- 1 cup vegetable oil (or oil that you choose)
- 2 tsp red chili flakes
- 2 to 3 whole dried red chilies
Instructions
- HEAT 2 tbsp oil in a saucepan over medium heat. Add chili flakes and whole chilies. Cook, stirring, until chilies start to gently sizzle, about 1 min. *If they begin to brown you’ve gone too far and will have to start over.
- ADD remaining oil to pot. Heat until oil is warmed through, but not too hot to touch. Remove from heat and let cool to room temperature.
- STORE in an airtight bottle or jar. Shake occasionally to disperse the chilies.
Originally published May 12th, 2015.
How to make garlic, ginger and shallot oil #16
A delicately infused oil/condiment with crispy and crunchy slivers of garlic, ginger and shallot. Perfect to be drizzled to your favourite recipe or dish. Note : lemons were not used in this recipe and the lemon was used in this photo purely as an awesome prop!smile
[dropcap]Garlic,[/dropcap] ginger and shallot oil is a delicately fragrant and deliciously rich condiment with a multitude of uses – made simply by gently frying and stirring the three ingredients in cooking oil of your choice on low-medium heat. The following recipe results in two fabulous products – the heavenly infused oil and the crispy/crunchy medley of moreish fried garlic, ginger and shallot chips/crisps. This divine concoction is a luscious ingredient that can be added to a variety of recipes, including salads, or to garnish/finish-off dishes, including soups, congee, steamed seafood, etc.
The recipe is super simple, but also easy to ruin if you make haste and don’t keep an eye on it. Just remember to keep the heat low-medium, and to turn the heat off when the ingredients just turns brown, otherwise you’ll risk over-cooking and burning the fried pieces. The recipe can be modified if you choose to make just garlic oil, ginger oil, or shallot oil alone. I enjoy all of these three ingredients and think that they work harmoniously naturally, and by frying them together, their combined distinctive flavours are intensified.
In this recipe, you can optionally drain the crispy fried pieces from the oil and store and use them separately. The infused oil will work just fine without them, but I personally like to store and use them together for that magical blend of delicious delicate slippery-smooth oil and sweet unctuous fried mini chip crunch.
Dried/fried garlic, onion and shallot are popular ingredients in many Asian cuisine, and they’re readily available at most Asian stores. Whilst dried garlic, et al are conveniently available – by making your own, you’re able to create both the tasty fried crisps, as well as the infused oil which is not often easily available commercially, yet so wonderful to use. By making your own infused oil, you can also experiment and customize your blend to include whatever ingredient you please.
Both infused oil and fried garlic, onion and shallot are used regularly in Lao cuisine, either in recipes or to garnish dishes. Making infused oil and its complementary chips is a quick and easy process that can be made each time when required – however, I prefer to make a large quantity so that it can be stored and used whenever it is needed. The blend in this recipe is a personal choice and you can customize it to suit your palate. I particularly enjoy the fragrance and nuttiness of the oil and the bitter and sweet taste of the fried garlic and shallot pieces together. The use of infused oil and its crispy counterpart are quite limitless. It’s a moreish and addictive combination, so use it sparingly.
You can use any type of cooking oil for this recipe. I used a combination of sunflower oil and rice bran oil, simply because I enjoy the subtle nutty taste of sunflower oil (and the fact that it’s ideal for frying), and because I’ve never used rice bran oil before and wanted to try it. The rice bran oil imparts a lovely golden liquid amber hue to the blend, and the final infused ‘gar gin sha oil’ is delicately sweet, aromatic, and simply divine! Be sure to give this recipe a try and add this wonderful condiment to your pantry. You won’t regret it. smile
How to make garlic, ginger and shallot oil #1
Fried onion, fried garlic and fried shallot are readily available at most Asian stores, however infused oil with these ingredients are difficult to find.
How to make garlic, ginger and shallot oil #2
How to make garlic, ginger and shallot oil #3
How to make garlic, ginger and shallot oil #4
Break the garlic heads into cloves, then peal and slice the cloves into thin discs (optional – you can dice the garlic instead).
How to make garlic, ginger and shallot oil #5
Wash and peal the ginger, then slice it into thin julienne strips (optional – you can dice the ginger instead).
How to make garlic, ginger and shallot oil #6
Peal the Asian shallots, then slice them into thin discs. With your fingers, separate the discs into rings.
How to make garlic, ginger and shallot oil #7
How to make garlic, ginger and shallot oil #8
In a frypan or wok, add the cooking oil and bring to low-medium heat. Add the sliced garlic, ginger and Asian shallots.
How to make garlic, ginger and shallot oil #9
Stir gently and regularly (be careful that the hot oil does not splatter on to you). Ensure that the oil is not too hot, otherwise the ingredients will burn quickly. Maintain the heat at about low-medium, or reduce it if the oil is too hot and it bubbles too heavily. What you want is a gentle bubbly simmer.
How to make garlic, ginger and shallot oil #10
Continue to stir regularly – don’t let it out of your sight. In this photo – the ingredients are getting there, but it’s still not yet ready to turn the heat off.
How to make garlic, ginger and shallot oil #11
When about half of the garlic and shallot pieces start to turn light brown, turn off the heat and continue to stir gently (the ingredients will continue to cook and darken after the heat is turned off). I turned the heat off just before taking this photo.
How to make garlic, ginger and shallot oil #12
After the heat was turned off, I continued to gently stir, and as you can see, the ingredients continued to cook and darken. They’re looking very good here.
How to make garlic, ginger and shallot oil #13
When the infused golden oil has cooled down, carefully transfer the mixture/liquid into a large air-tight glass jar. Store in a cool safe place.
How to make garlic, ginger and shallot oil #14
How to make garlic, ginger and shallot oil #15
Enjoy with your favourite dishes and recipes, sparingly!smile
I recently made a recipe for a classic Caesar salad that was topped with garlic-infused olive oil baked croutons. I liked the idea of the garlic infused oil and wanted to try making it again for other uses. I found a recipe on Epicurious that slowly cooked the whole garlic cloves in cold olive oil until the garlic was golden but not burned and I thought that sounded tasty. The result was a delicious garlicky oil that tastes wonderful when cooking or roasting with as well as drizzling on salads and veggies right before serving. We also found that the potato bread was amazing dipped into this garlic-infused oil. I am looking forward to making more flavor infused oils – next time with herbs!
Place the olive oil in a small sauce pan with the four garlic cloves and slowly heat the olive oil on low, making sure to watch it carefully after 15 minutes, so the garlic cloves don’t burn. Simmer for 30-35 minutes, or until the garlic cloves are light golden brown. Remove from the heat and smash the garlic cloves lightly with the back of a spoon. Let the olive oil cool with the smashed garlic cloves for another 30 minutes.
Strain the garlic-infused olive oil through a fine sieve before funneling into a small oil dispenser. The garlic-infused flavored oil can be stored in an airtight container, refrigerated, for up to 1 month. Enjoy!
Mullein and garlic infused olive oil is one of the most popular natural remedies for ear infections/earaches, and for good reason. In folk medicine, mullein is revered for its ability to ease discomfort, and garlic is well-known for its immune supporting qualities. Both are used to encourage circulation and lymphatic flow, which may be helpful when ear discomfort is due to fluid buildup. (1) (2)
Author and herbalist Louise Tenney claimed that mullein is an excellent pain reliever, relaxing the mind and central nervous system to calm inflamed and irritated nerves, and it can be particularly helpful for those who are having trouble sleeping.”
These therapeutic qualities are likely due to constituents such as coumarin and hesperidin, which have been the subject of research regarding analgesic properties. (3) (4)
Studies Say Mullein Garlic Oil Helps With Ear Discomfort
In How Ancient Remedies Are Changing Modern Medicine, National Geographic author Peter Gwin describes traditional remedies as a “trove” for researchers to look through as they search for modern therapies. Although not mentioned in that article specifically, there does seem to be some research on mullein and garlic oil which supports its use for earaches.
In this study, researchers found that ear drops containing mullein (Verbascum olympicum), garlic (Allium sativum), calendula flower (Calendula officinalis) and St. John’s Wort flower (Hypericum perforatum) in a base of olive oil were “as effective as Anaesthetic ear drops . . . for the management of AOM-associated ear pain.”
In another study published in the well-respected journal Pediatrics, researchers used the same blend of ingredients listed above (garlic, mullein, calendula and St. John’s wort in olive oil) plus lavender flowers and vitamin E. The study divided 171 children into four groups which received various combinations of interventions.
- Just herbal ear drops
- Herbal ear drops plus antibiotics
- Anesthetic ear drops plus antibiotics
- Herbal ear drops plus anesthetic ear drops
The study concluded that “Each group had a statistically significant improvement in ear pain over the course of the 3 days. Patients who were given ear drops alone had a better response than patients who were given ear drops together with amoxicillin. Results were better in the NHED group than in the controls. Nevertheless, the findings indicated that the pain was mostly (80%) self-limited and could be explained simply by the time elapsed. ” (emphasis mine)
What else is mullein helpful for?
Before we dive any further, I want to mention that although this article has been reviewed by Dr. Scott Soerries, MD, Family Physician and Medical Director of SteadyMD, it is not personal medical advice and none of these statements have been evaluated by the FDA. As always, please talk with your healthcare provider about any herbal remedy, supplement, or dietary changes.
That said, I like to keep mullein leaves and flowers on hand for several things, like:
- Respiratory Support Tea – According to The Complete Gardeners Guide, “a tea made from leaves, flowers or both (one teaspoon to one cup boiling water) is said to alleviate hoarseness and bronchial catarrh.”
- Deep Sleep/Relaxation Tea – “A brew created from the flowers alone is reputed to allay pain and induce sleep.” (The Complete Gardeners Guide)
- Skin Care – Mullein leaves and flowers are often added to calendula salve to soothe minor burns (including sunburns), cuts, and other irritations.
I don’t have mullein, can I just use garlic?
Yes! Many people have found a simple garlic oil infusion to be helpful for earaches. You can also add things in if you have them on hand – calendula or St. John’s wort would be good options.
Is there anything else I need to know?
If the eardrum is perforated, nothing should be put in the ears. This Dr. Mom pocket otoscope – which is available on Amazon – was designed by an ER physician to help moms know what is going on when their little ones have an earache. It comes with a link to high resolution photos of normal and abnormal eardrums. The doctor also includes instructions on how to properly use the otoscope for best viewing results.
Can I buy garlic and mullein oil?
Yes, Herb Pharm makes one that’s infused with garlic and mullein, plus soothing calendula and St. John’s Wort. You can find it here.
An easy, no-fuss tutorial on how to make crispy garlic chips at home, and ways to incorporate them into your cooking repertoire.
Garlic chips! Have you made them? More importantly, have you ever tasted one? If the answer is no, I’m here to rock your world. Once you get your hands on homemade garlic chips, you’ll want to start sprinkling them on everything that comes out of your kitchen.
I like to think of them as savory fairy dust. Pure caramelized garlic flavor in a crispy, crunchy package. They provide fantastic texture, make everything taste ten times better, and you’ll impress everyone in the process. It’s a win-win situation.
I’m sharing an incredible recipe later this week that uses these crispy garlic chips, but in the meantime, I thought it would be fun to provide a quick recipe and cooking tutorial on how to make them at home.
After all, crispy garlic chips deserve their own time in the limelight. Your cooking repertoire will never be the same.
How to Make Garlic Chips:
Garlic chips are exactly what you expect them to be. Thinly sliced garlic that is cooked in oil until crispy, crunchy, and golden brown in color. In other words, fried garlic slices. The garlic slices should be very thin and uniform, so that they all cook evenly in the oil.
Yes, we’re frying today. Please don’t hate me. The good news? We’re shallow frying in a small skillet and the entire process takes less than ten minutes start to finish. You won’t need a ton of oil (this small-batch recipe only requires 1/4 cup total) or a frying thermometer to make these.
Even better news? There is minimal to zero clean up and you’ll be rewarded with roughly 1/4 cup crispy garlic chips (a little goes a long way!) and a small, but practical amount of homemade garlic oil that can be used for low-heat cooking, salad dressings, drizzling and dipping, and everything in between.
Here’s What You’ll Need:
- 6 large peeled garlic cloves, thinly sliced
- small skillet (preferably 7″ to 8″ inches in diameter or smaller)
- heat proof spatula
- 1/4 cup pure avocado oil (or olive oil) – see section below or recipe notes
- fine-meshed strainer (or slotted spoon), for draining the garlic chips and reserving the oil
What Type of Oil Should I Use?
You’ll want to use a high-quality oil to make garlic chips, particularly if you wish to reserve and use the garlic oil for other dishes. I recommend using avocado oil or olive oil.
Pure avocado oil has a very high smoke point and neutral flavor, and it is a healthier and lower processed alternative to other natural oils, such as canola, vegetable, etc.
I like to use avocado oil for this recipe, particularly if I’m using the garlic chips for a variety of dishes and prefer a more versatile cooking oil that can be re-heated at a higher temperature.
Olive oil has a lower smoke point, but is a great substitute for avocado oil for this recipe. It will produce a more flavorful and robust infused garlic oil that will lend itself better to Italian or Mediterranean dishes or dipping bread, drizzling, etc.
Ways to Use Garlic Chips:
- sprinkled or crushed on salads, roasted or sautГ©ed vegetables, mashed potatoes, etc.
- as a garnish on homemade soups or dips
- sprinkled on pasta dishes (this spaghetti amatriciana or spaghettini with roasted tomatoes are excellent choices, but the options are endless!)
- topped on stir fries or rice pilafs
How to Store Garlic Chips and Garlic Oil:
Like everything, garlic chips will be at their best the day of frying and immediately after they are made. However, they can be prepared ahead of time and stored in an airtight container at room temperature for up to a month.
Since oils are more prone to light and heat degradation, I recommend storing homemade infused oils in the refrigerator unless you’re using them immediately. Garlic oil can be stored in the refrigerator for up to a month.
How to Make Crispy Garlic Chips – an easy, no-fuss tutorial on how to make crispy garlic chips at home, and ways to incorporate them into your cooking repertoire!




